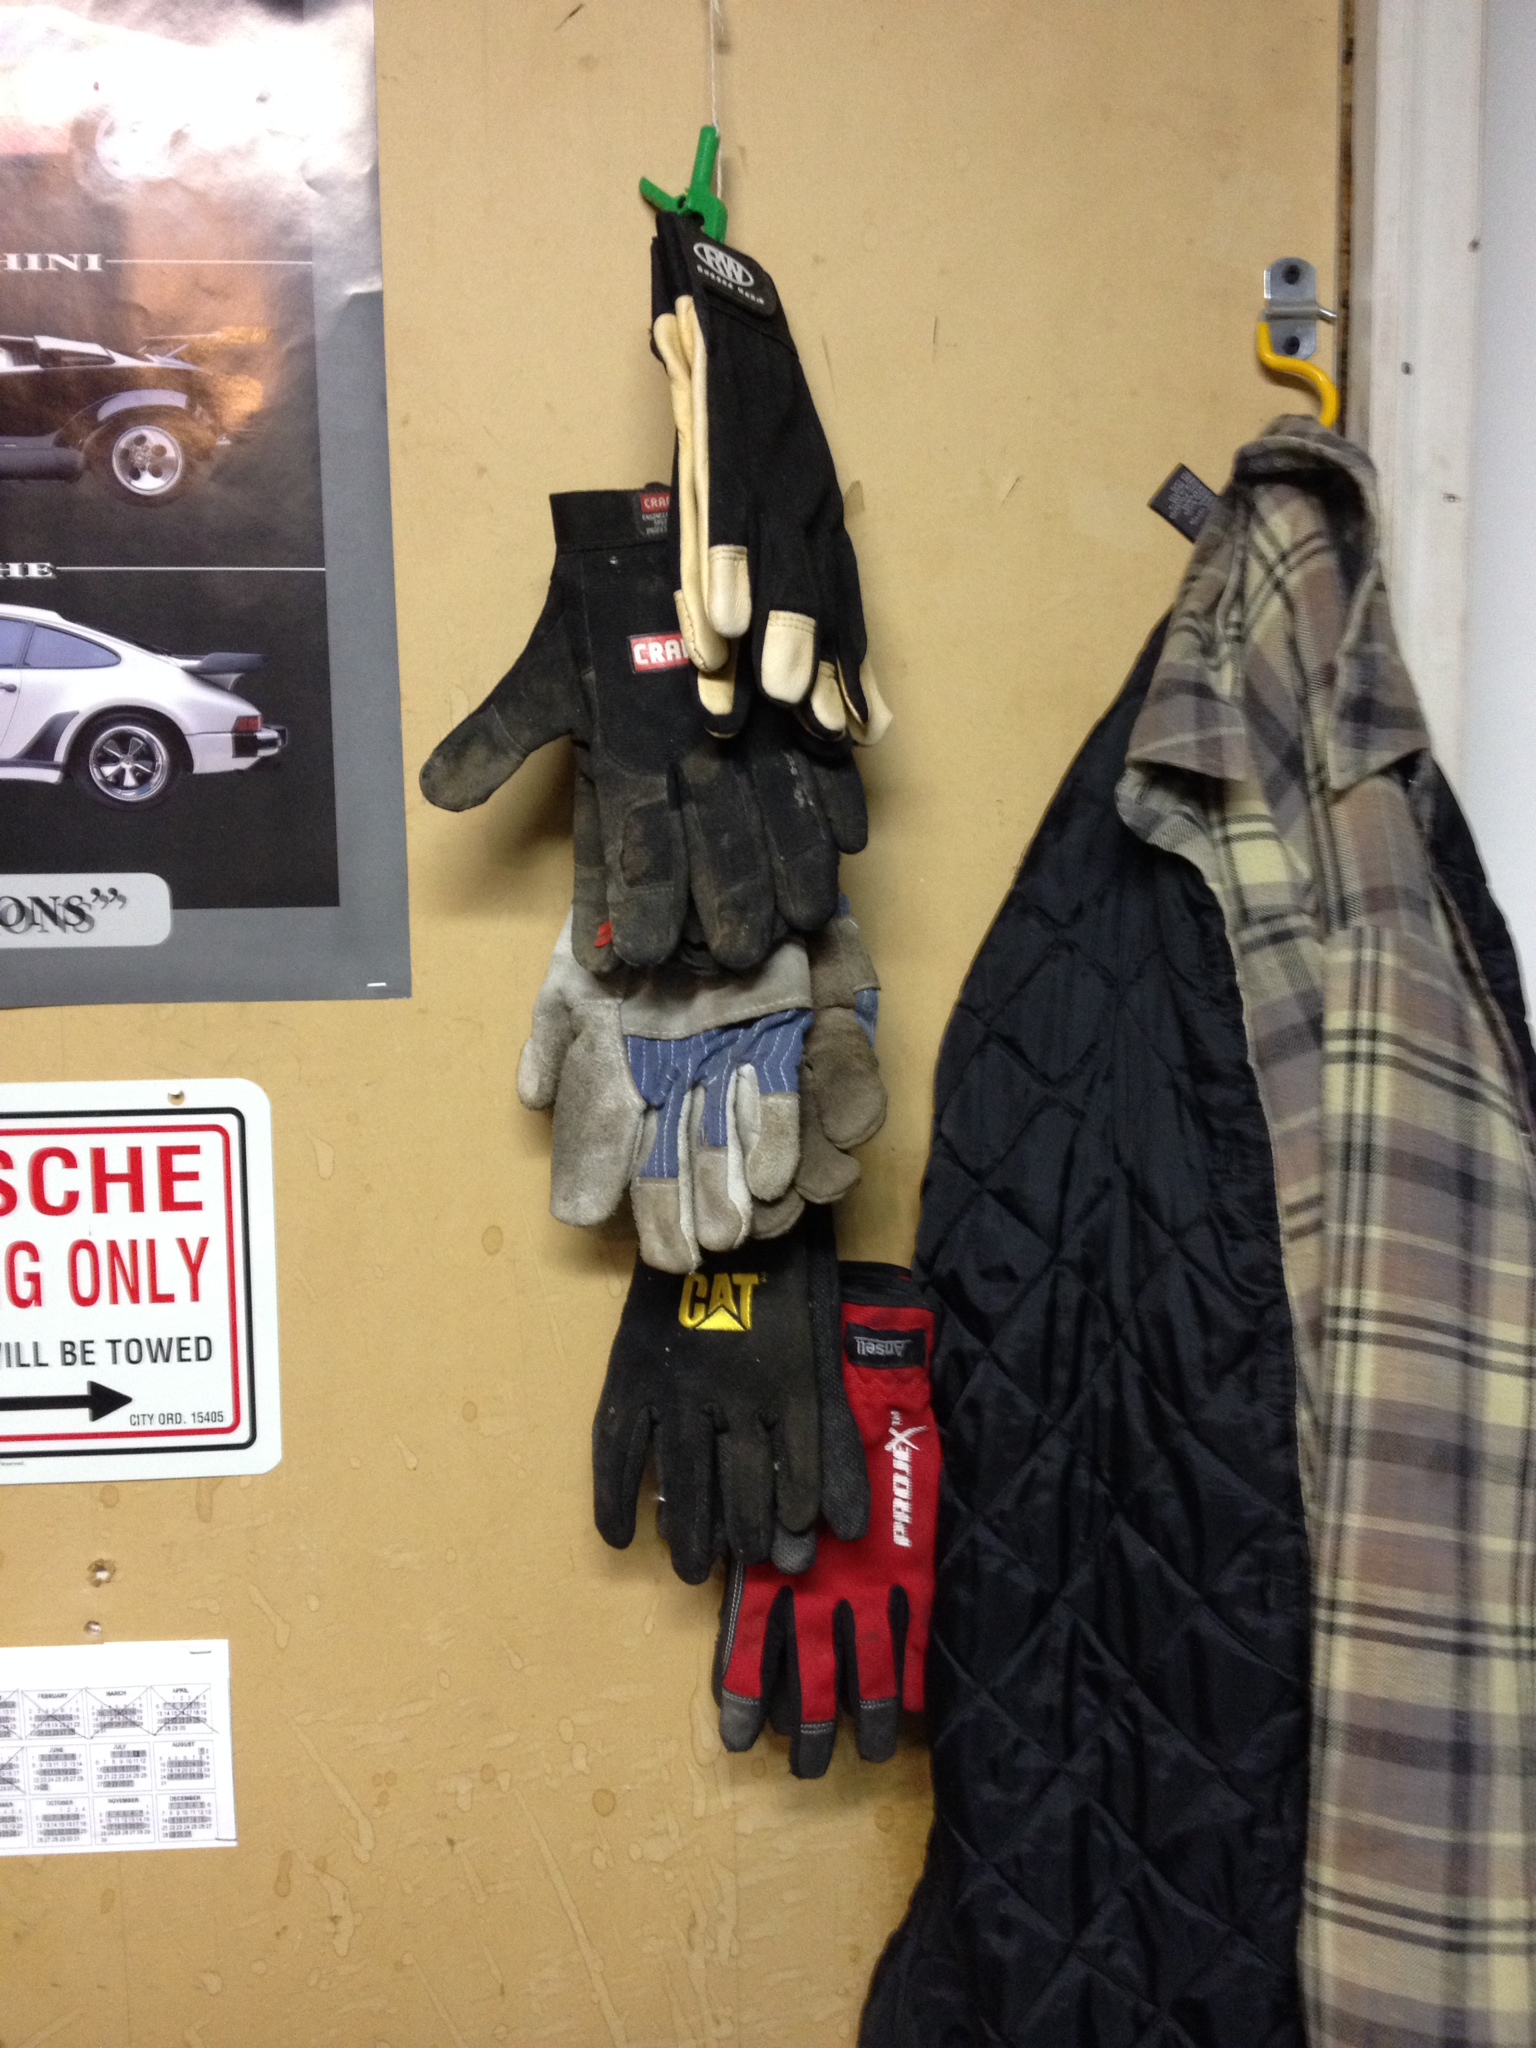
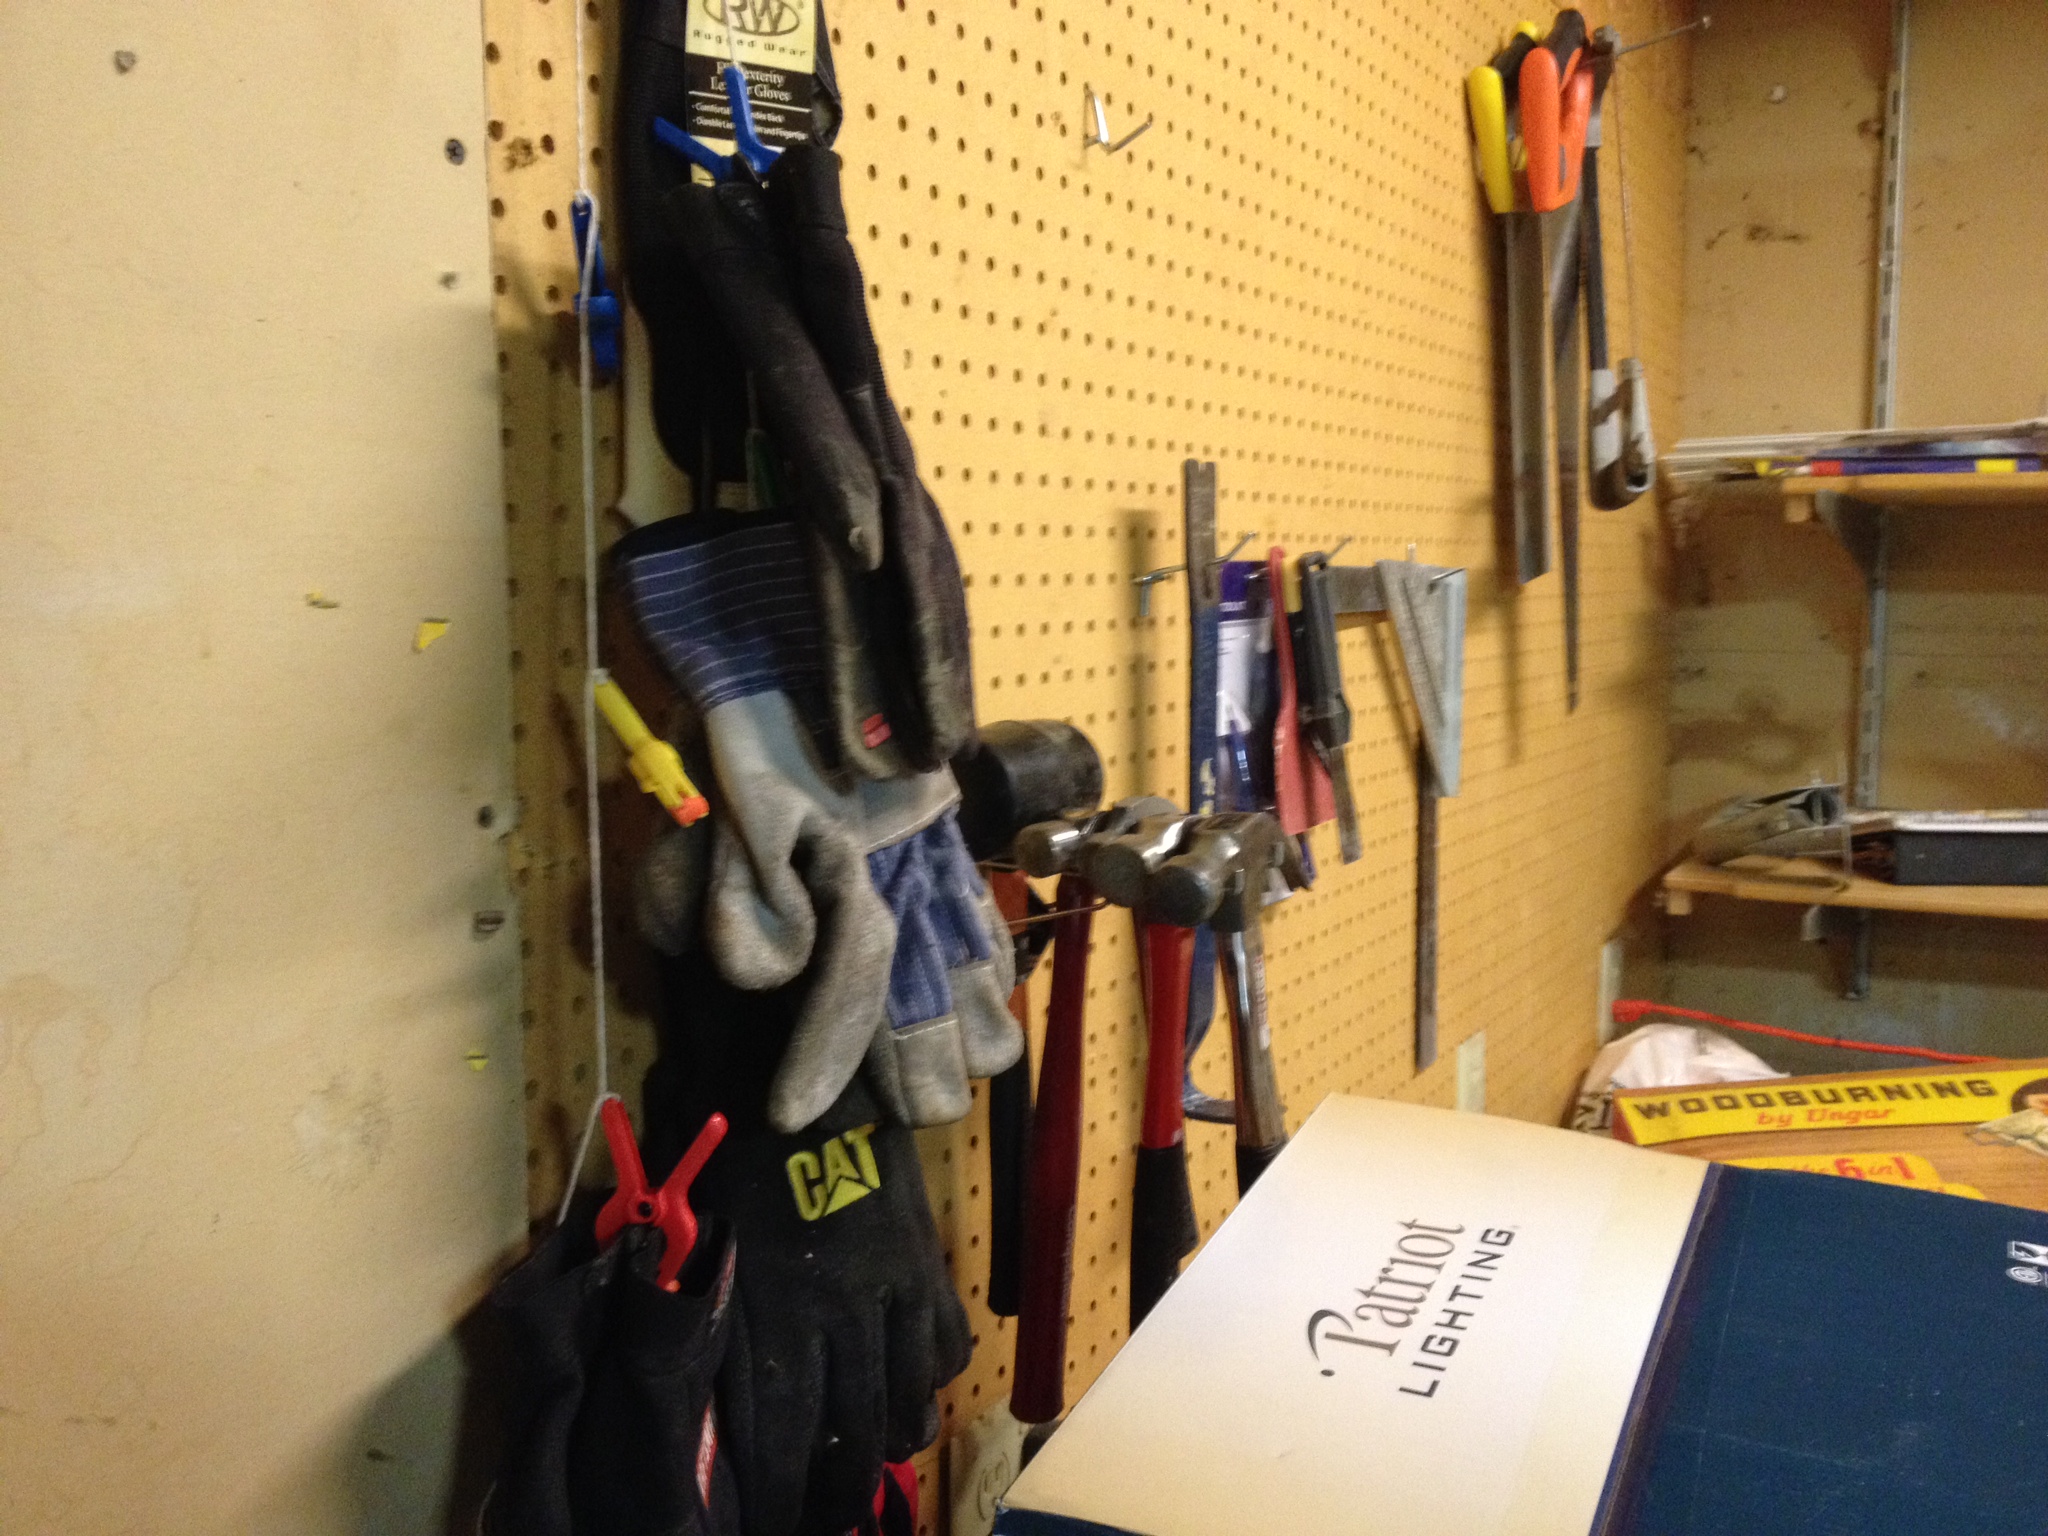
Organizing gloves. They can be a bit frustrating to organize… They used to just pileup on top of my tool chest. Which was a wasted of space… Even worse, the gloves were never actually organized and I couldn’t find a gloves companion. In fact you could say my gloves were far from organized…
I came up with a super simple idea, that costs next to nothing (in my case I had all of the supplies already and they were doing nothing good, so it was free!), and a huge improvement in my garage. A simple clip strip for organizing the gloves in my garage and shed. In about 5 minutes I had opened up all the space at the top of my toolbox and I from now forward – I can ALWAYS find a matching pair of gloves immediately.

The Solution – Build a Simple Glove Hanger
I made a simple glove hanger. Here’s the better part – the concept really isn’t any different than the clip strips that retail stores use to display various quick grab add on sale items. You know, things like gloves…. ha! (I worked retail for how long and only now came up with this idea???)
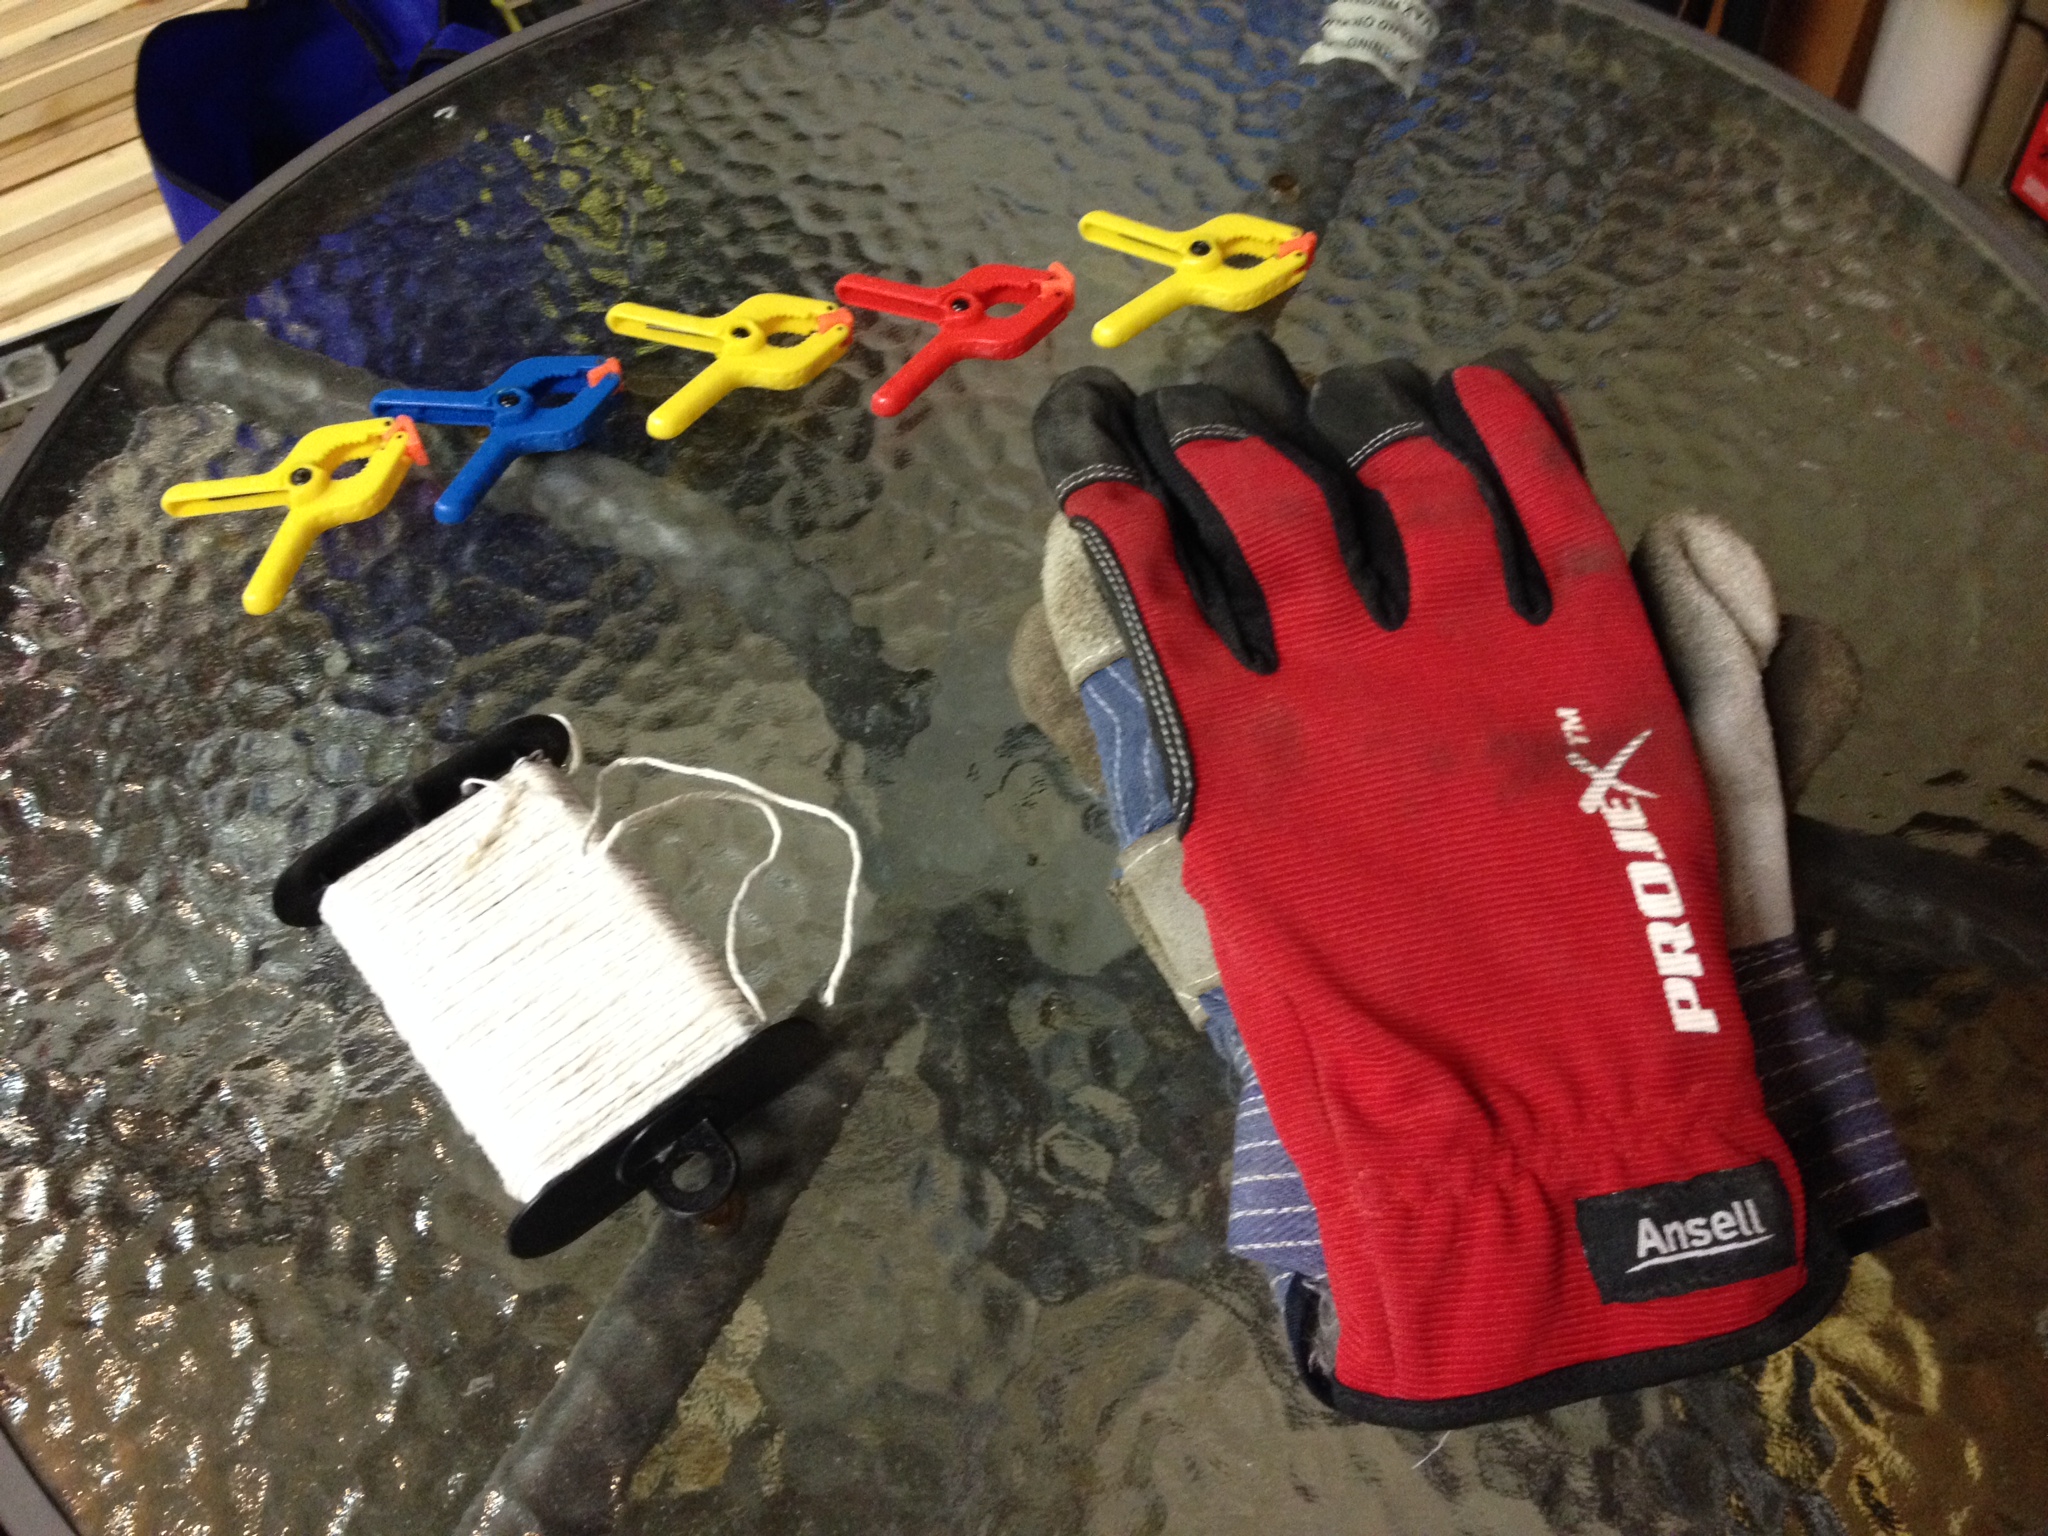
Materials List
- Tying Twine
- 1″ Spring Clamps
- Preferably with pre-drilled holes in the handle
- A screw, nail, or hook to hang the glove hanger on
Assembly Instructions
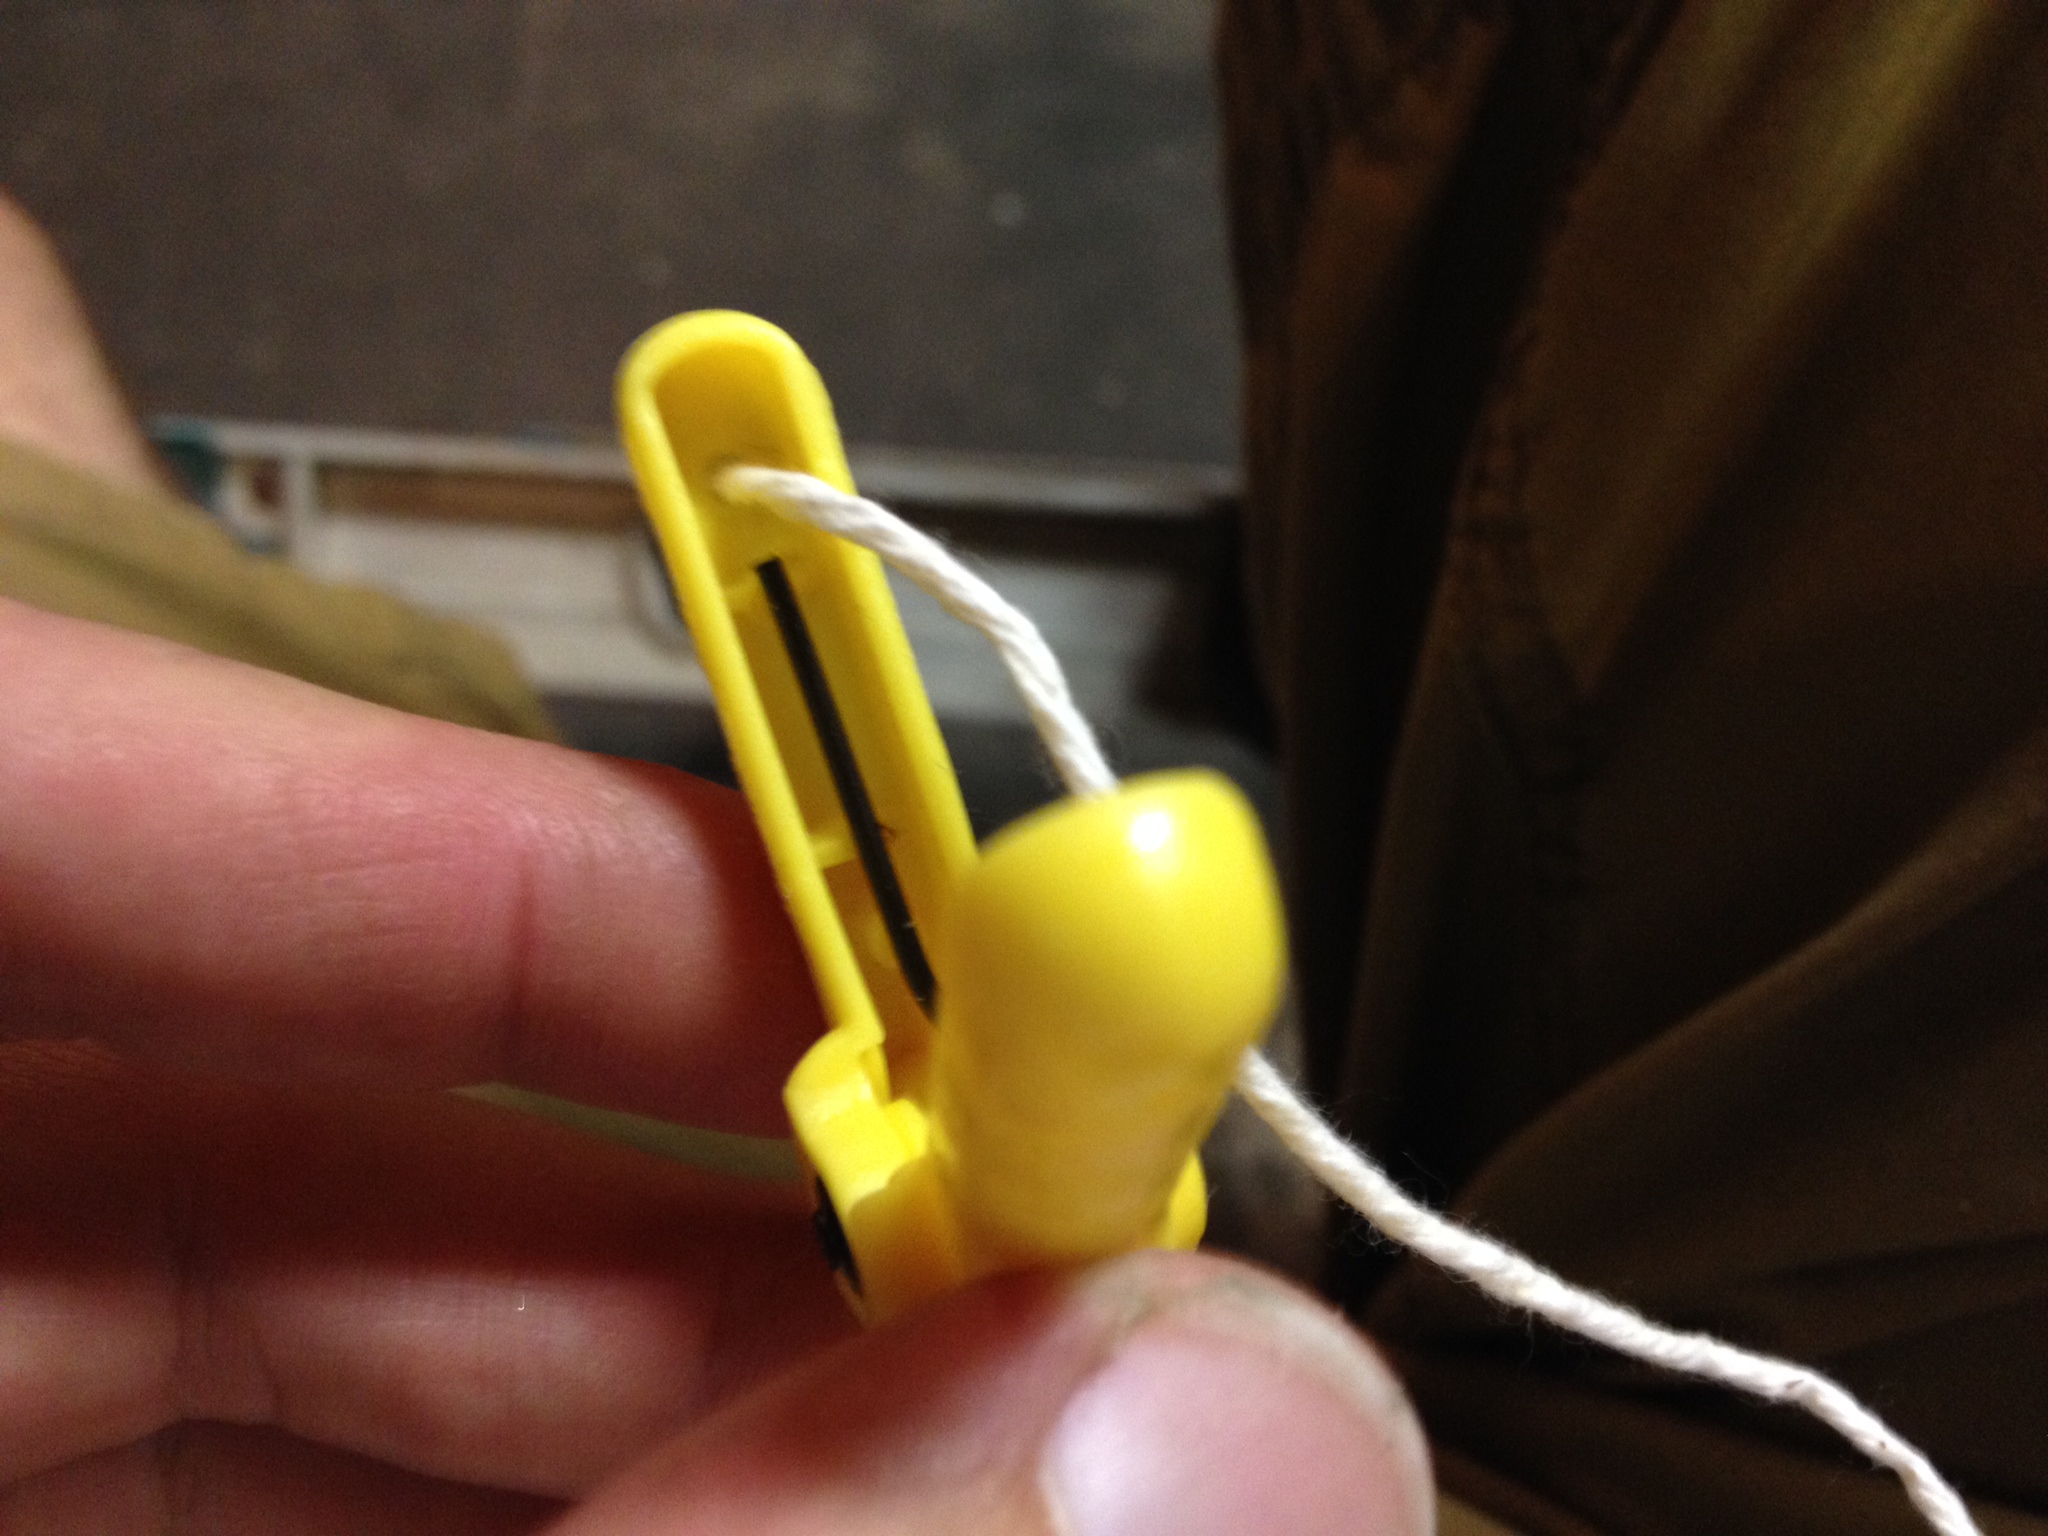
- If the clamp handles don’t have holes in them, drill holes through each one.
- Cut a stripe of twine the appropriate length for how long you’d like the hanger. It’ll vary depending on how many clamps and the spacing you prefer, but about 36″ should be good.
- Tie the end of the twine to one clamp.
- Slip the other end of the twine through the next clamp, leaving about 5″ between each clamp. Tie a knot to that clamp to hold it in place.
- Repeat step 4 until the desired number of clamps are attached.
- Tie a loop at the top of the string to allow it to be hung.
- Hang the clamp organizing strip.
- Attach gloves to each clamp
And that’s it – it really is that simple. The quantity / length you need is dependent on how many gloves you need / want to hold. In my case, I made two hangers with 5 clamps on each, so 10 pairs of gloves assuming you only put one pair on each clamp. So I needed about 30″ per hanger.
My clamps already had holes through the handles, so this was super easy. I just threaded the twine through the holes, tied a triple not at each clamp to ensure that it doesn’t move. Next, tie a loop at the top to hang the hanger, and I was all set. The clamps are spaced about 5″ apart. This gives a small overlap of each set of gloves without taking up too much space in the garage.
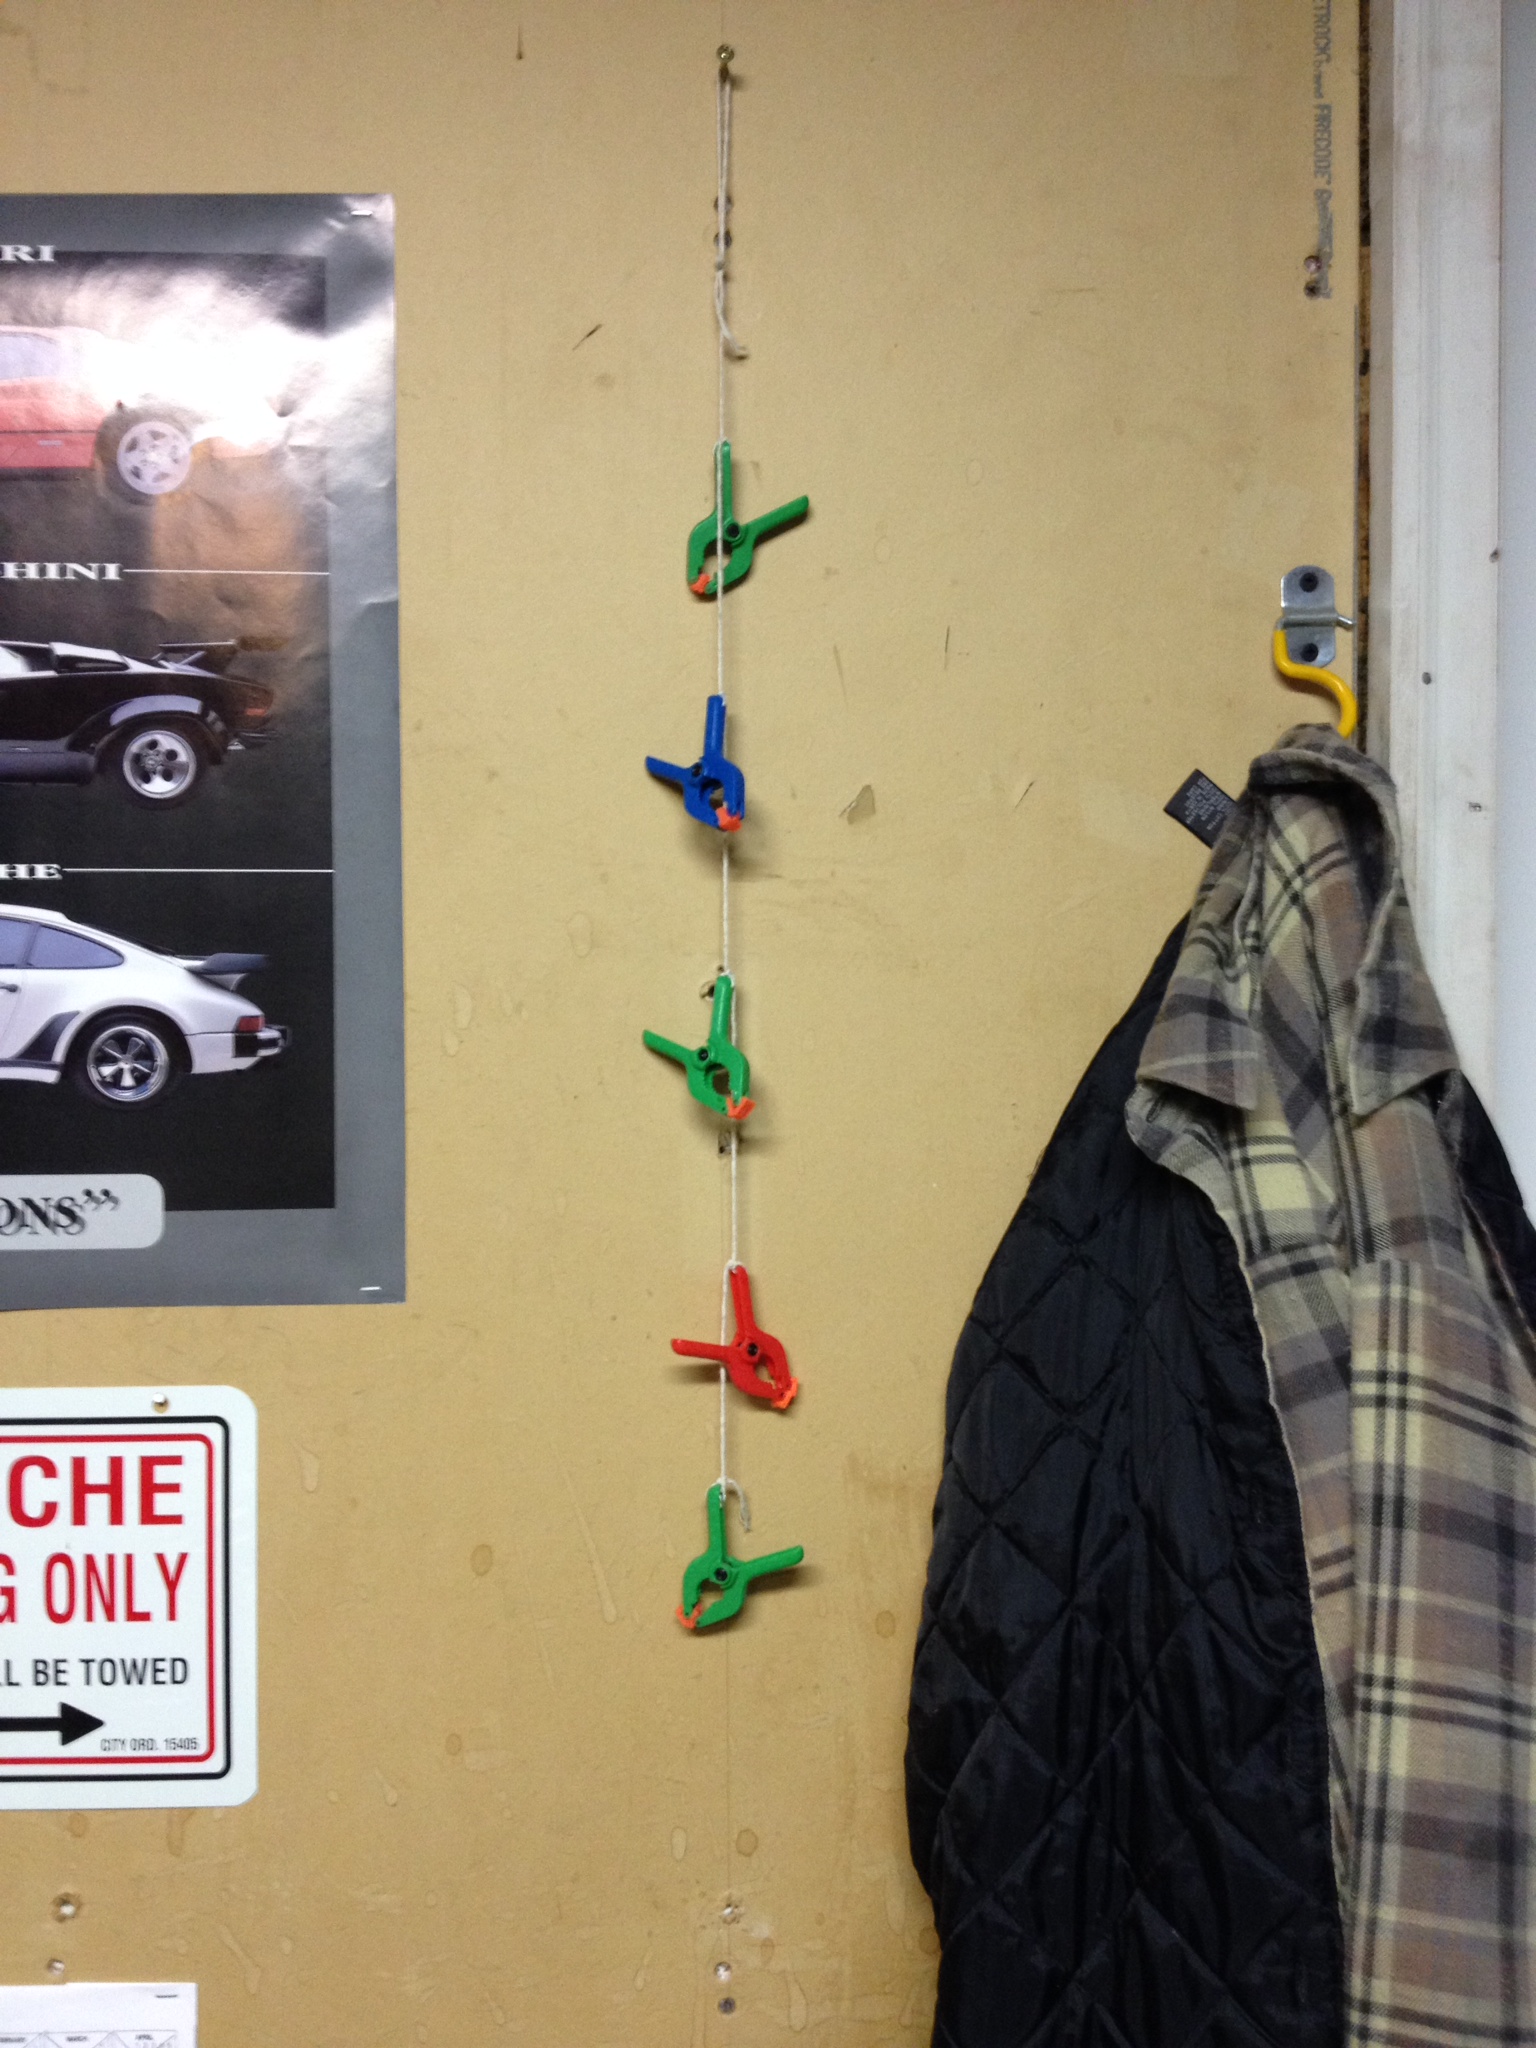
These are so simple and helpful. Put a pair of gloves into the clamp, hang the hanger, and you’re all set. Pretty straight forward.
Update
I want to thank Ask This Old House for sharing this idea on their TV show. This idea was featured on episode 1310 – it was the lead segment. You can watch it online on the PBS website here if you are an Ask This Old House Insider – its at the 1:40 mark.