QNAP has released Container Station 3. This post is for the older version – Container Station 2.
Please view post Update Container Version in QNAP Container Station 3 for a tutorial on how to update containers in the latest version of Container Station.
Updating the version of an application in a QNAP Container Station container is often required. The steps to update a QNAP Container Station container aren’t all that clear. For that reason this tutorial will provide the background and knowledge on how to properly update the version of the container.

NOTE: this tutorial is specific to QNAP Container Station 2. Container Station 3 was in beta at the time of writing.
Contents
How Containers are Versioned
Given the concept of using containers, the version of the software is locked into the container. What this means is that the version isn’t updated within the container like we often do on modern operating systems like Windows or Linux. The container holds the version of the application.
The configuration and data is portable from one version of a container to another however. So the container is updated to a newer version and the end result is two containers – one per version. What is nice here is that if any conflicts or issues arise with the new version for one reason or another, it can be stopped and the older version can be restarted and thus it’s quick and easy to revert back to the last known good state.
One downside to this is that with the older versions of images and containers existing disk usage will grow and the list of containers – most of which will be disabled – will grow as well. This can be cleaned up by deleting the older containers and images as needed.
Methods to Update QNAP Container Station containers
Method 1: Duplicate Container
This is the easiest method as it doesn’t require additional configuration work. It just copies the configured settings into a new container based on the same image. If that image was configured to be the :latest version (and not a specific version) then the latest version of the application can be pulled into the newly created container and the update process completes.
This can run into issues at times however with network configuration conflicts and thus the creation of the new container isn’t allowed. Adjusting the settings can get past that conflict of course. Additionally the mapping of shared folders for configuration and data typically are not copied over for one reason or another.
- Click on the Container tab on the left hand navigation
- Click on the container name that is out of date and needs to be updated.
- Stop the current container by clicking the Stop button.
- Click on the More button and choose Duplicate
- Set a meaningful name, such as the container name and version
- The current version can be found at:
https://hub.docker.com/r/<namespace>/<package>/tags - Replace
<namespace>and<package>with those that match the container to be updated
- The current version can be found at:
- Check the Pull the image from the registry before creating the container. checkbox
- Ensure the other settings are set correctly for the container as needed.
- Click on the Advanced Settings >> link
- Go through each setting tab to ensure that the settings look accurate
- It’s common that the Shared Folders need to be re-mapped
- Click the Create button
- A summary of the container configuration is shown. Review and click OK when ready.
NOTE: I ran into issues in Container Station v2.x due to what I think was network issues. The Create button never enabled and an error showed in the Network options.
Troubleshooting
The Create button may show in grey thus preventing the completion of the creation process. This indicates there are conflicts or incomplete configuration. Resolve these issues to proceed.
Manifest Unknown Error
If the container is based on an image that is no longer available from the repository – Docker’s repository for example – or the local device, the error of manifest for <repository/imagename> not found: manifest unknown: manifest unknown will be thrown in the Log section of Container Station. This is saying “you asked me to pull an updated copy of the image, but the image can’t be found”.

Shared Folders
For one reason or another the configuration of the Shared Folders don’t map over when using this method. Those settings will need to be manually configured before the Create button will be clickable.
Network Configuration
The network configuration can cause issues if there are port mapping conflicts, etc. Altering the network configuration settings should allow this to proceed, however the proper configuration is beyond the scope of this tutorial and will vary depending on the containers usage and needs.
Method 2: Manually Pull and Recreate from Image
This method involves manually recreating the container. Depending on the network volume, and environment settings this can be a frustrating method as it needs a lot of precise work that was already done previously to be redone. However if the base image that was used to make the original container is different or no longer exists in the repository (thus Container Station is unable to pull an updated version) then this method likely is necessary.
- Open Container Station in the QNAP web console
- Disable the existing container
- Click on the Container tab on the left hand navigation
- Click on the container name that is out of date and needs to be updated.
- Stop the current container by clicking the Stop button.
- Click the Settings button and uncheck the Auto start (if checked) option and click the Apply button.
- Click on the Images tab on the left hand navigation
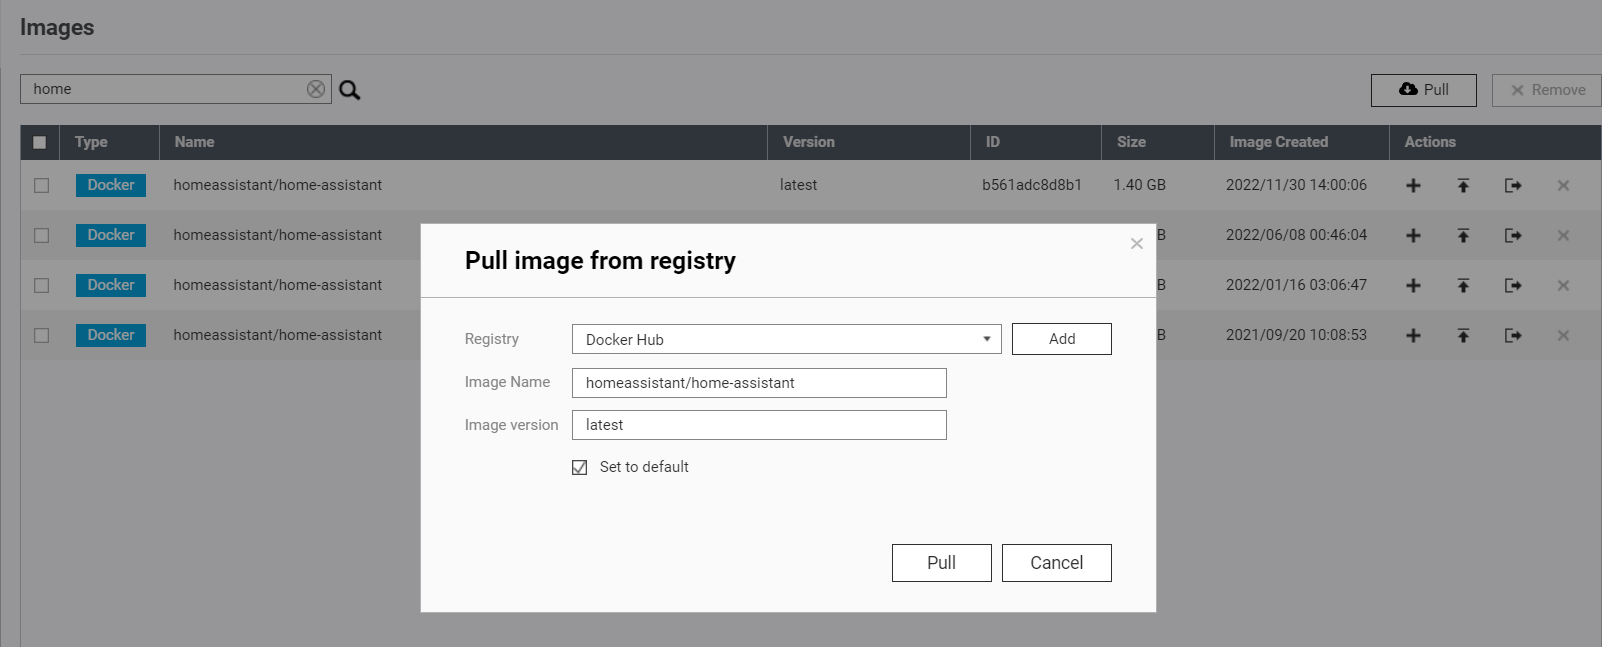
- Click on the Pull button
- Select the Registry (Docker Hub is the most common option)
- Type the name of the image to update in the Image Name field
- Optional: specify a specific version of the image in the Image version field. Setting this to the default of latest is the most logical

- Click the Pull button to start the download of the image
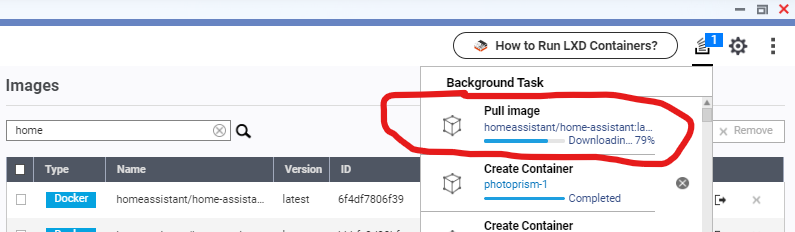
- The image will show in the list once it has completed downloading. The Background Tasks dropdown will show the progress of the download.
- After the pull of the updated container is complete, click on the Container tab on the left hand navigation
- Click the + icon for the newly downloaded image (as denoted by the Image Created column) to create a new container.
- Set a meaningful name, such as the container name and version
- Configure the container as needed, mirroring on the original containers configuration
- Click the Create button
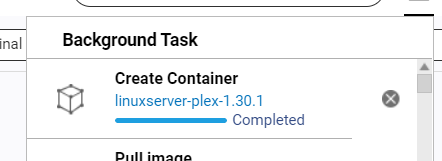
- The Background Tasks dropdown will show the progress of the container creation