This is a tutorial on how I setup Home Assistant on a QNAP TS-251 NAS box in Container Station.

Contents
Install Container Station
If you don’t have Container Station installed on the QNAP server, do that first via App Center.
Container Station is a way to run a virtual app or virtual server on your NAS. This is really running via Docker but adding a GUI for you to setup and configure the Docker container. Docker has really become a great corner-stone on how to run virtual servers and is really cool – the more you get into running servers the more you appreciate this technology.
Prepare For the Container
The container holds all of the server-level code/logic. But as you use your container, there will be some unique information for your container that you’ll want to store elsewhere. This allows for you to stop, upgrade, delete the container itself as needed without loosing your data.
In File Station create a new directory in a location you like for this data. I suggest creating a directory called Container at the root level.
Within this directory, create a subdirectory named homeassistant.
Install Home Assistant via Container Station
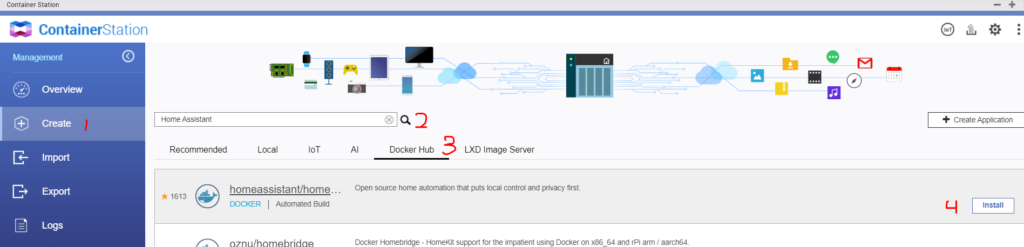
- In Container Station, click the Create button on the left hand panel.
- In the search box, search for Home Assistant and click the magnifying glass icon.
- Click the Docker Hub tab.
- There will likely be several results. Look for
homeassistant/home-assistantand click on the Install button.
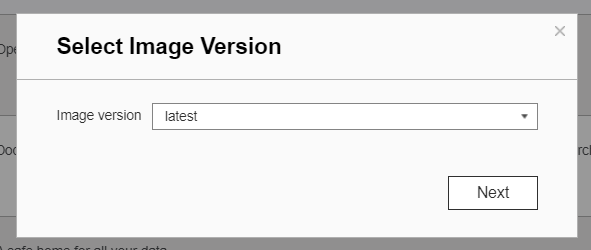
- Use the latest version (unless you have a strong reason to use an alternate version) and click Next.
- Create the Container
- Set a Name for the container (example:
home-assistant-1).- This is the “friendly name” you’ll see when you look at your containers, so make sure you can recall what it is.
- Set Entrypoint to
/init. - Check the Auto start option
- This will ensure the container starts up automatically when your NAS restarts.
- Set the CPU Limit to less than 100%.
- I suggest 80% to prevent this container from overtaking the NAS.
- Set the Memory Limit to less than the maximum.
- I suggest about 75% to prevent this container from overtaking the NAS.
- Set a Name for the container (example:
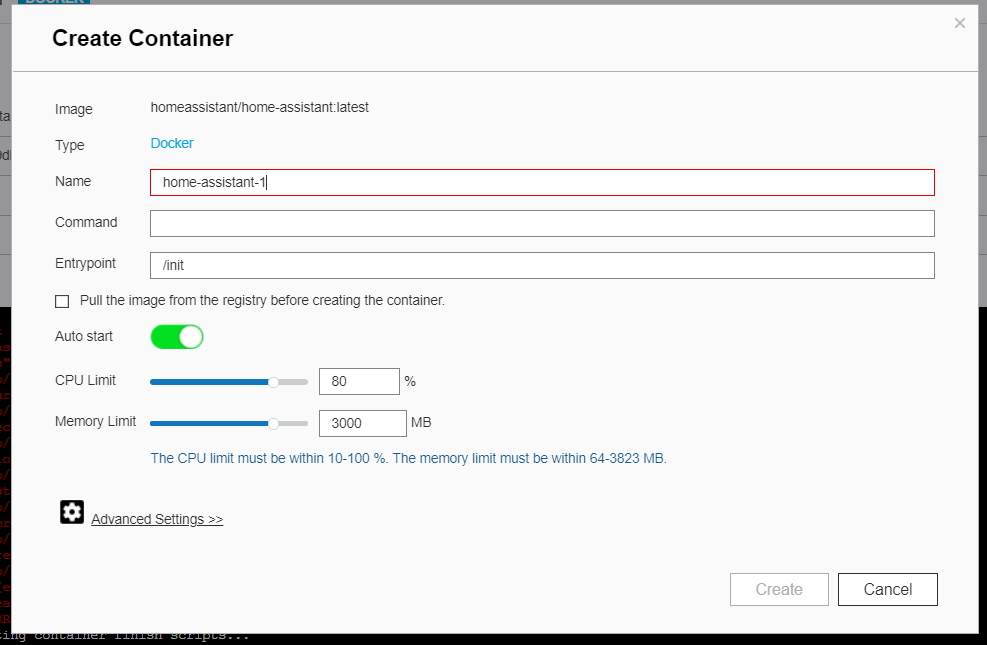
- Click the Advanced Settings >> link
- On the Environment tab:
- Click the Add button and enter TZ in the Name column and enter your time zone value in the Value column.
- The full list of possible time zone names can be found here. The database name column is what value is expected here.
- Click the Add button and enter TZ in the Name column and enter your time zone value in the Value column.

- On the Network tab:
- Set the Network Mode: to Host
- On the Device tab:
- Check the Allocate interactive and TTY processes for the container box
- Check the Run containers in privileged mode. box
- Technically this is optional, but in my opinion this is worth enabling.
- On the Shared Folders tab:
- Click the Add button in the Volume from host section.
- Set the Volume from host field to the container directory you made previously (ie.
/Container/homeassistant) - Set the Mount Point to
/config - Ensure Read and Write are checked.

- Click the Create button to create the container.
- A summary screen shows your configuration settings. Click OK.
- This will create the container which takes a few minutes to fully load.
- You can click into the container on the Container tab to see the status of if the container has been loaded or not.
- You can now access Home Assistant via your web browser. Home Assistant runs at port 8123. Simply add
/8123to the end of your NAS IP address.- Example: If your NAS is accessed at
http://192.168.0.110:8080/cgi-bin/, Home Assistant would be accessible athttp://192.168.0.110:8123
- Example: If your NAS is accessed at
And with that, you should be up and running with Home Assistant on QNAP via Container Station!
