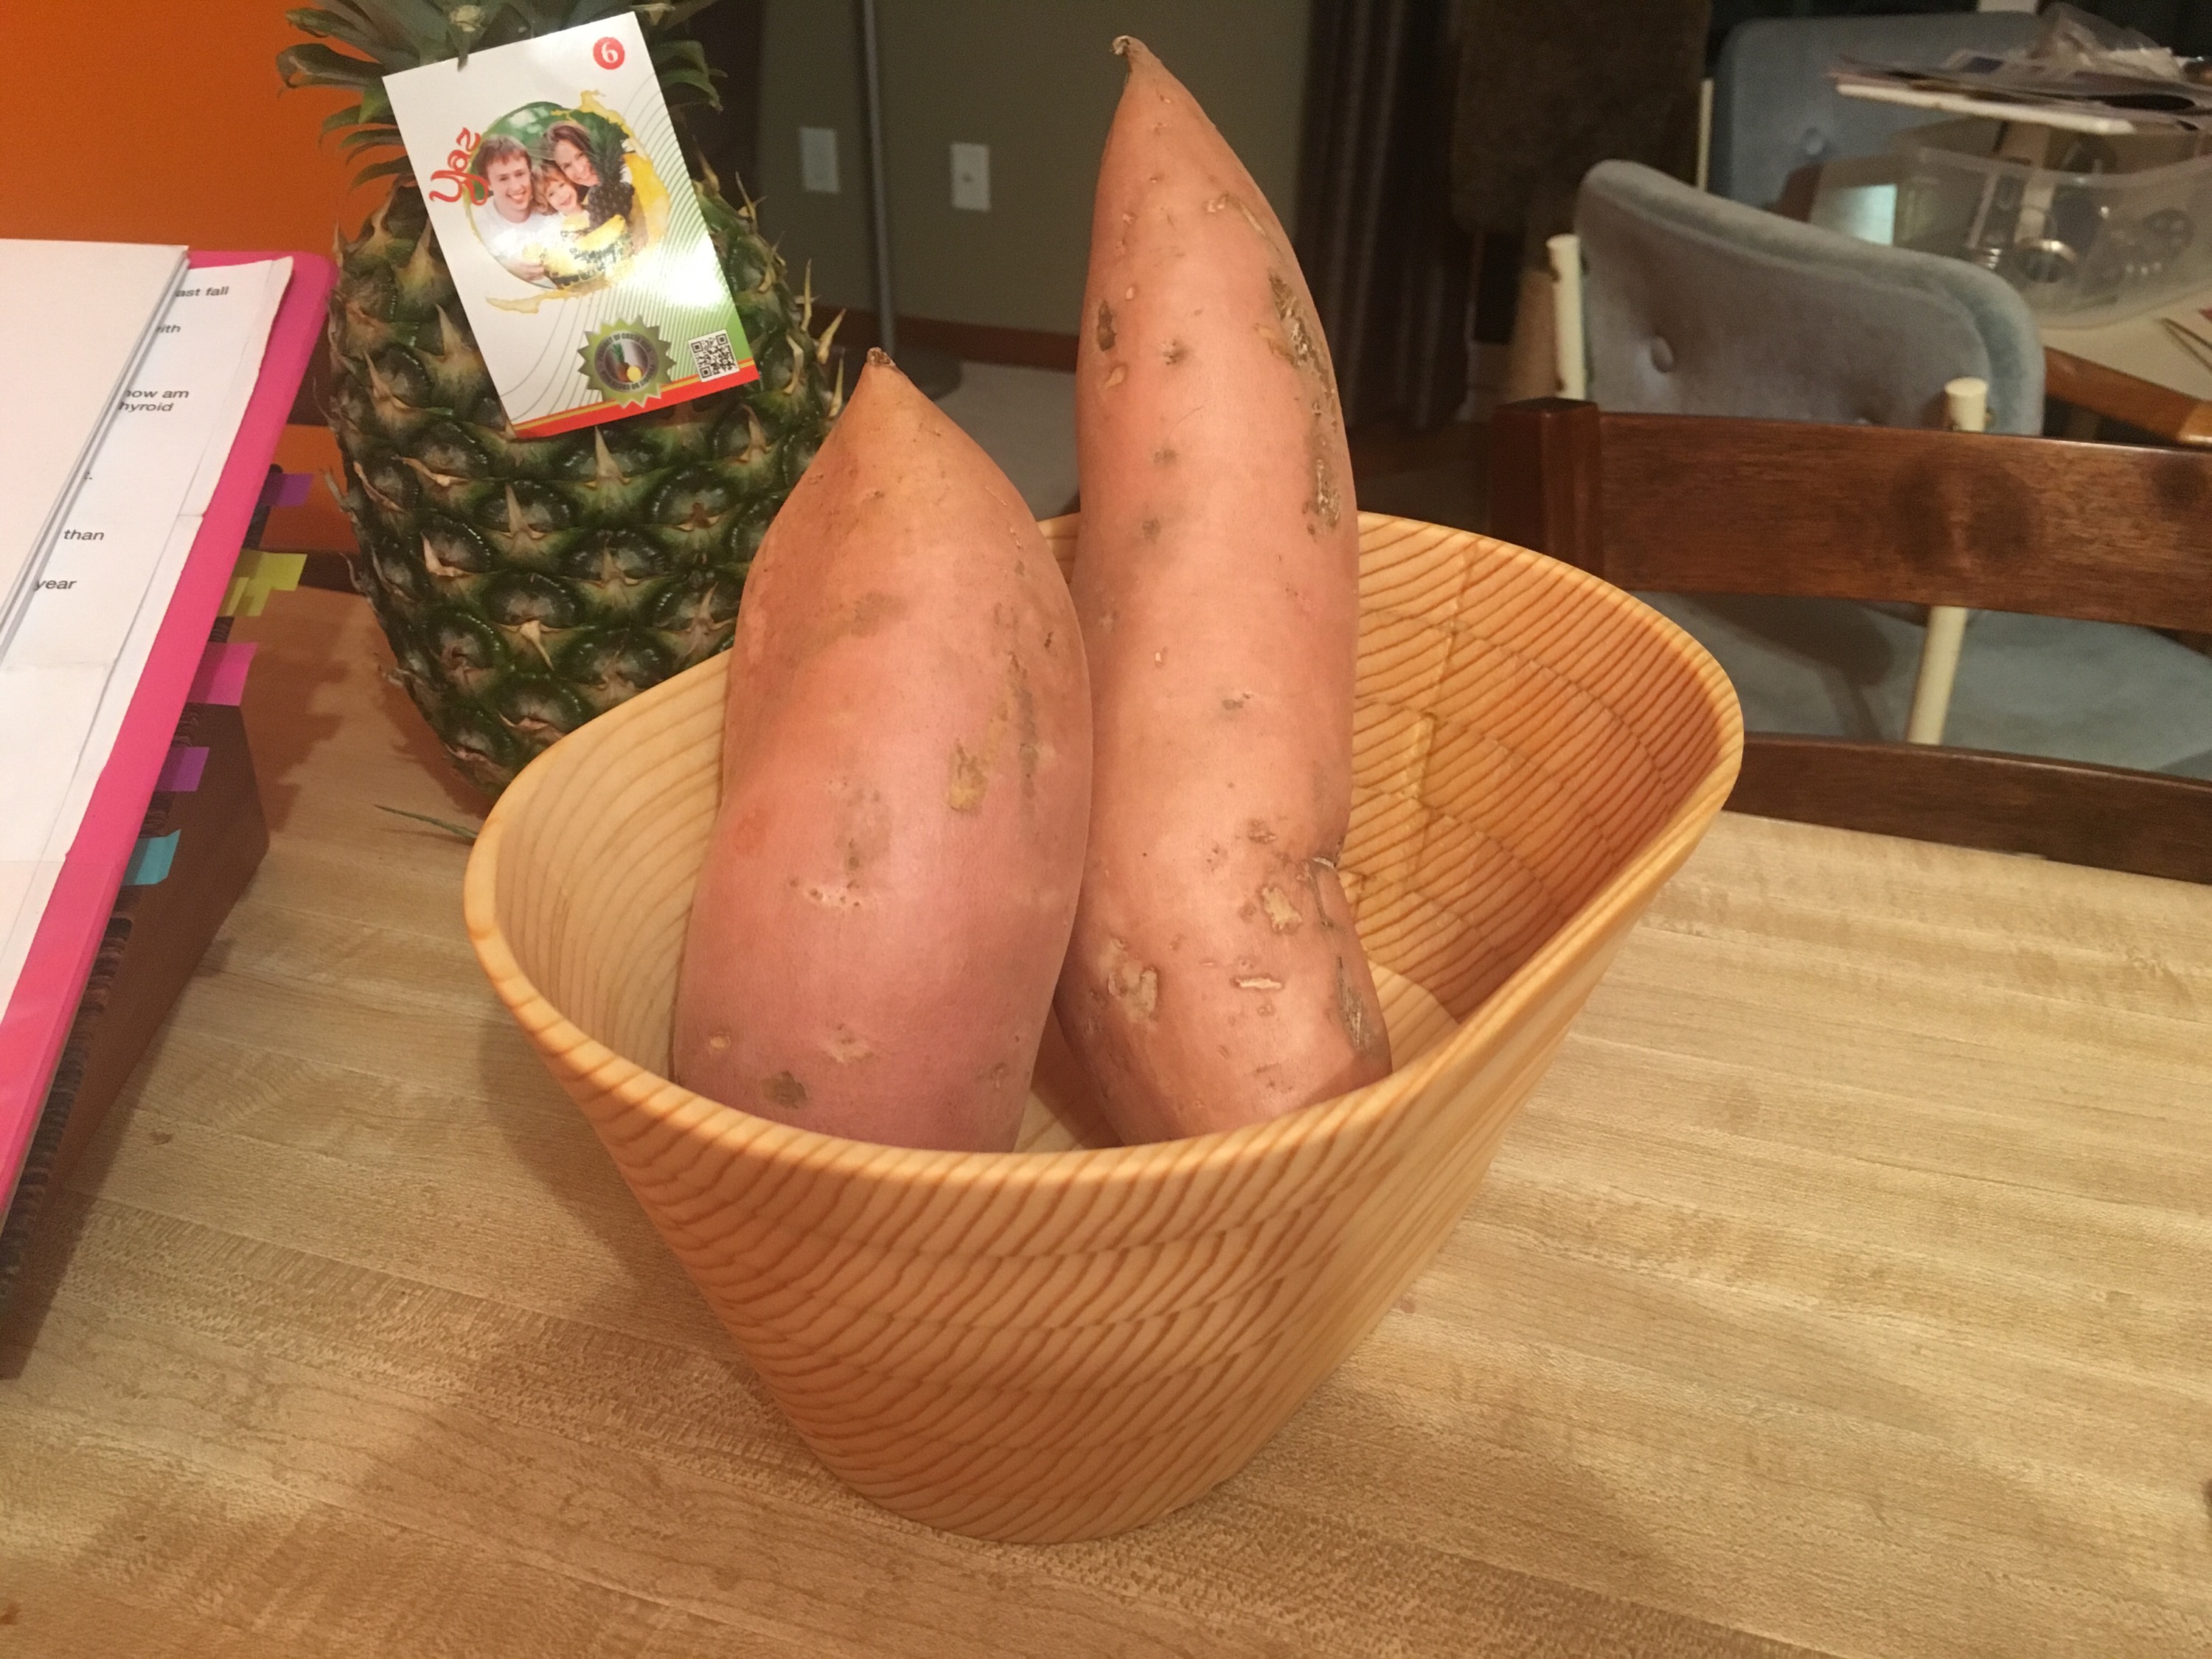
I was in need of a bowl for the kitchen for holding produce. Well to be honest I could probably use a few, but for now I’ve only had a chance to make one. I have a wood lathe and have considered turning one on there. But between my chisels needing sharpening and not having a blank that would make a large enough bowl for my needs, I started to look for another way to make this.
Contents
A Scrollsaw Pattern
I found exactly what I was looking for. The Scrollsaw Workshop published by Steve Good. This website is nothing short of awesome if you are looking to put your scroll saw to work for some fun and unique projects. Steve offers free scrollsaw patterns among other great resources. I’ll be honest, I don’t think I’ve really scratched the surface of what he offers. I knew I wanted to make a bowl so I sought out a pattern for just that – but there is so much more that he has! I encourage you to take a look on your own time, but for now I’ll step down from the soap box and get back on track with the project at hand.
Wood Selection
I’ve been on a kick lately of using whatever scrap wood I can find in my garage. I have a sizable pile of it and quite frankly I’d like for it to be smaller. In addition, I know that if I went to buy a piece of wood I’d make a big ordeal about it – what is the right species, etc. and what should be a quick fun project would turn into a longer drawn out process. Also, since this was my first attempt at such a project I figured I’d start simple.
All that rambling to tell you I ended up using a piece of 1″ x 8″ standard pine. Why? That’s what was in the scrap pile that fit this project.
It would be fun to try some exotic woods, possibly with a darker color. And I might try that at some point – though I’ve never cut much other than pine on the scrollsaw so I may have to see how well the small blade cuts.
Prepare the Pattern
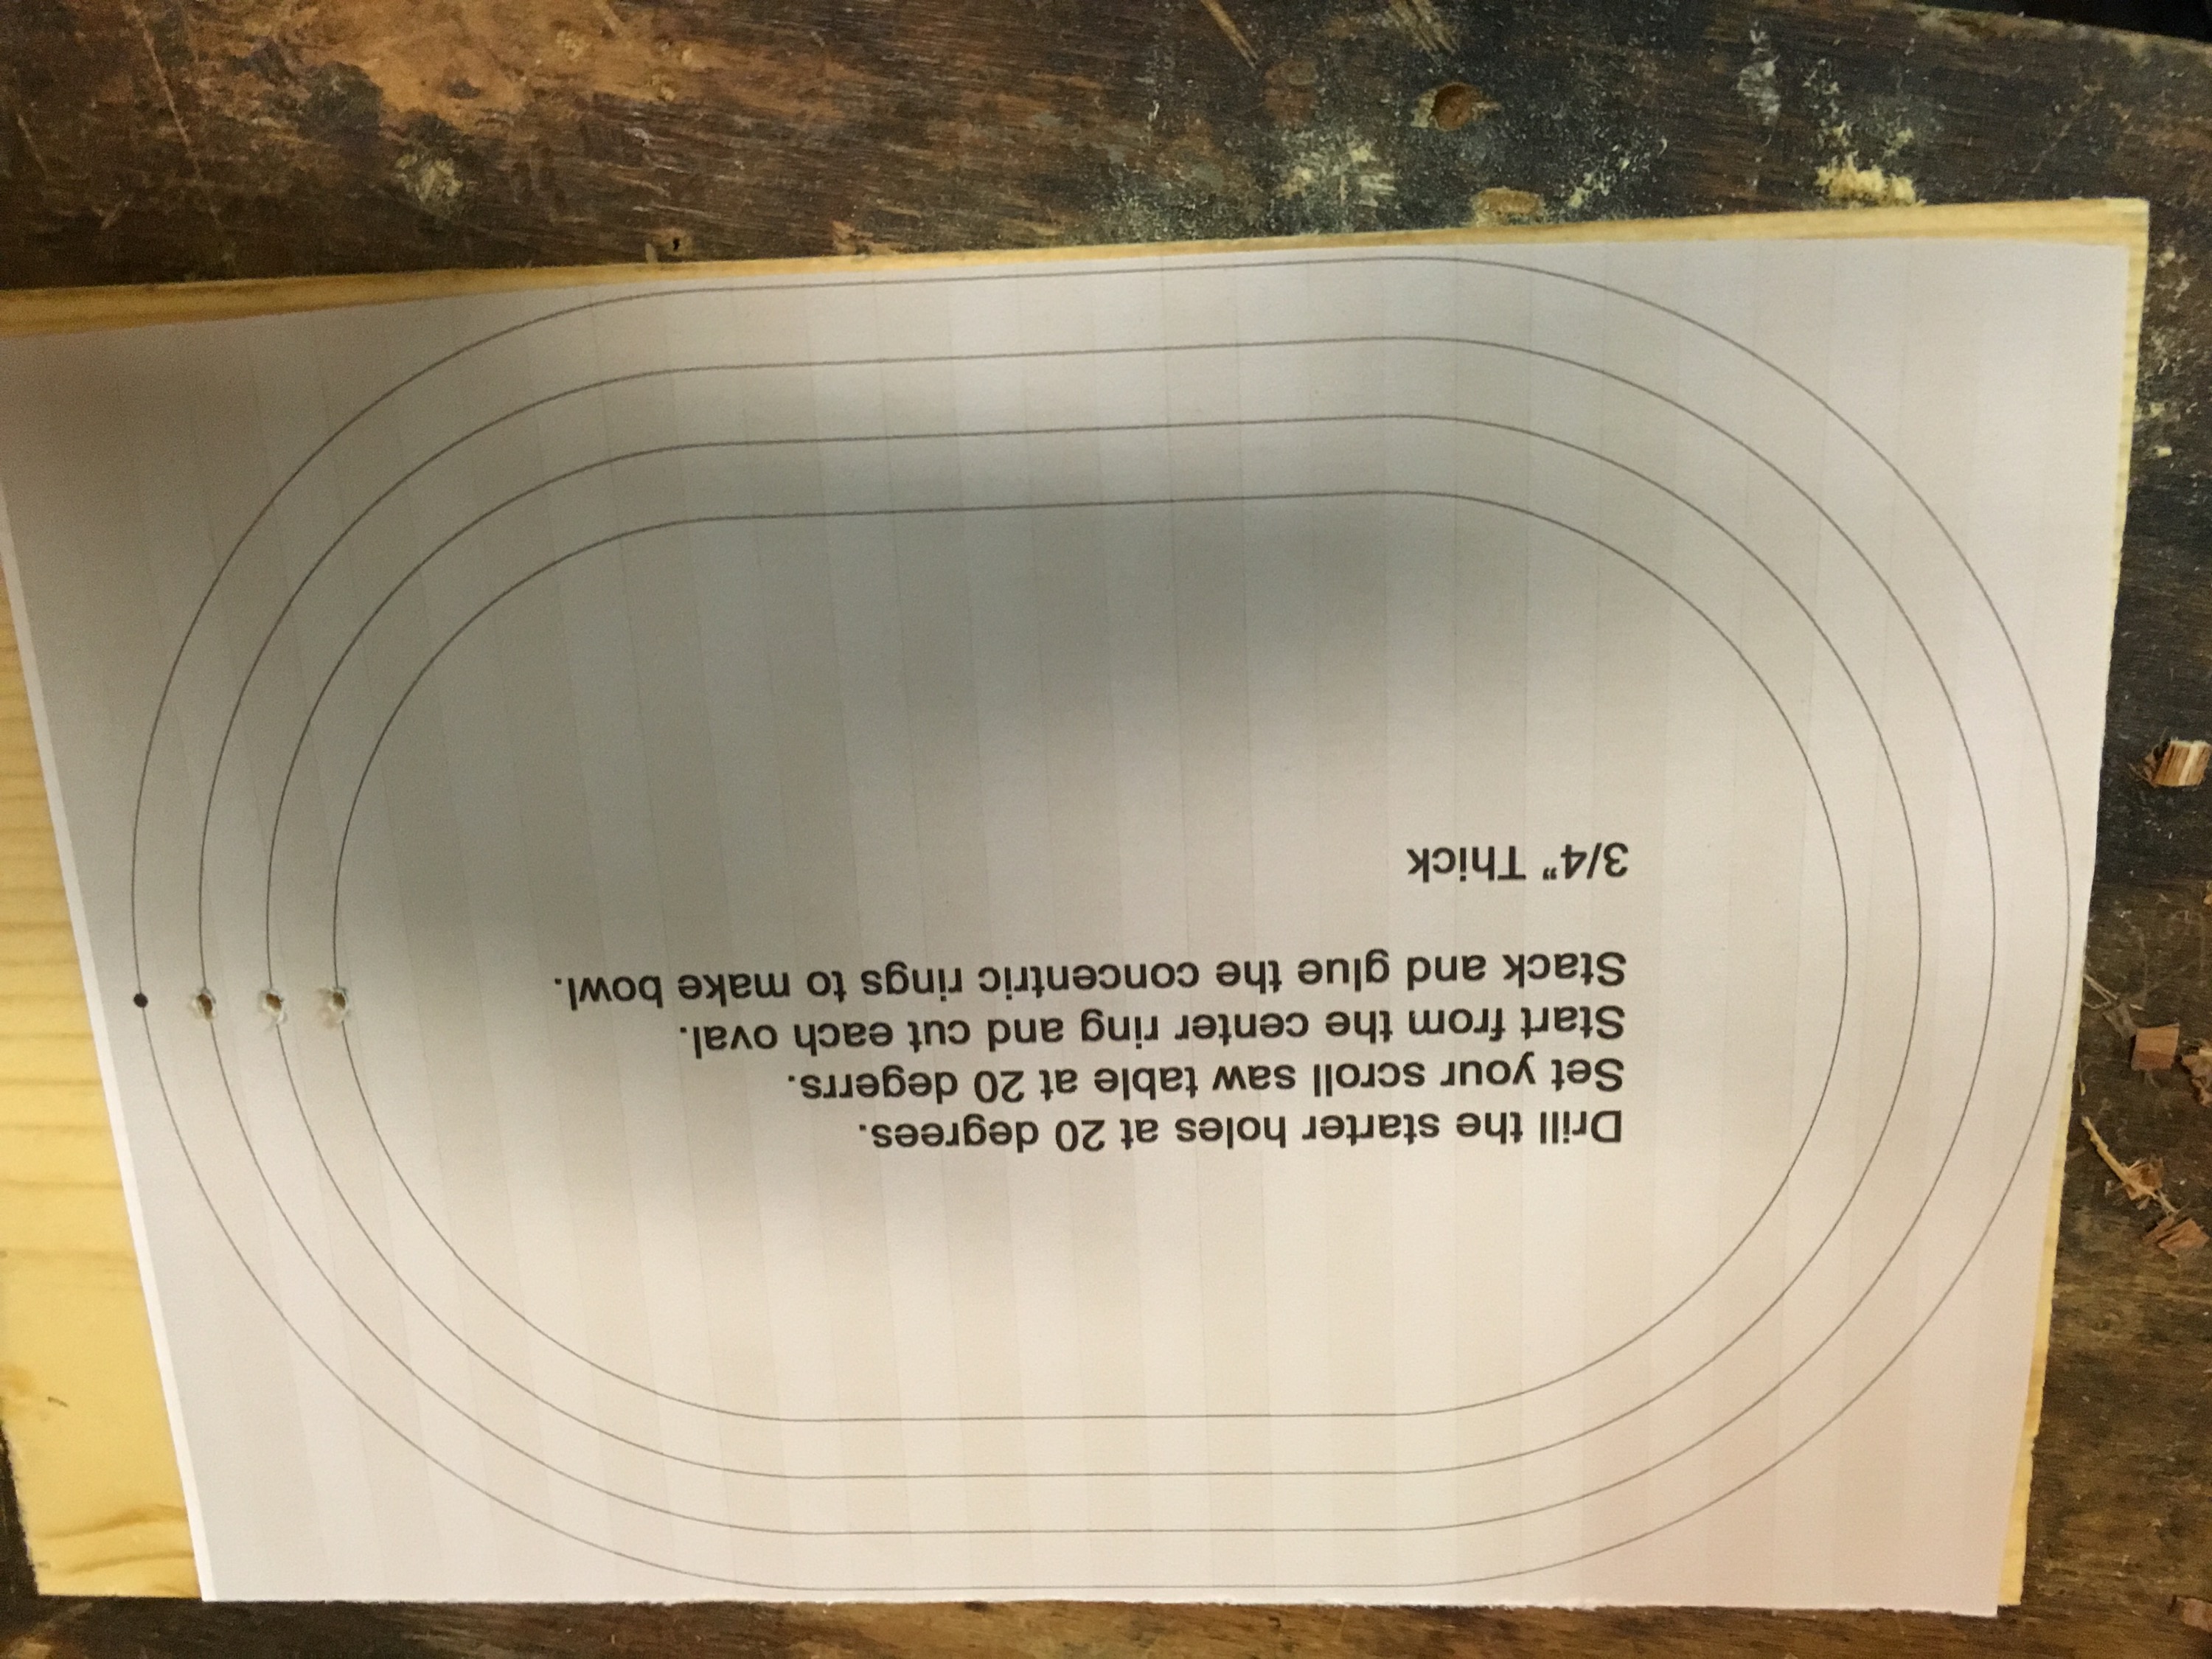
I used the Oval Bowl pattern from the Scrollsaw Workshop site mentioned above. I wanted my bowl to be slightly larger than the pattern was designed for. I simply enlarged the pattern using Photoshop (many other applications would work if you don’t have Photoshop like Photopea – a free online alternative). But this created a slight problem when I started cutting the rings – they didn’t line up correctly. But once I was at the saw this was fairly simple to adjust – rather than following the lines on the pattern I just traced each ring to the stock to make the next cutline.
Aside from resizing the pattern, the only other thing I did was print it onto a sticker paper. This allowed me to adhere the pattern directly to the wood stock and then drill or cut as needed. You could also tape the pattern to the stock but that would only hold at the edges and could cause it to flip up at times.
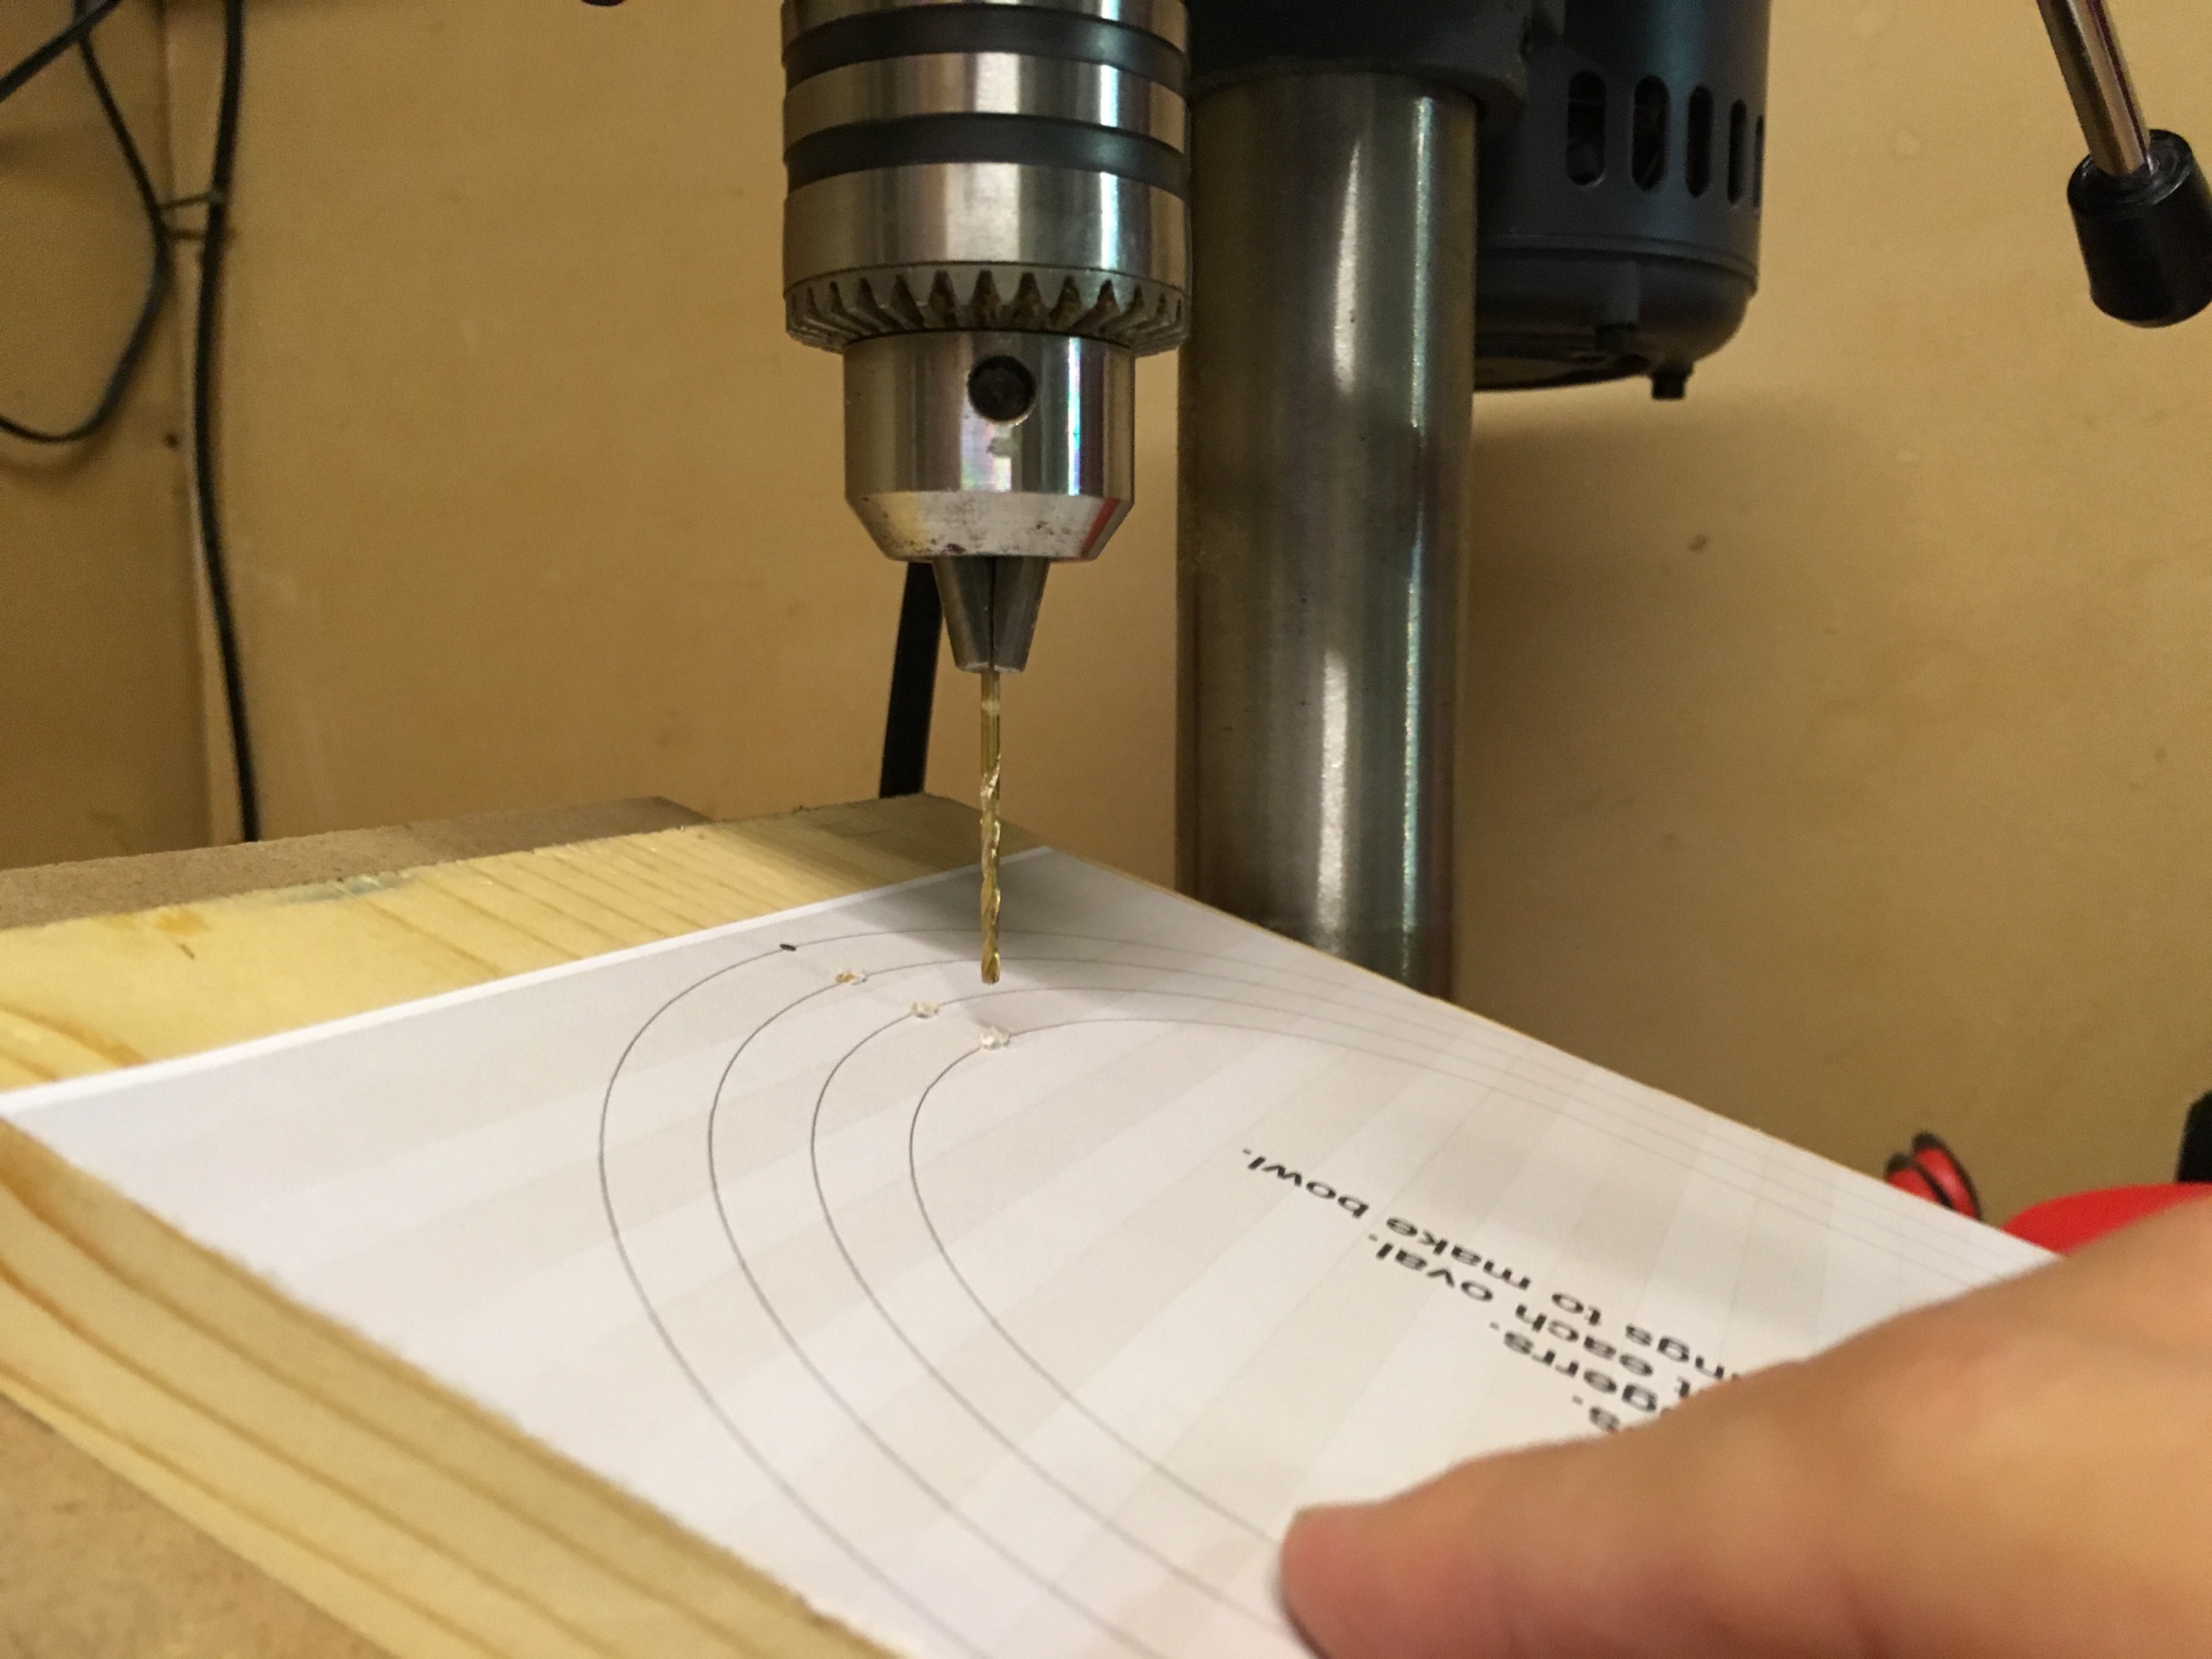
Drill Holes
To start, set the table on your drillpress at 20˚ – this is the angle that the bowl tapers at. Chuck a small drillbit into the drillpress – just big enough that the scrollsaw blade will fit through the hole.
Ideally, you want to use a pin-less blade as it will require a smaller hole through the stock. In my case though, I was able to utilize the best of both worlds. I used pinned blades, but found that the pin will slip in and out of the blade if your use a pliers carefully.
Drill a hole for each line, thus creating the starting point for cutting each ring of the bowl. Take note to my comment above though about enlarging the pattern – if you did that you’ll want to only drill the first hole, cut the ring, use that to find the second ring and then drill the hole, etc. You’ll actually need to drill a few holes in succession to ensure they are wide enough to accept the blade. You may need to use a knife or scratch awl or other method to make this hole large enough to accept the blade.
Cut the Rings
Now for cutting out the rings that will make the walls of the bowl. Setup the scrollsaw by setting the table at a 20˚ angle.
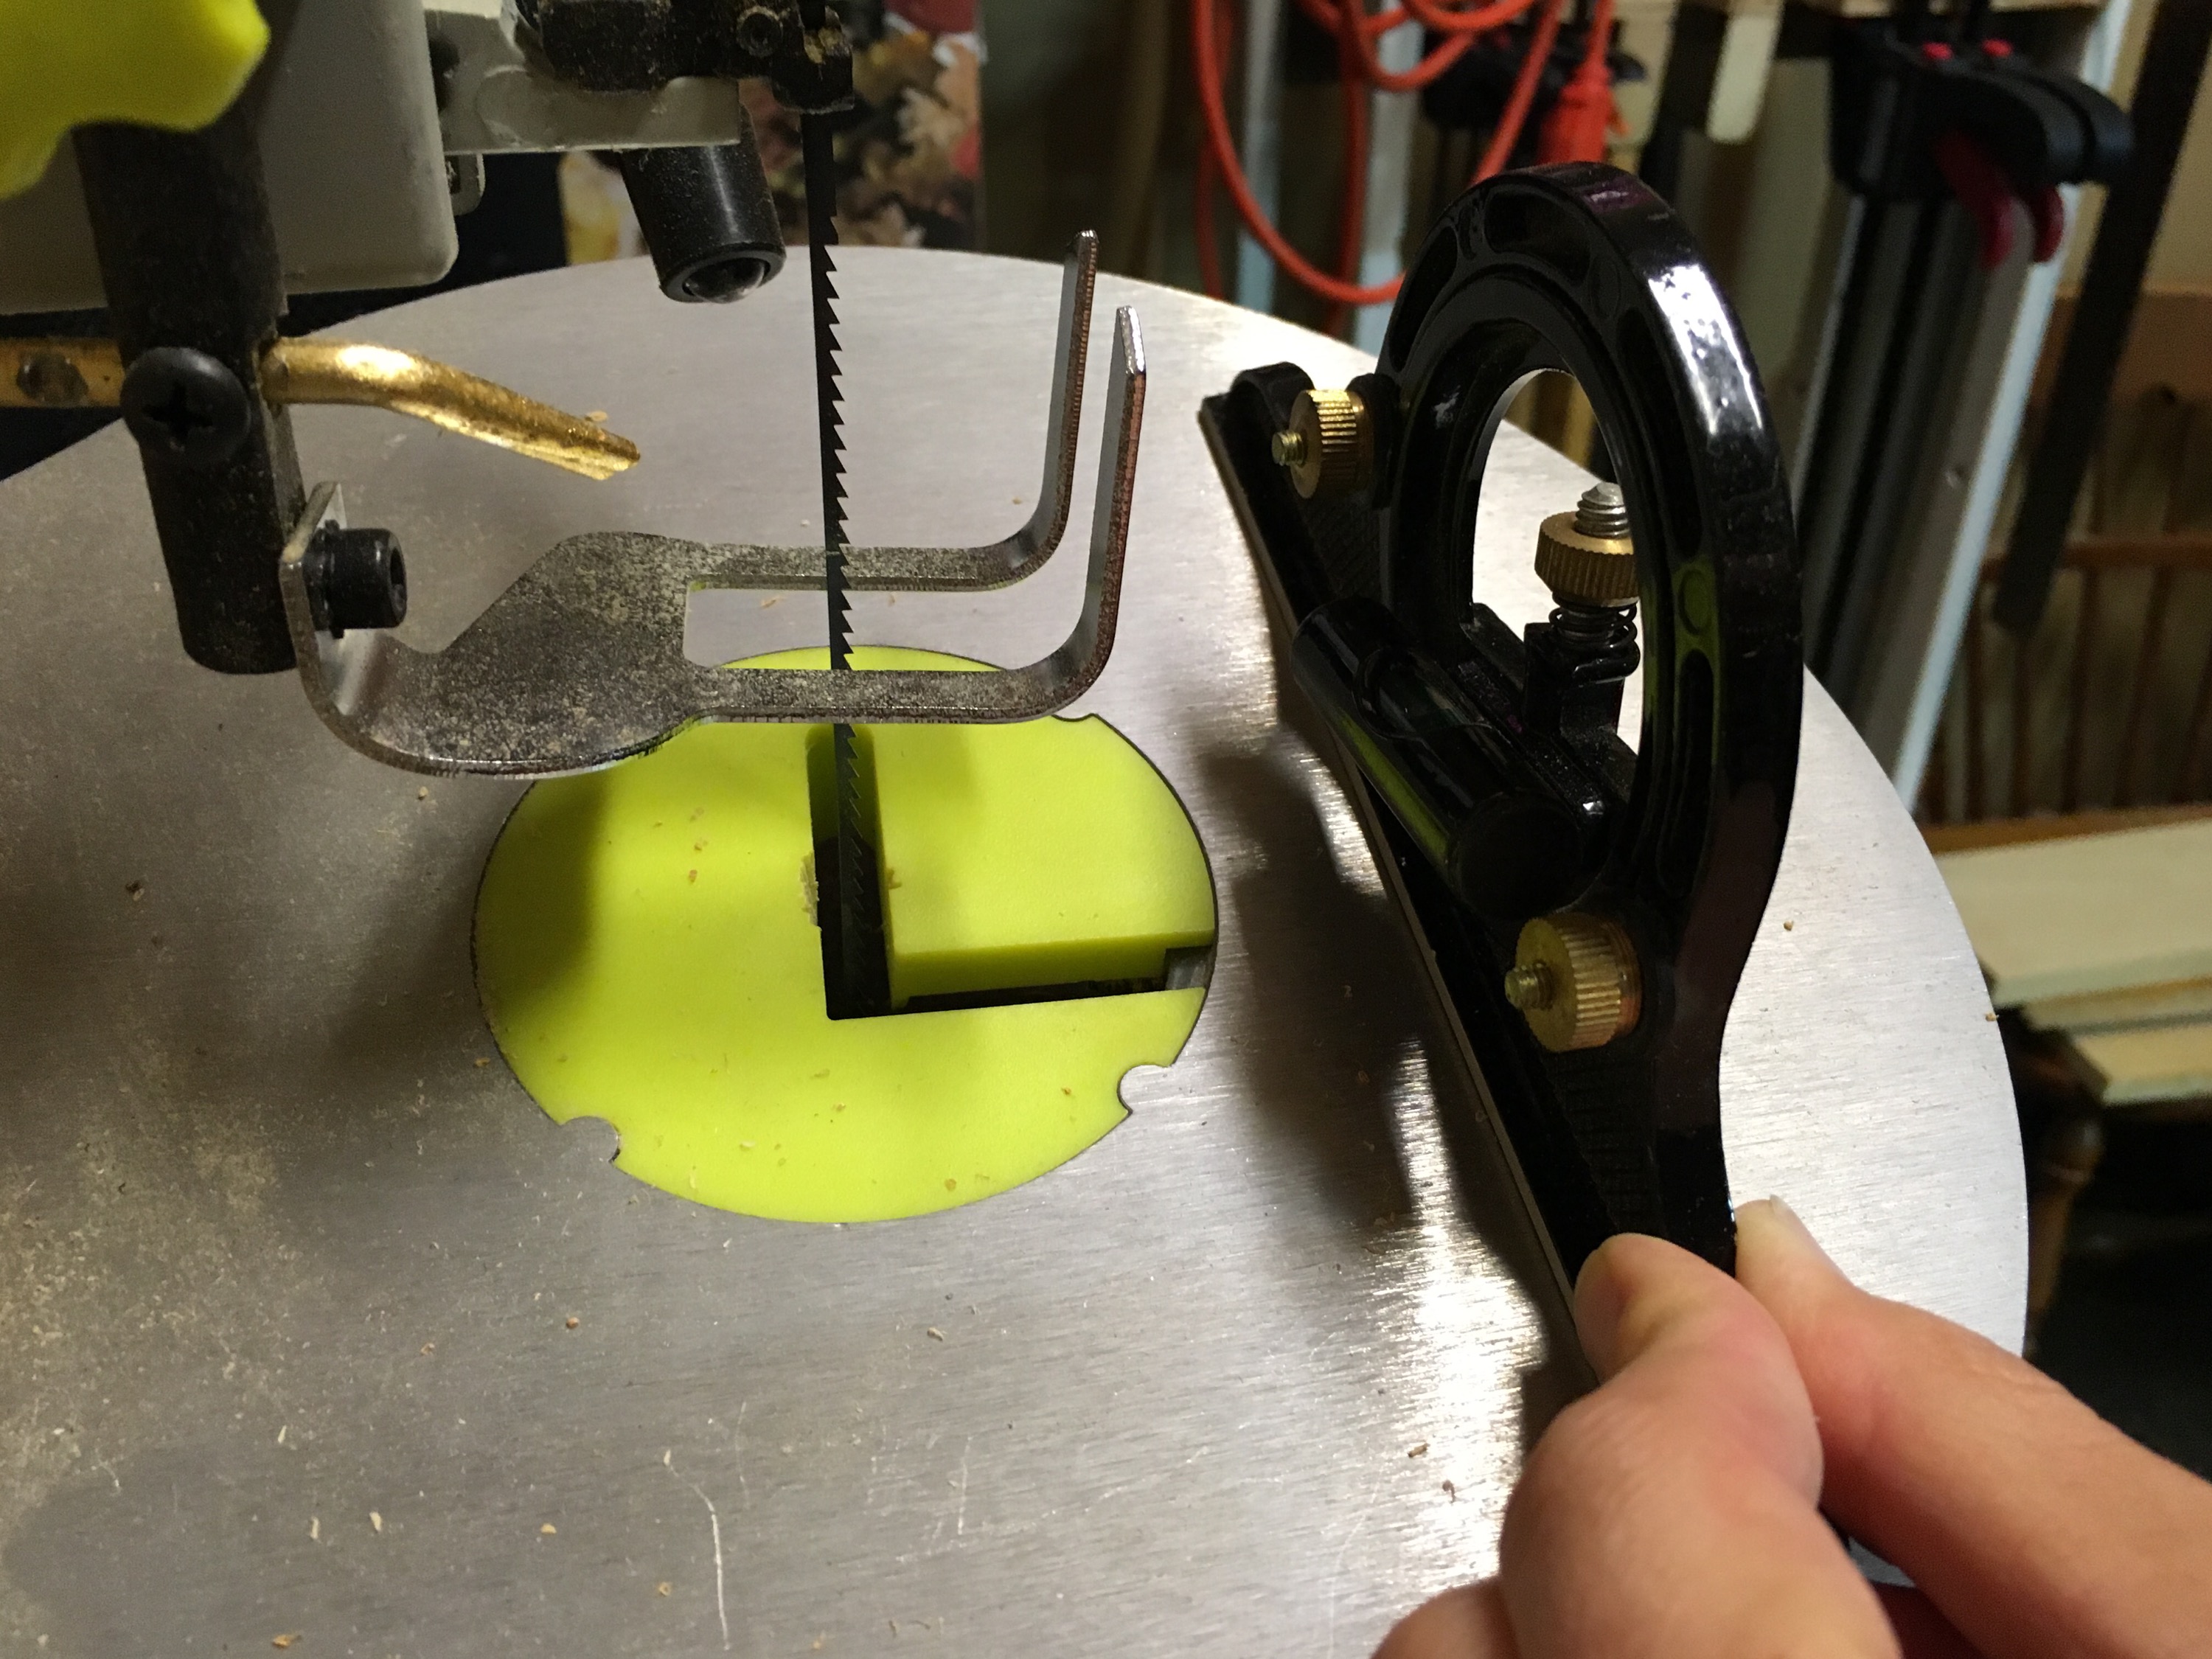
Start by trimming off the outer edge of the wood – this will be waste. This will remove the corners and start to make the oval shape.
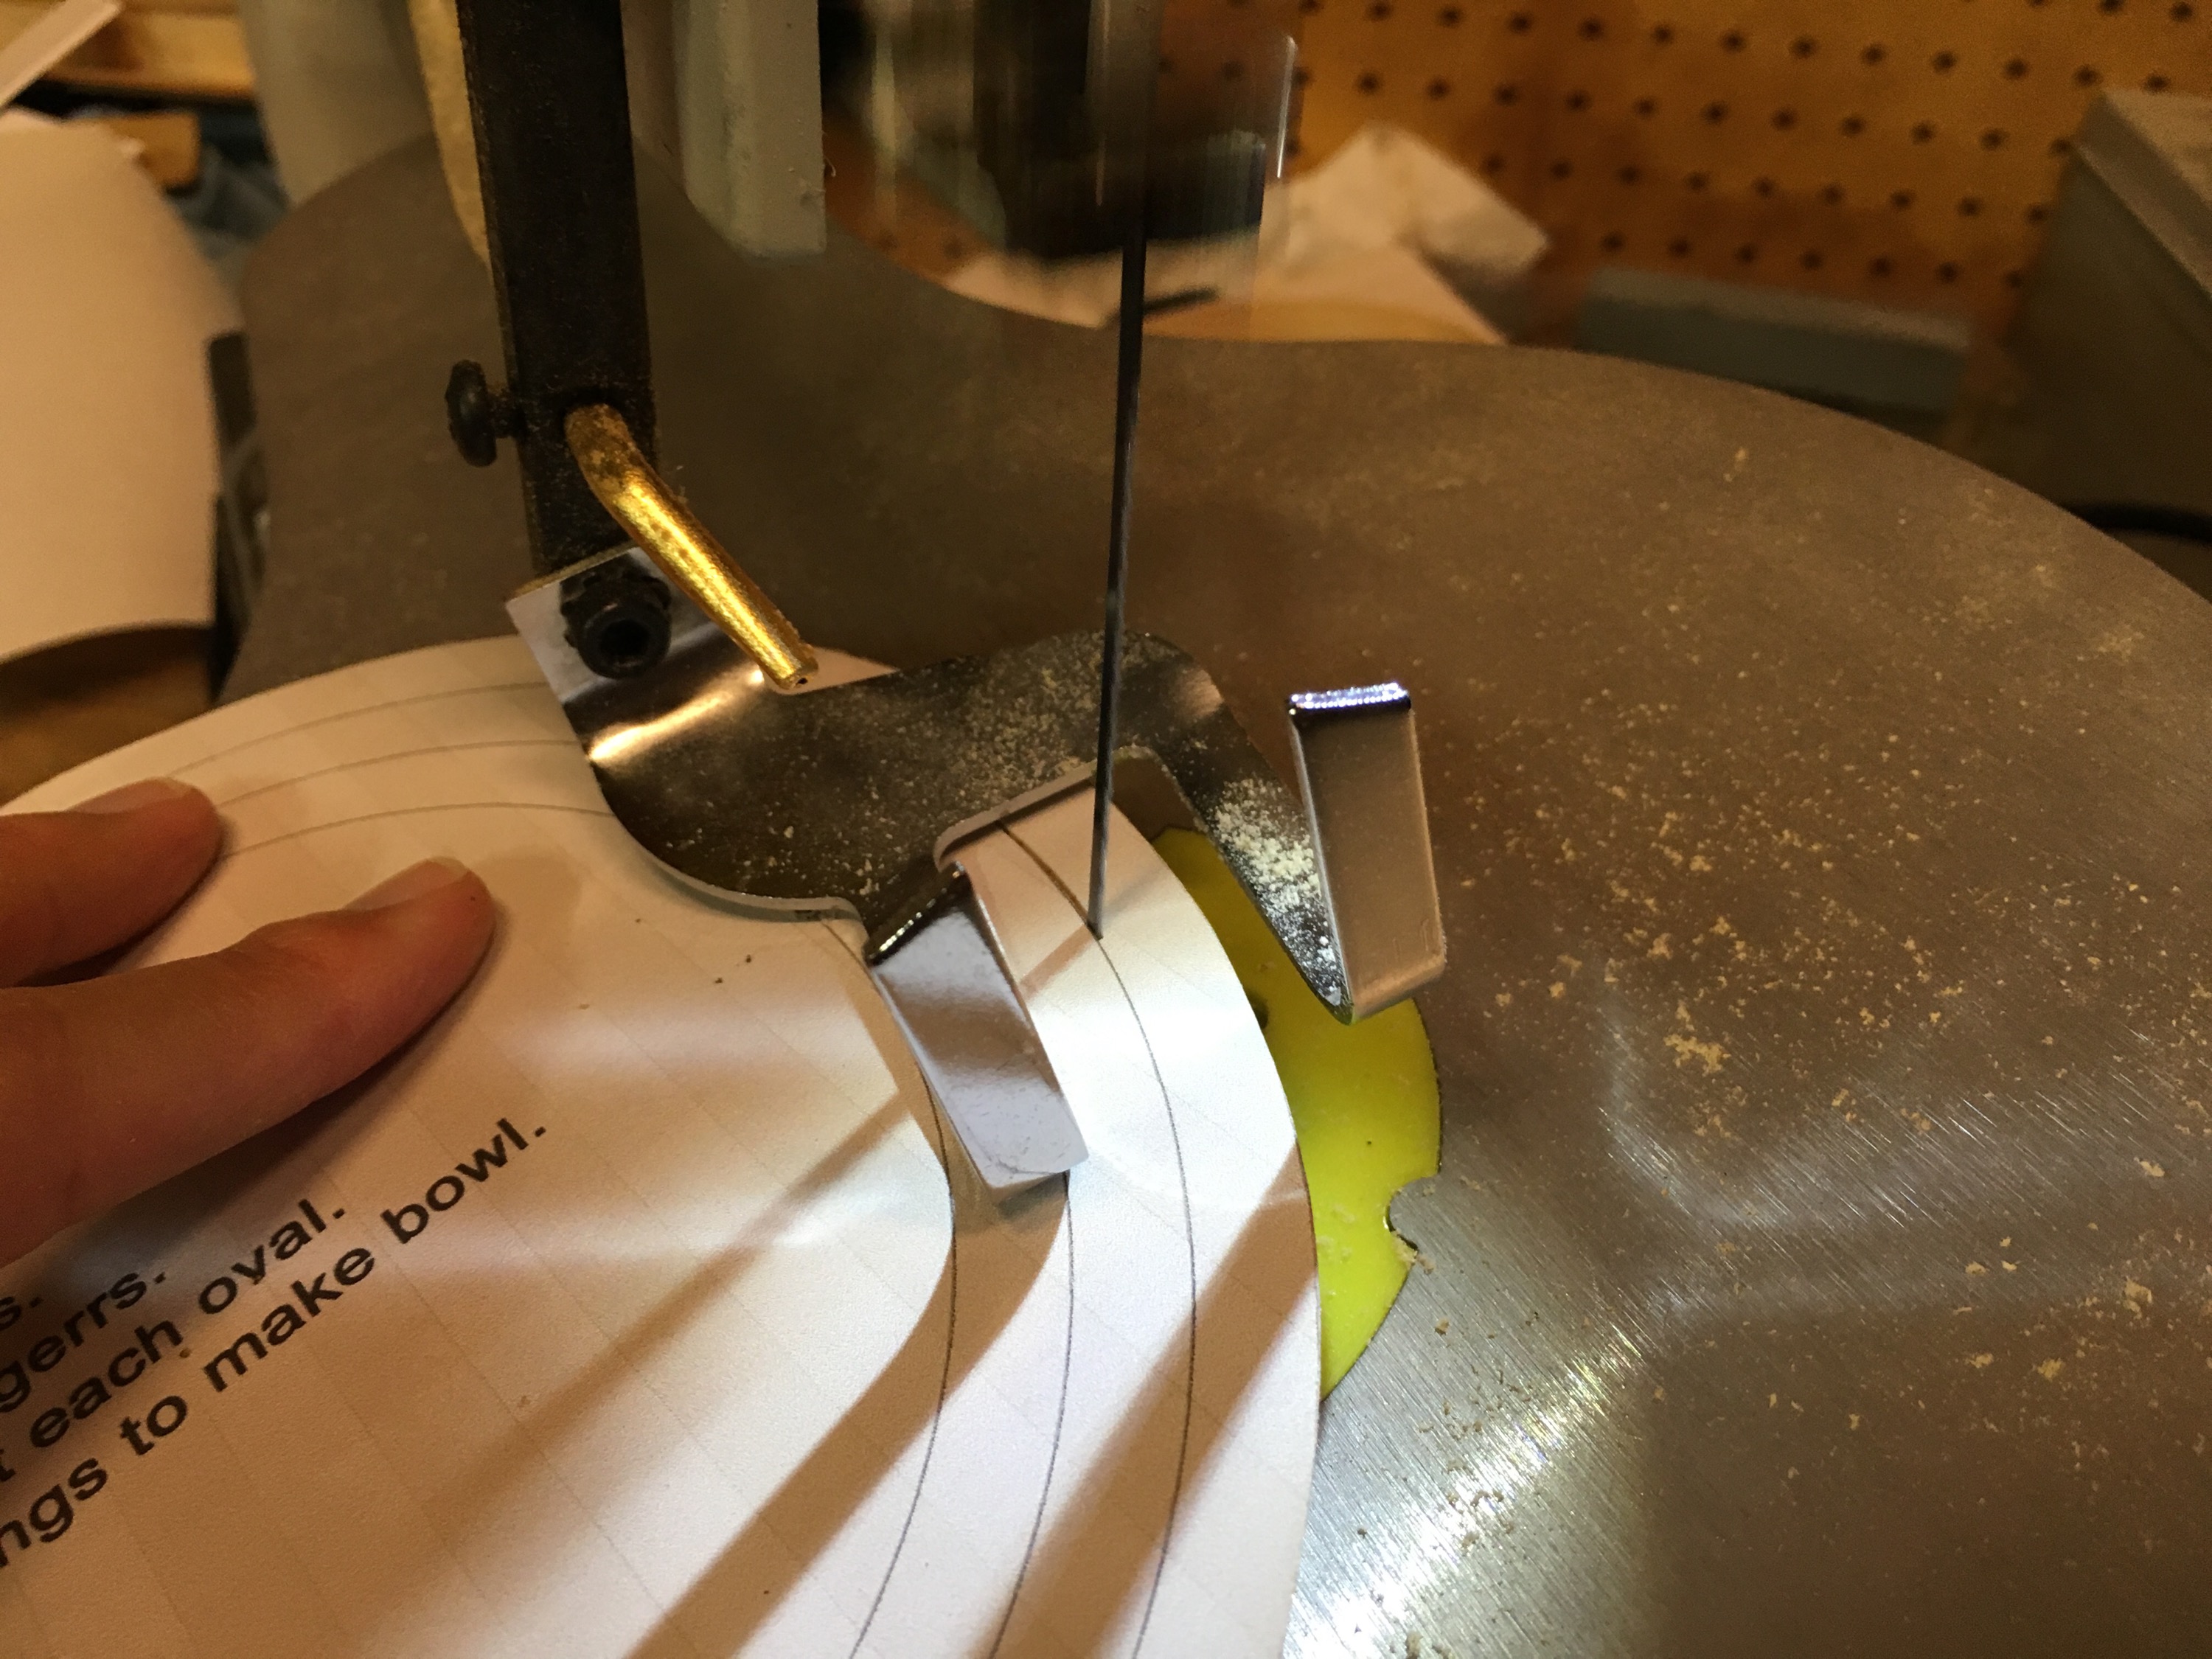
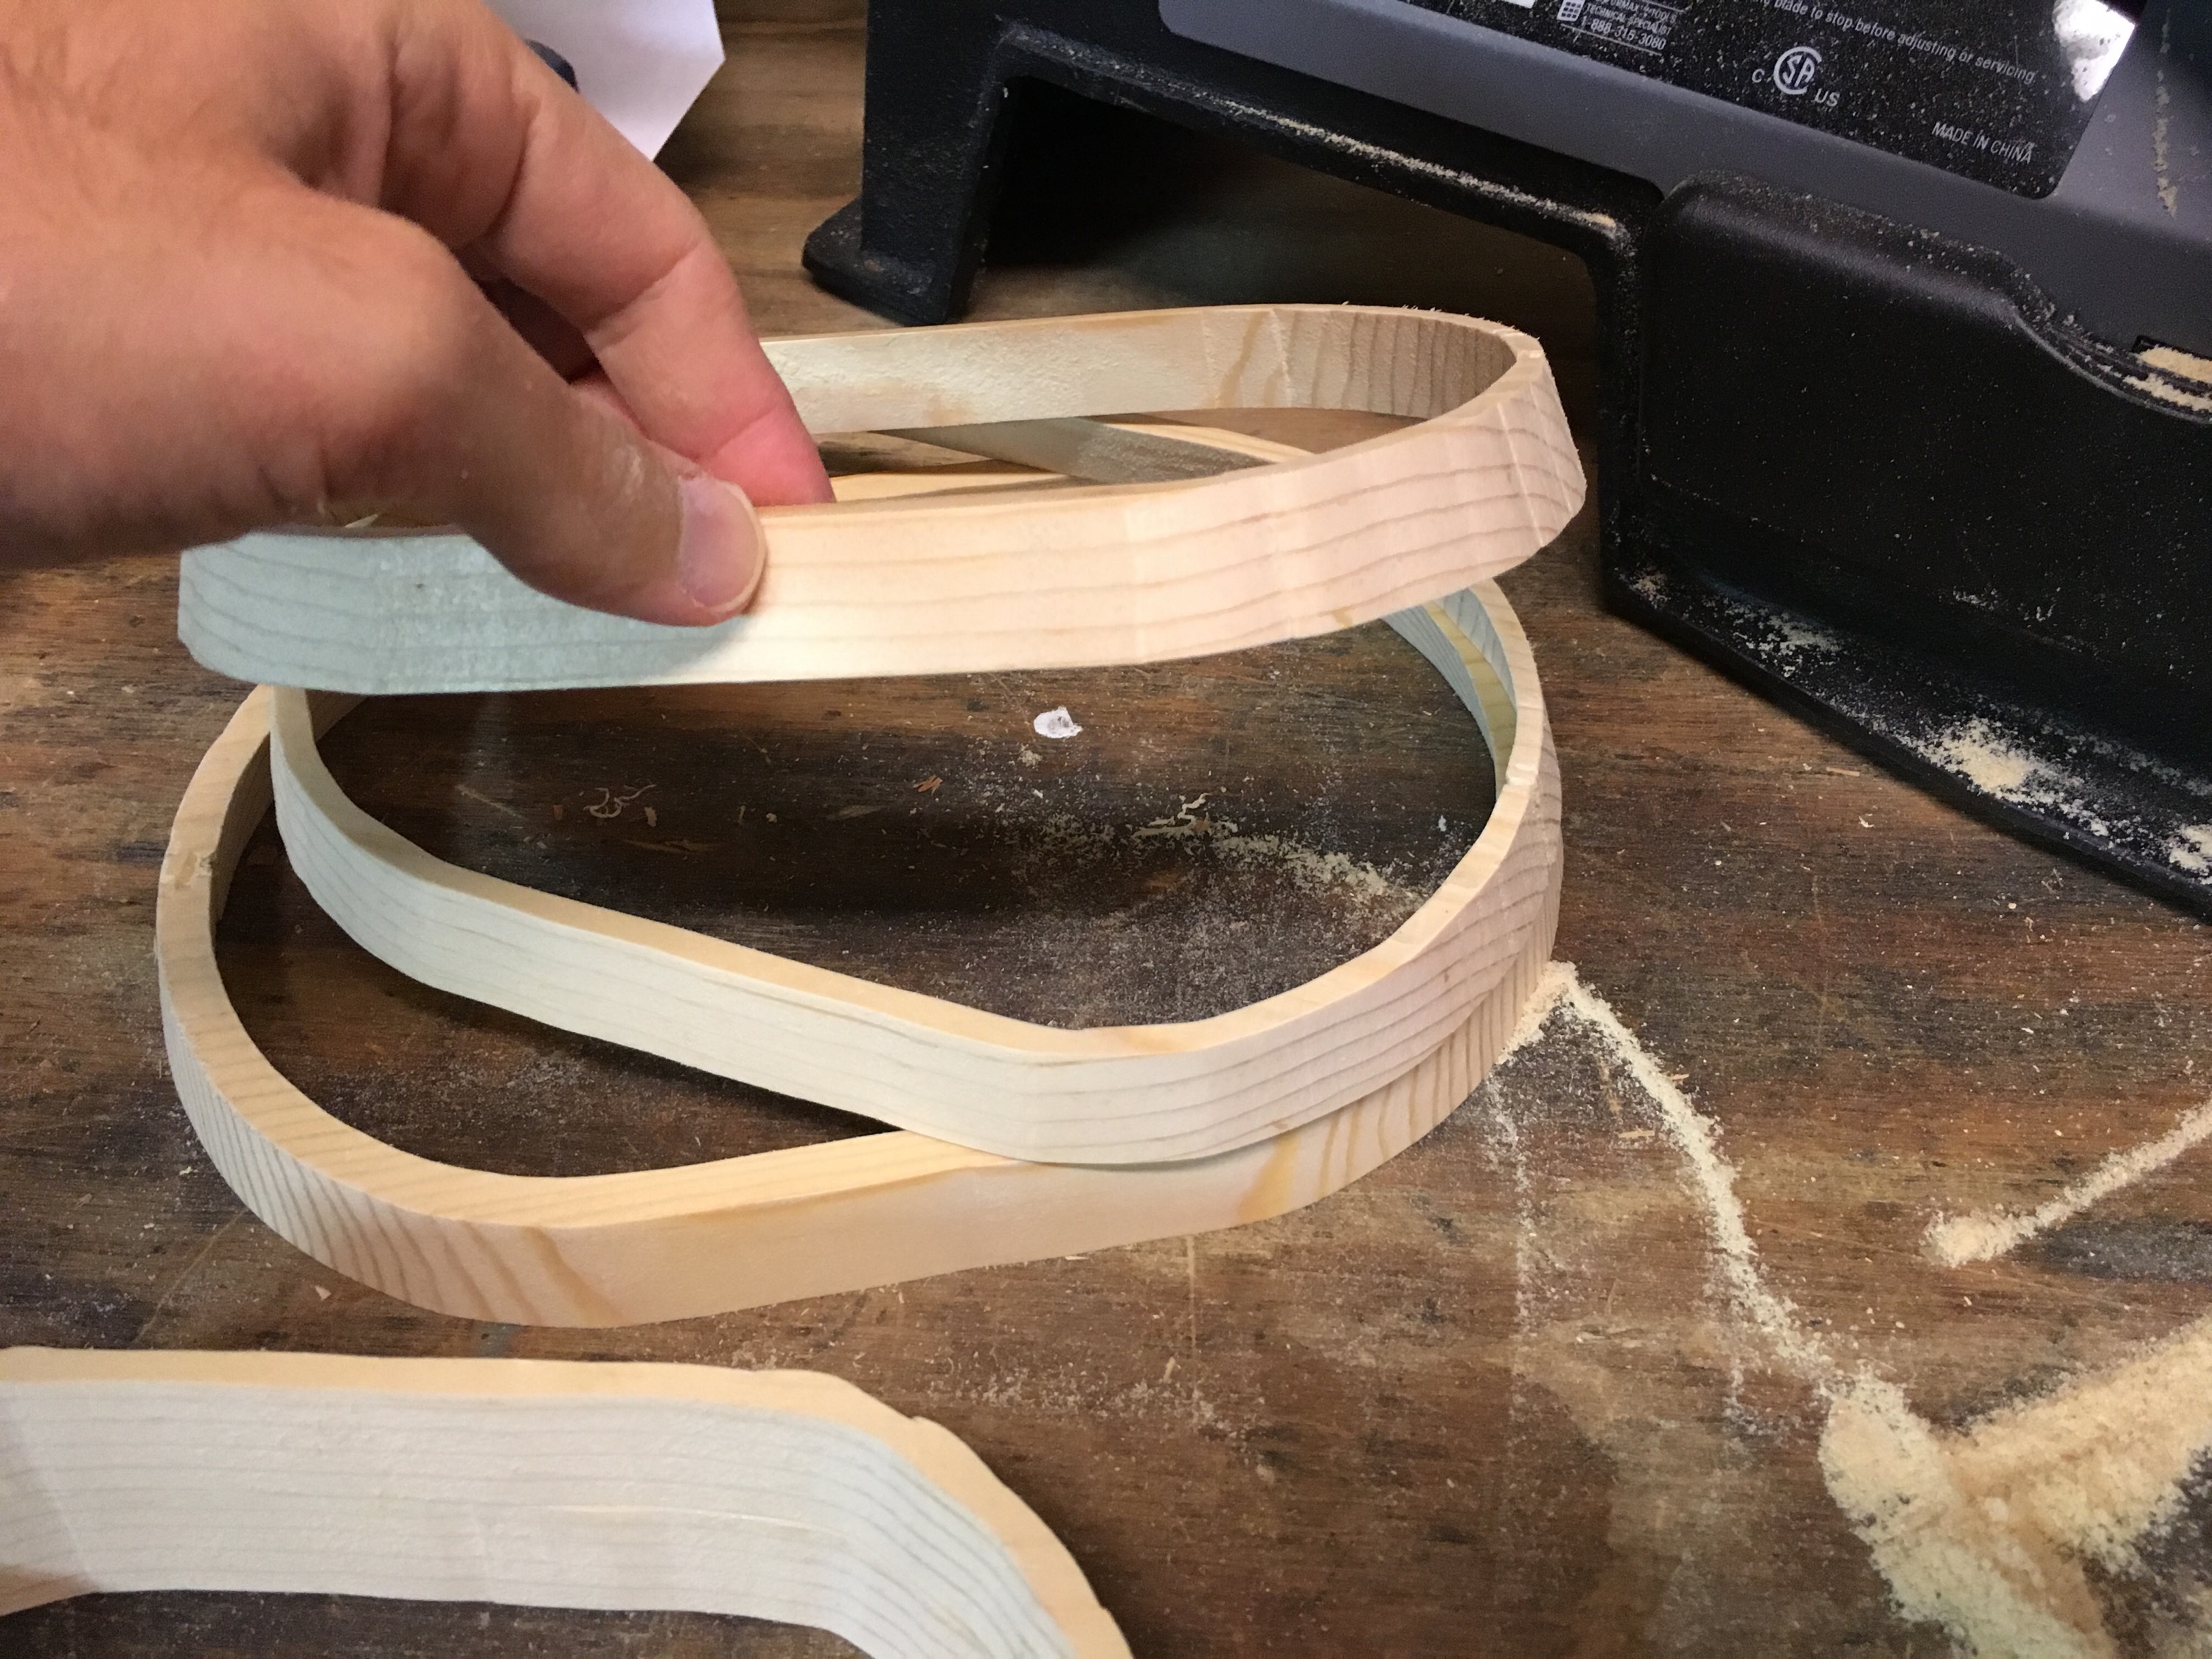
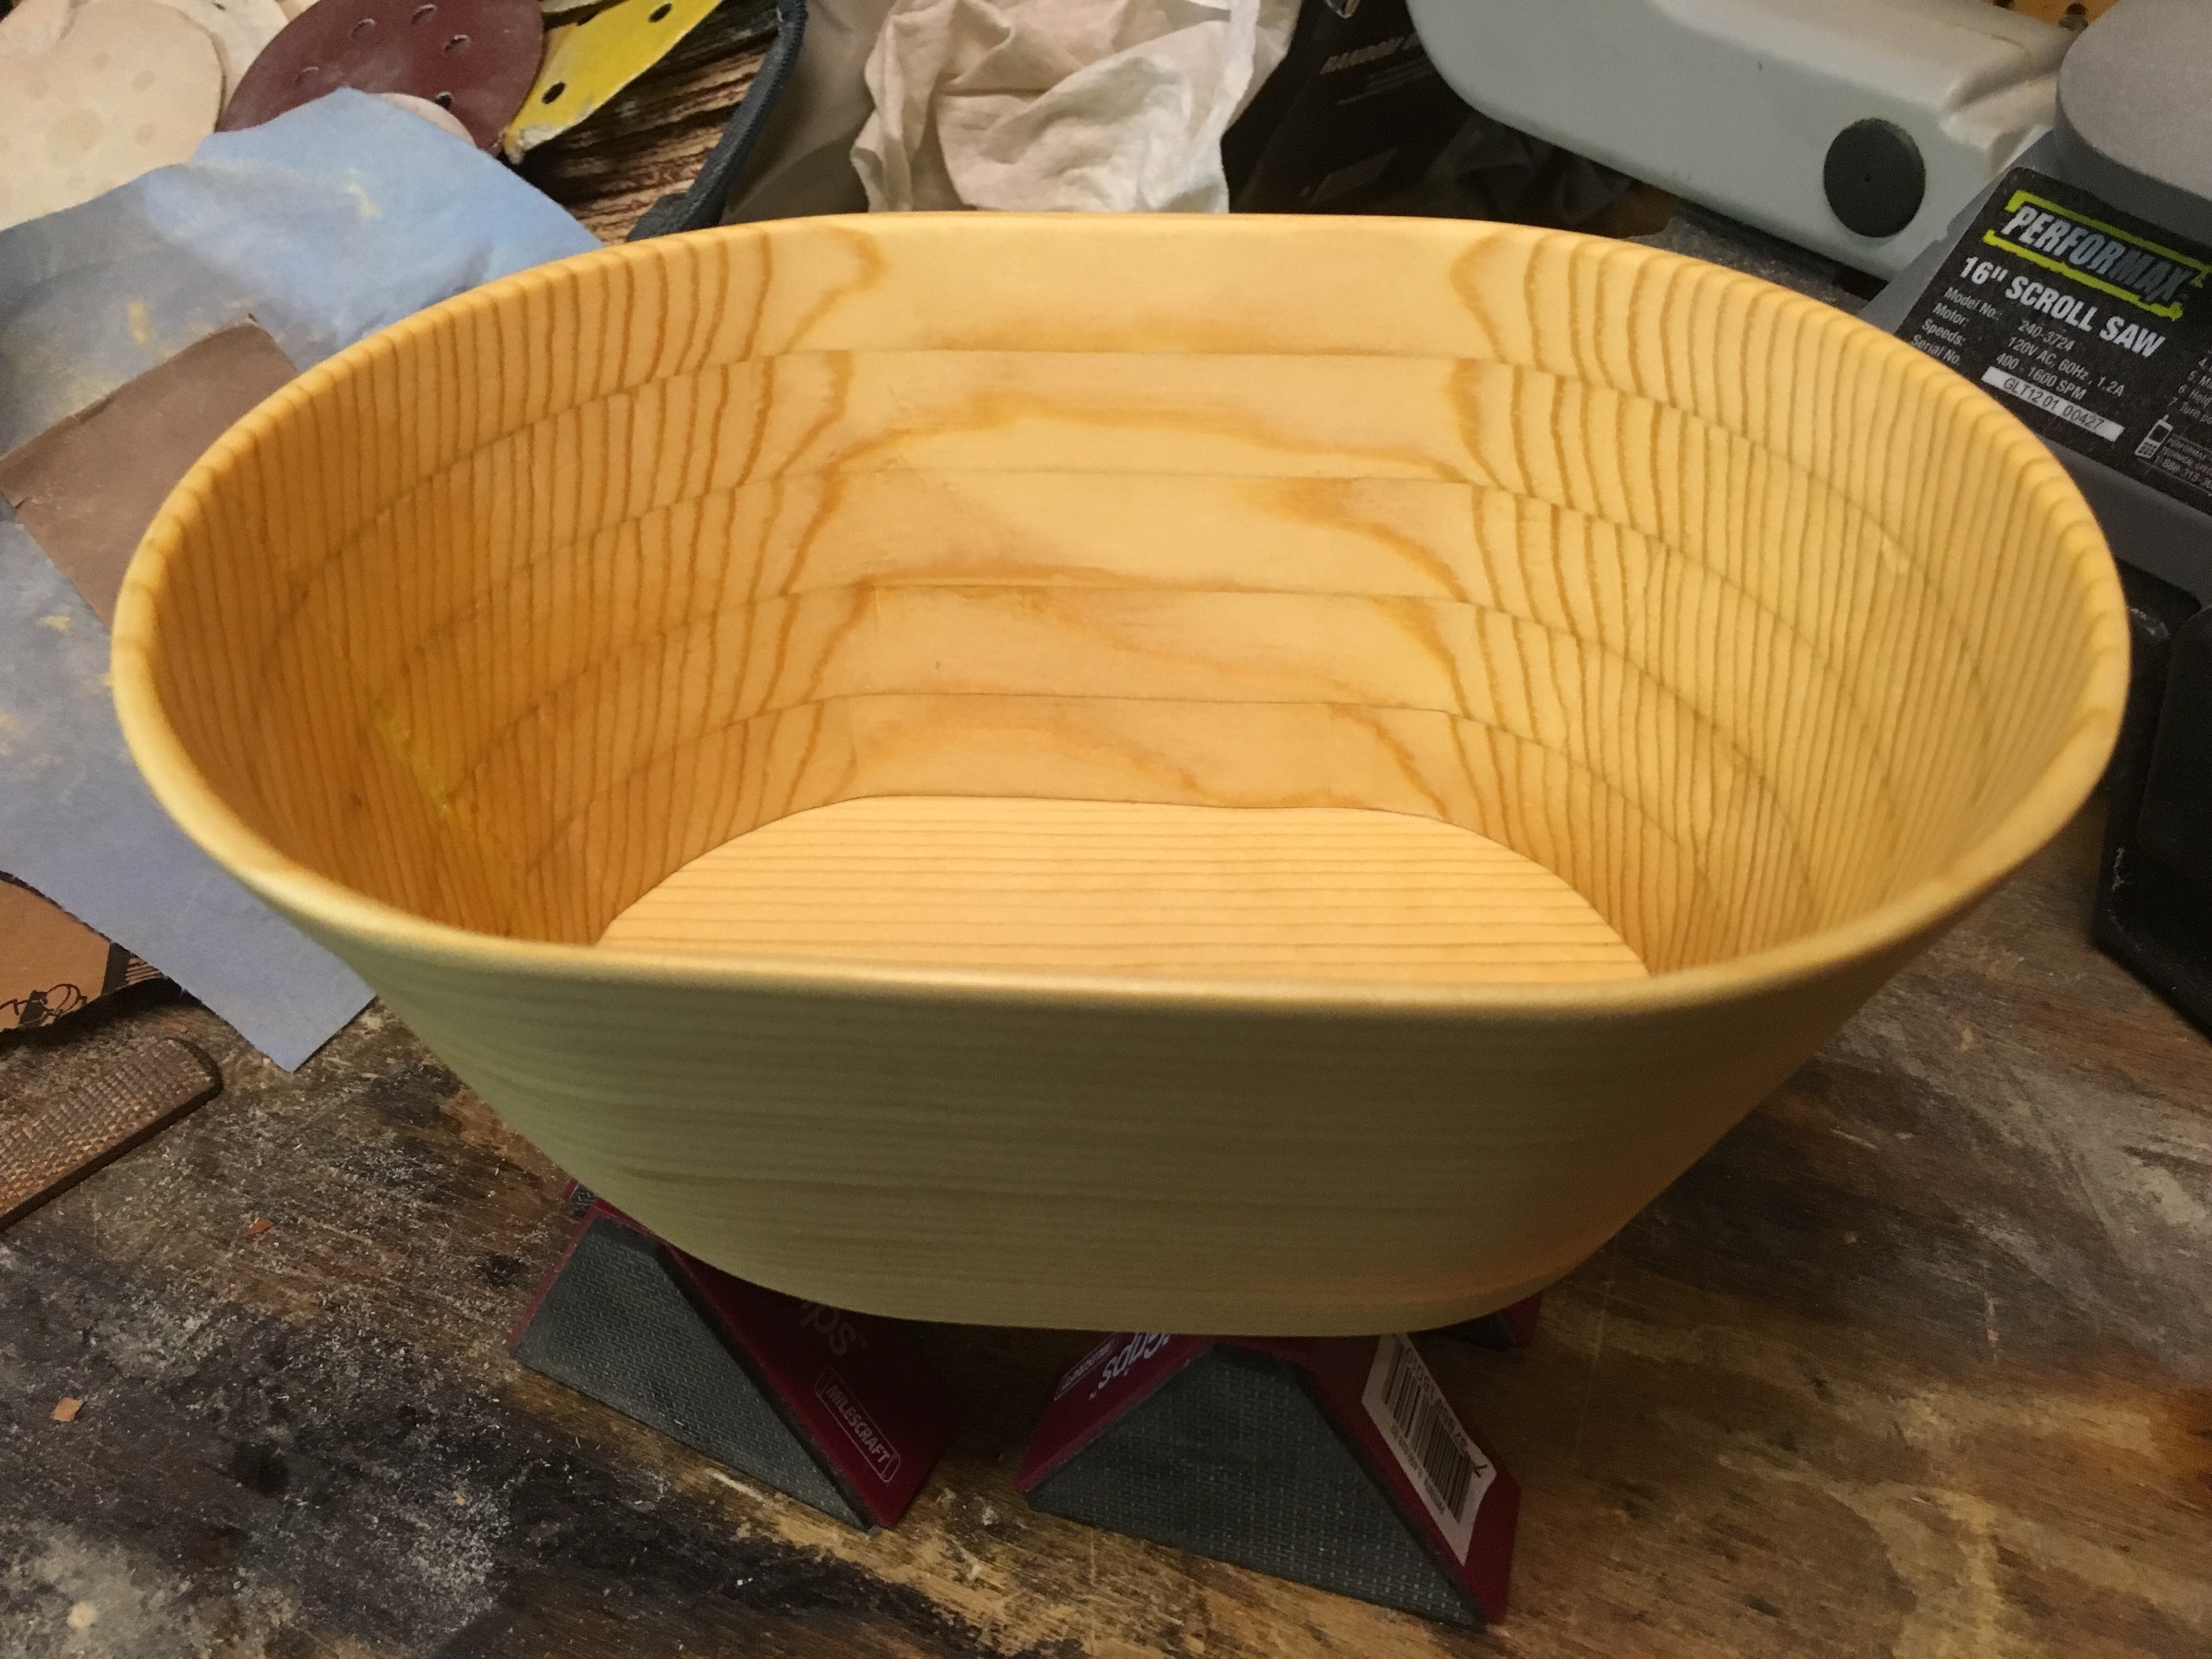
Once that cut is complete, thread the blade through the outermost hole you drilled (teeth down), lock the blade into the saw and begin cutting. Follow the line and cut the ring out. The rings will become the sides of the bowl, and the remaining flat stock will be used as the bottom of the bowl. Because they are all cut at the same angle, the bowl will have a consistent angle and shape.
Assemble the Scrollsaw Bowl: Stage 1
Once all of the rings are cut out, you can dry-fit the bowl by simply stacking the rings. You’ll want to keep them all stacked in the same orientation that they were cut as then the grain will matchup pretty darn close to perfect.
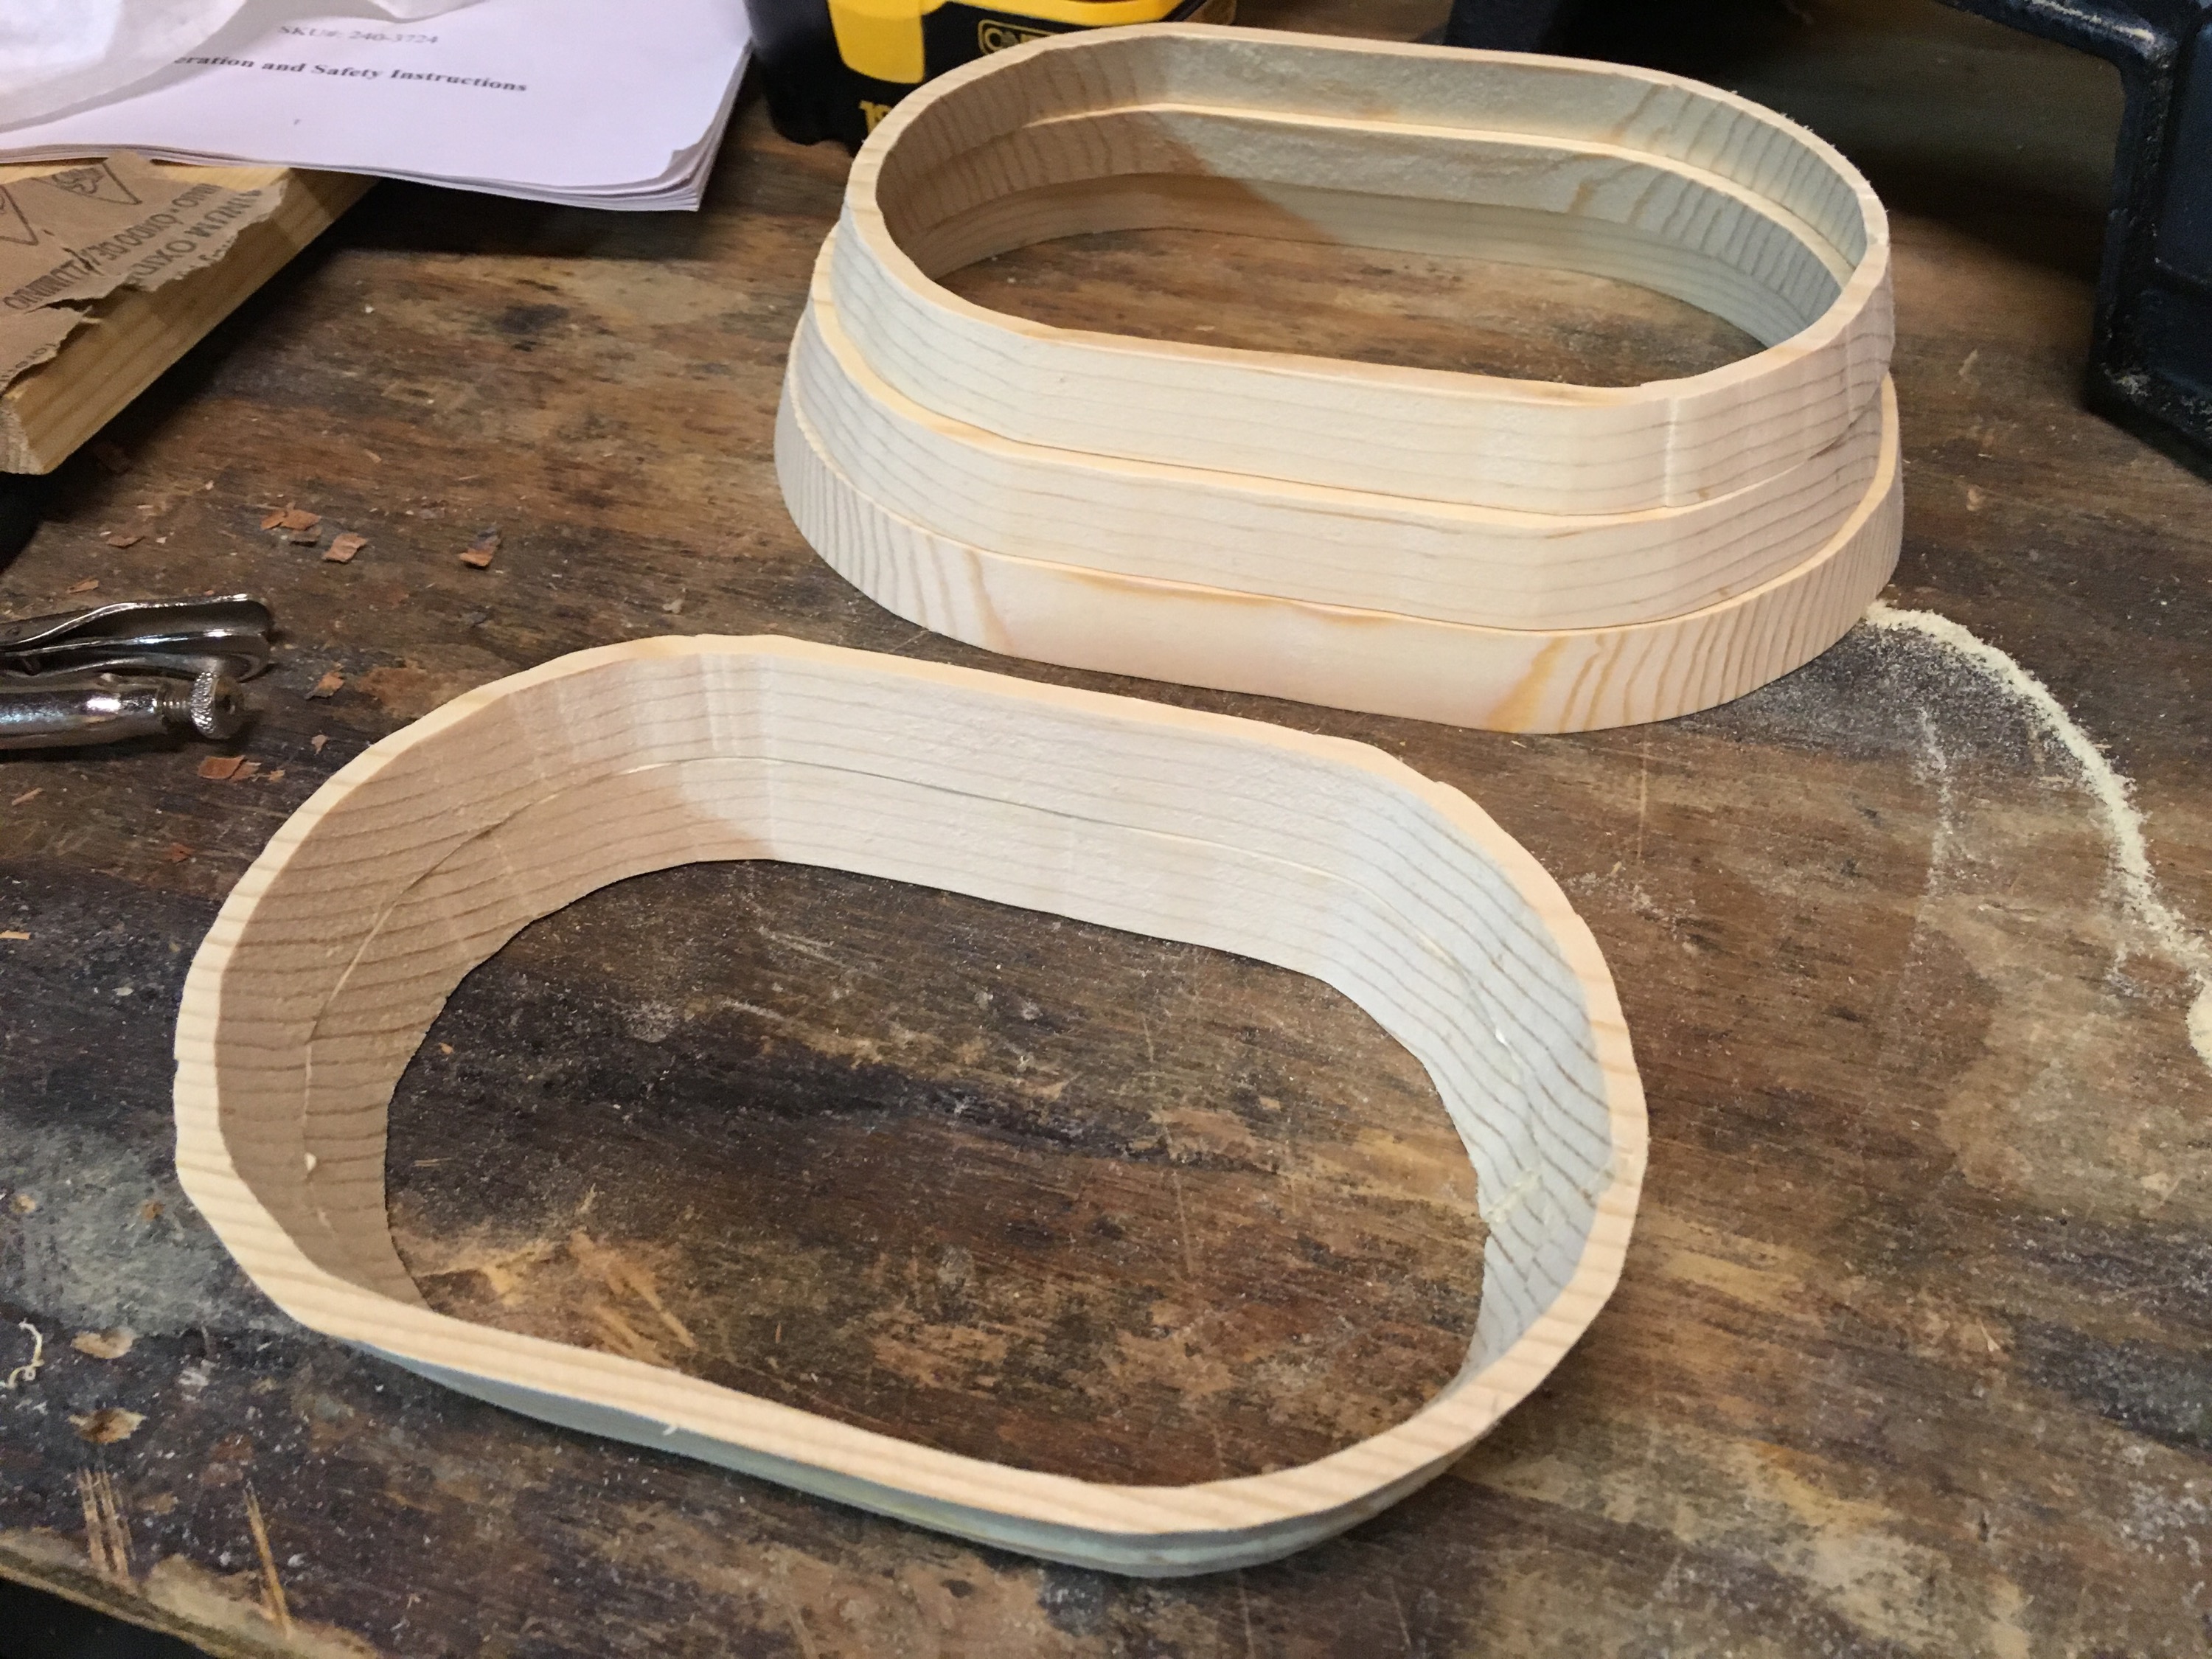
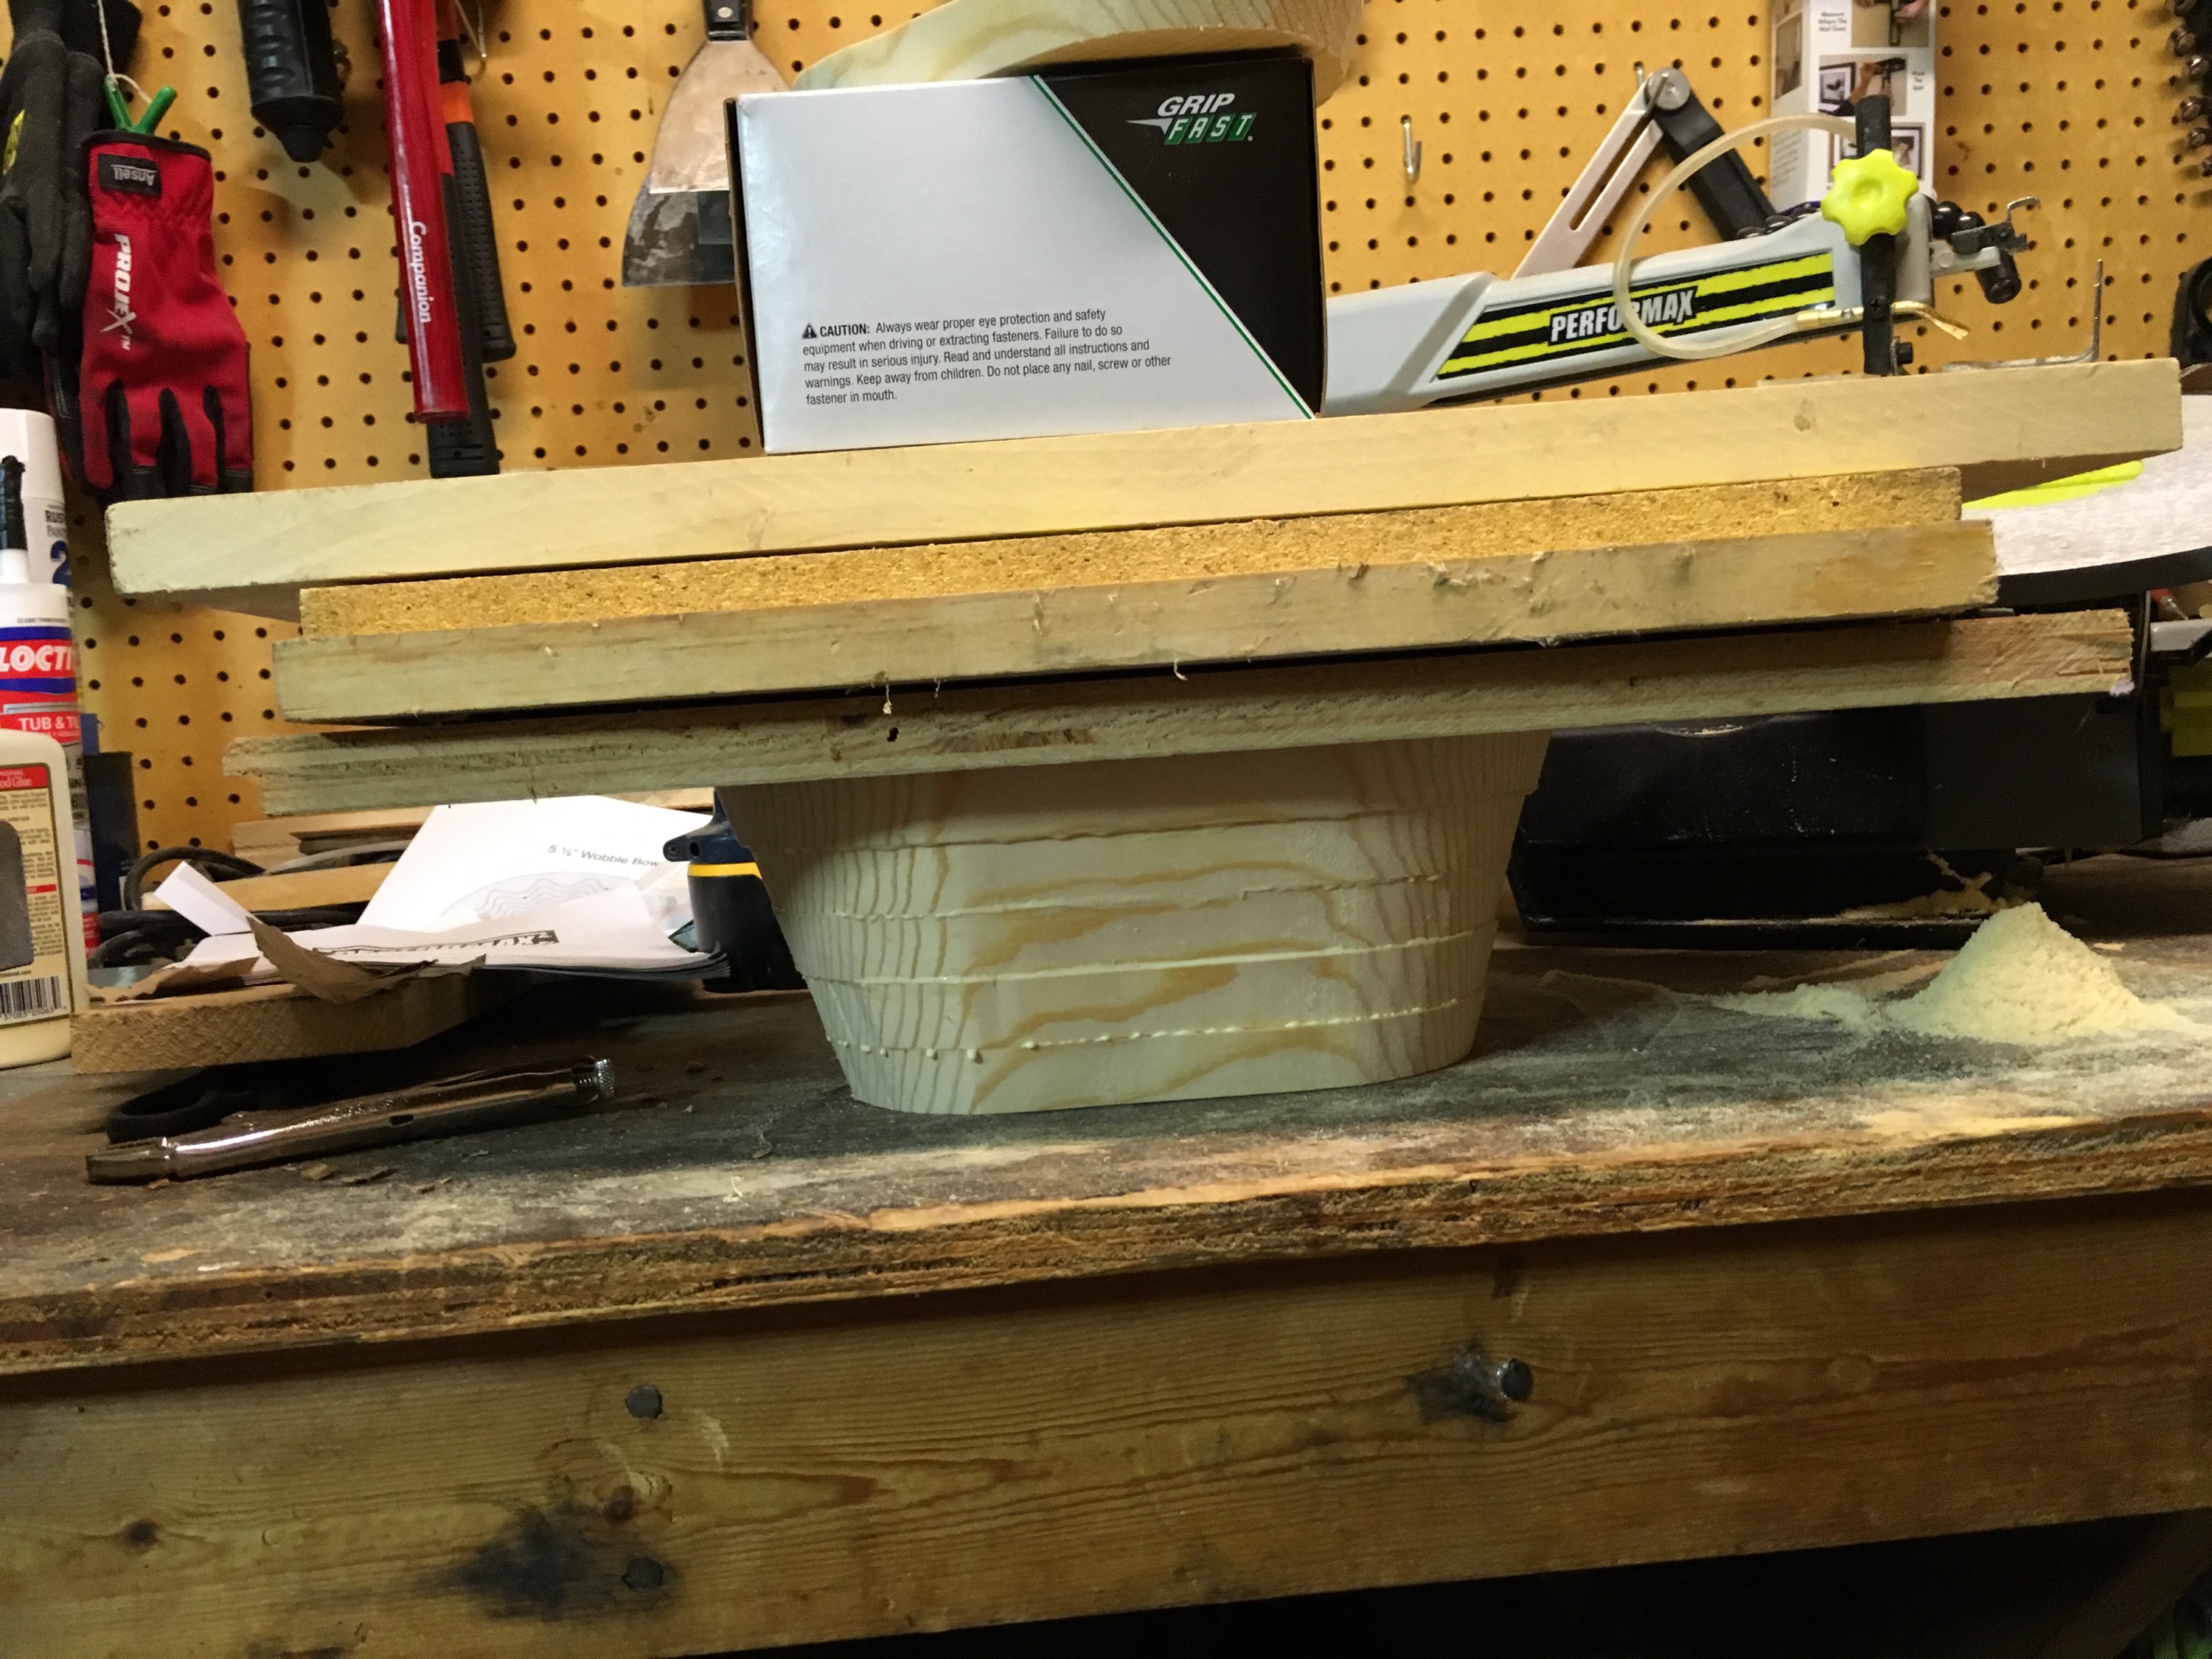
If all looks good, it’s time to glue up the bowl. The first step is to glue up only the rings – do not glue the bottom to the bowl yet. If you do, you’ll have one heck of a time trying to sand the inside.
Apply glue to both the top and bottom edges of the rings to be glued together. Give it a few seconds to become tacky and then stick the rings together. Ensure they are lined up just right and attempt to wipe as much excess glue as you can from the surface. Once it is all set, evenly stack some weight on top of the bowl to ensure the rings glue together nice and tight. Now step away and let the glue dry completely.
Sand the Inside of the Bowl
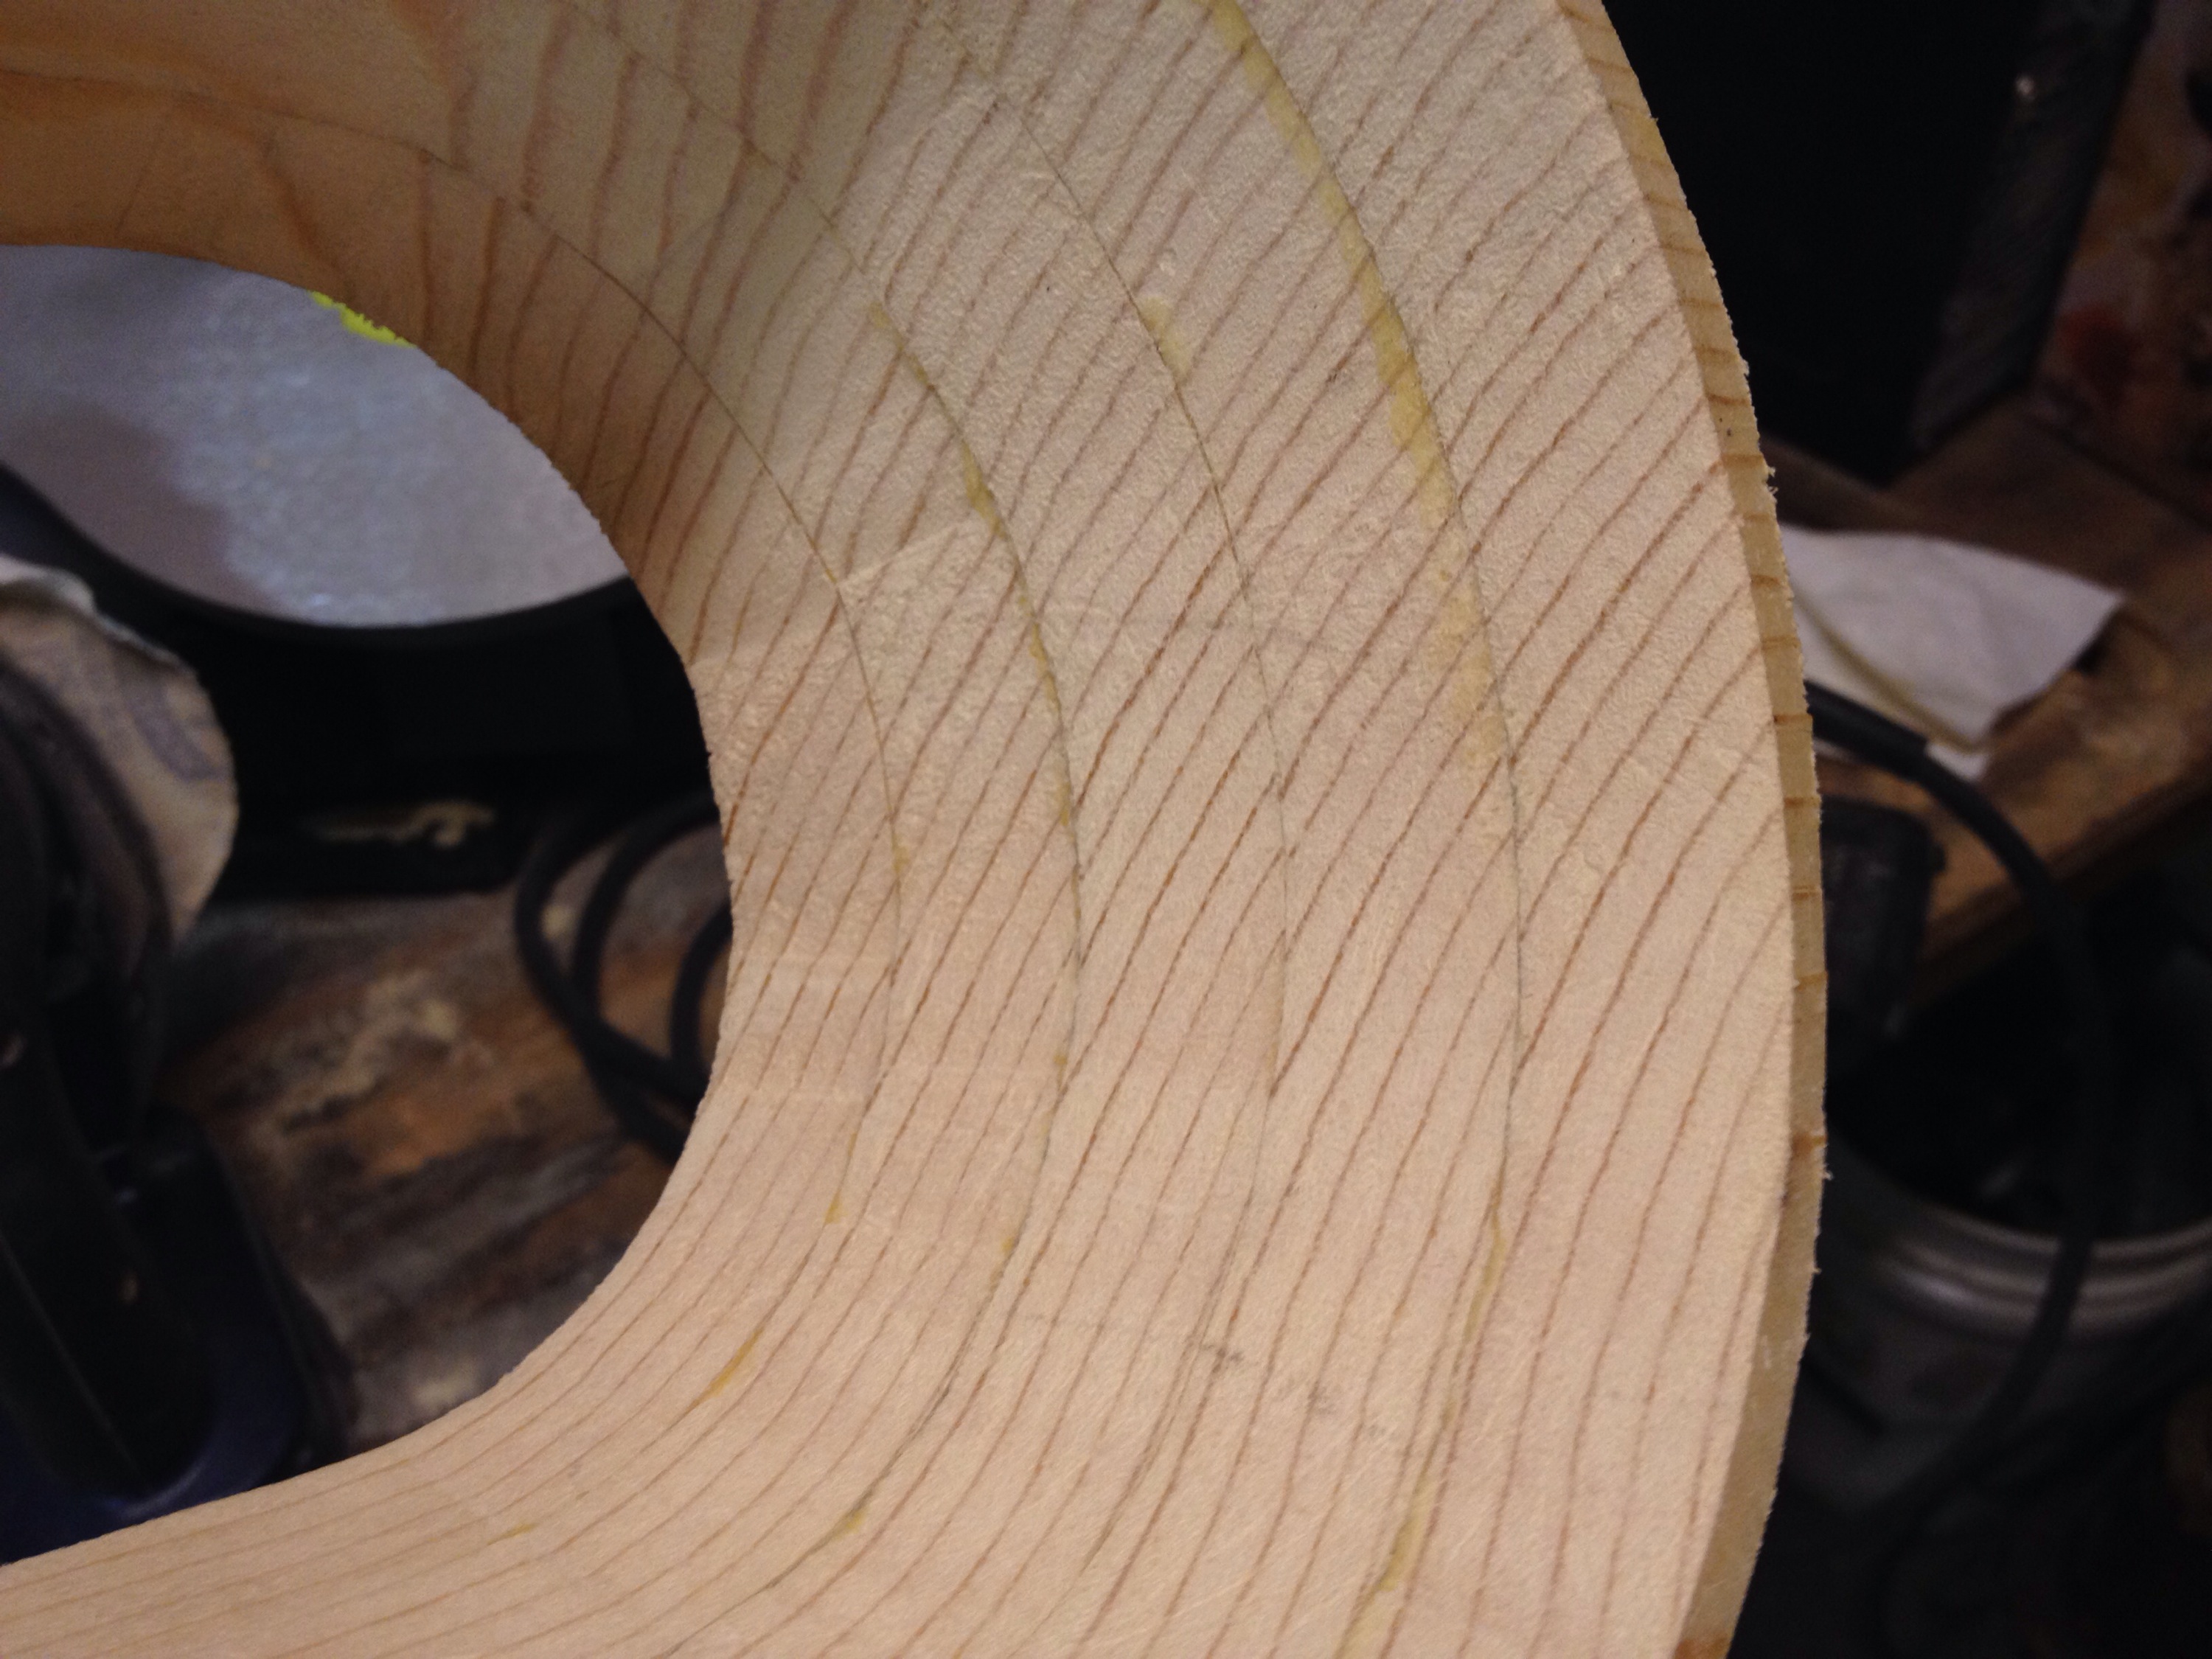
Now for the “fun” part… sand the inside of the rings so they are nice and smooth. You may have some rough edges and such, so starting with a 36 grit paper worked great for me to get it knocked down. Then onto an 80 grit, 120 grit, and finally 220 grit for a nice smooth surface.
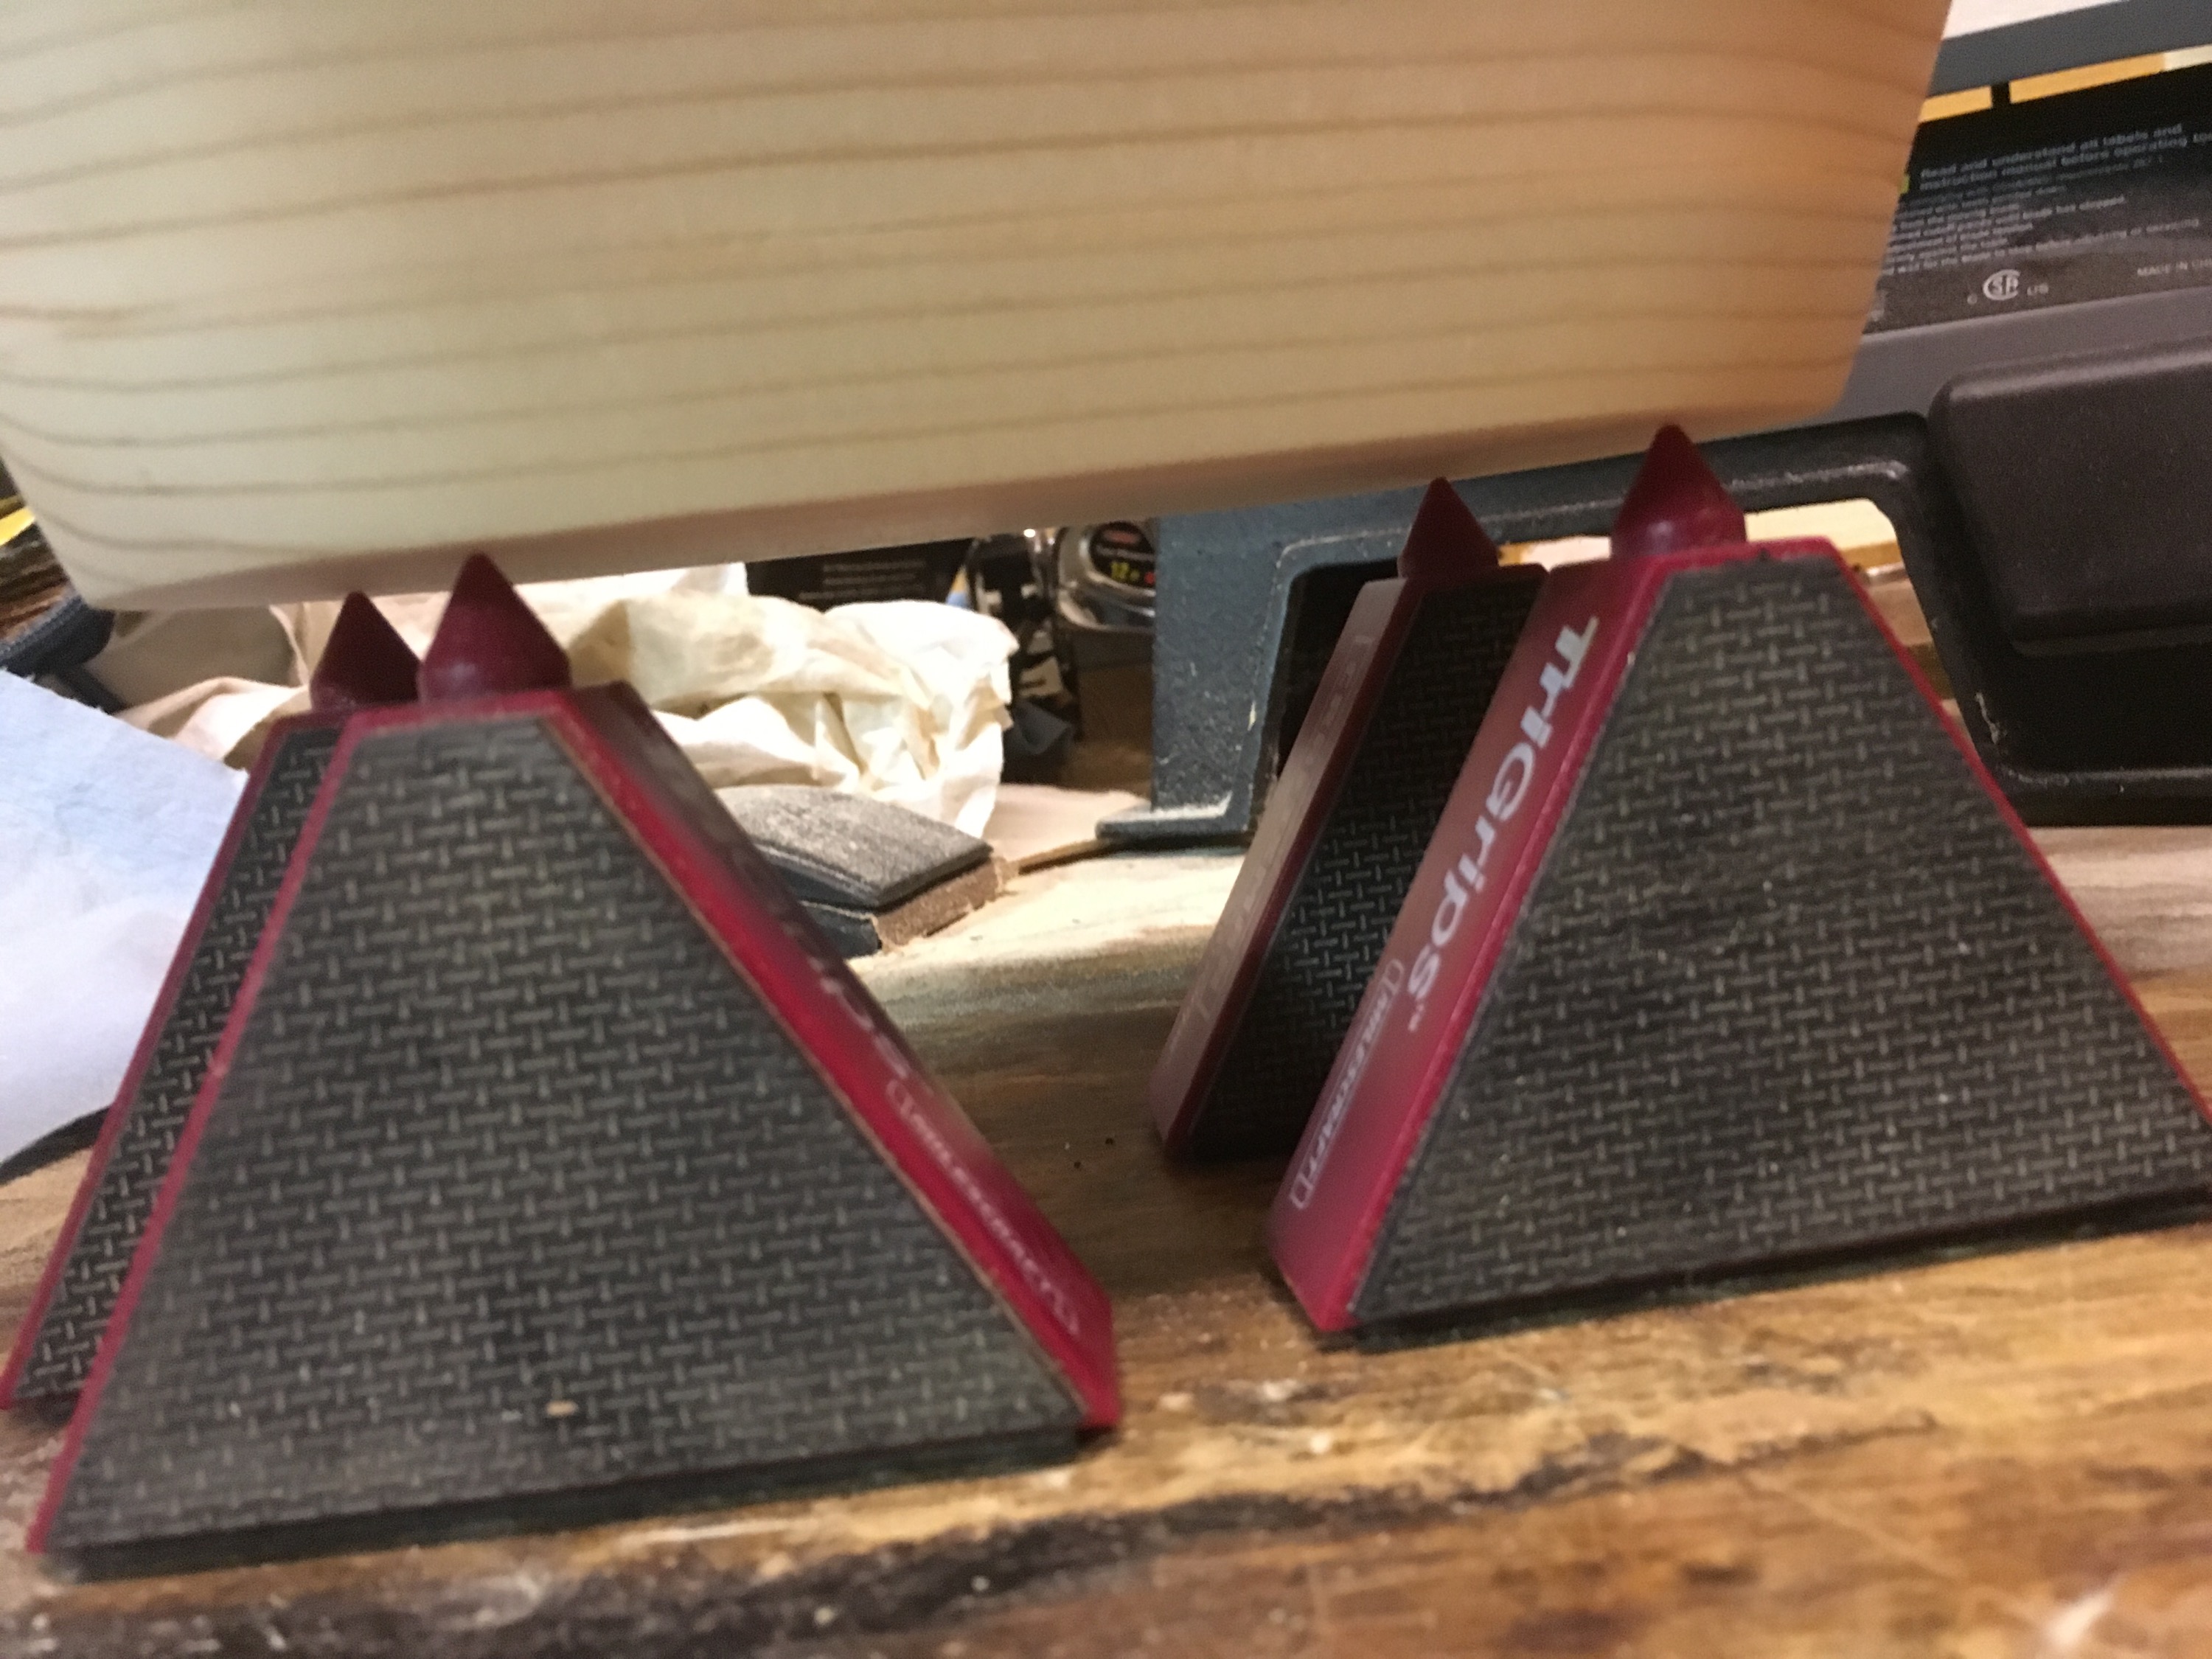
But the real trick is how do you best sand the inside edge of the oval shaped bowl. A curved file helps, some hand-sanding is required, but the best bet if you can is find a power sander that will fit in the bowl. I have a triangular tipped sander from a cordless tool set that worked pretty well. All in all, the inside isn’t as nice and smooth as the outside, but it’s good enough for my purposes. A drum sanding disc on a drill may work as well – I didn’t explore that option however.
At this time, you’ll also want to sand the top of the bottom of the bowl to finish that off. You’ll probably be able to do just 120 and 220 grits on this since it’s already a nice smooth surface.
Once those two pieces are sanded nicely, you have the inside surfaces finished and you are ready for the next stage of assembly.
Assemble the Scrollsaw Bowl: Stage 2
Apply glue to the bottom of the rings and the top edge of the bowl bottom. Stack them together, line them up, clean up the excess glue, and stack some weight on top. Let the glue fully dry before moving on to ensure the bowl doesn’t fall apart.
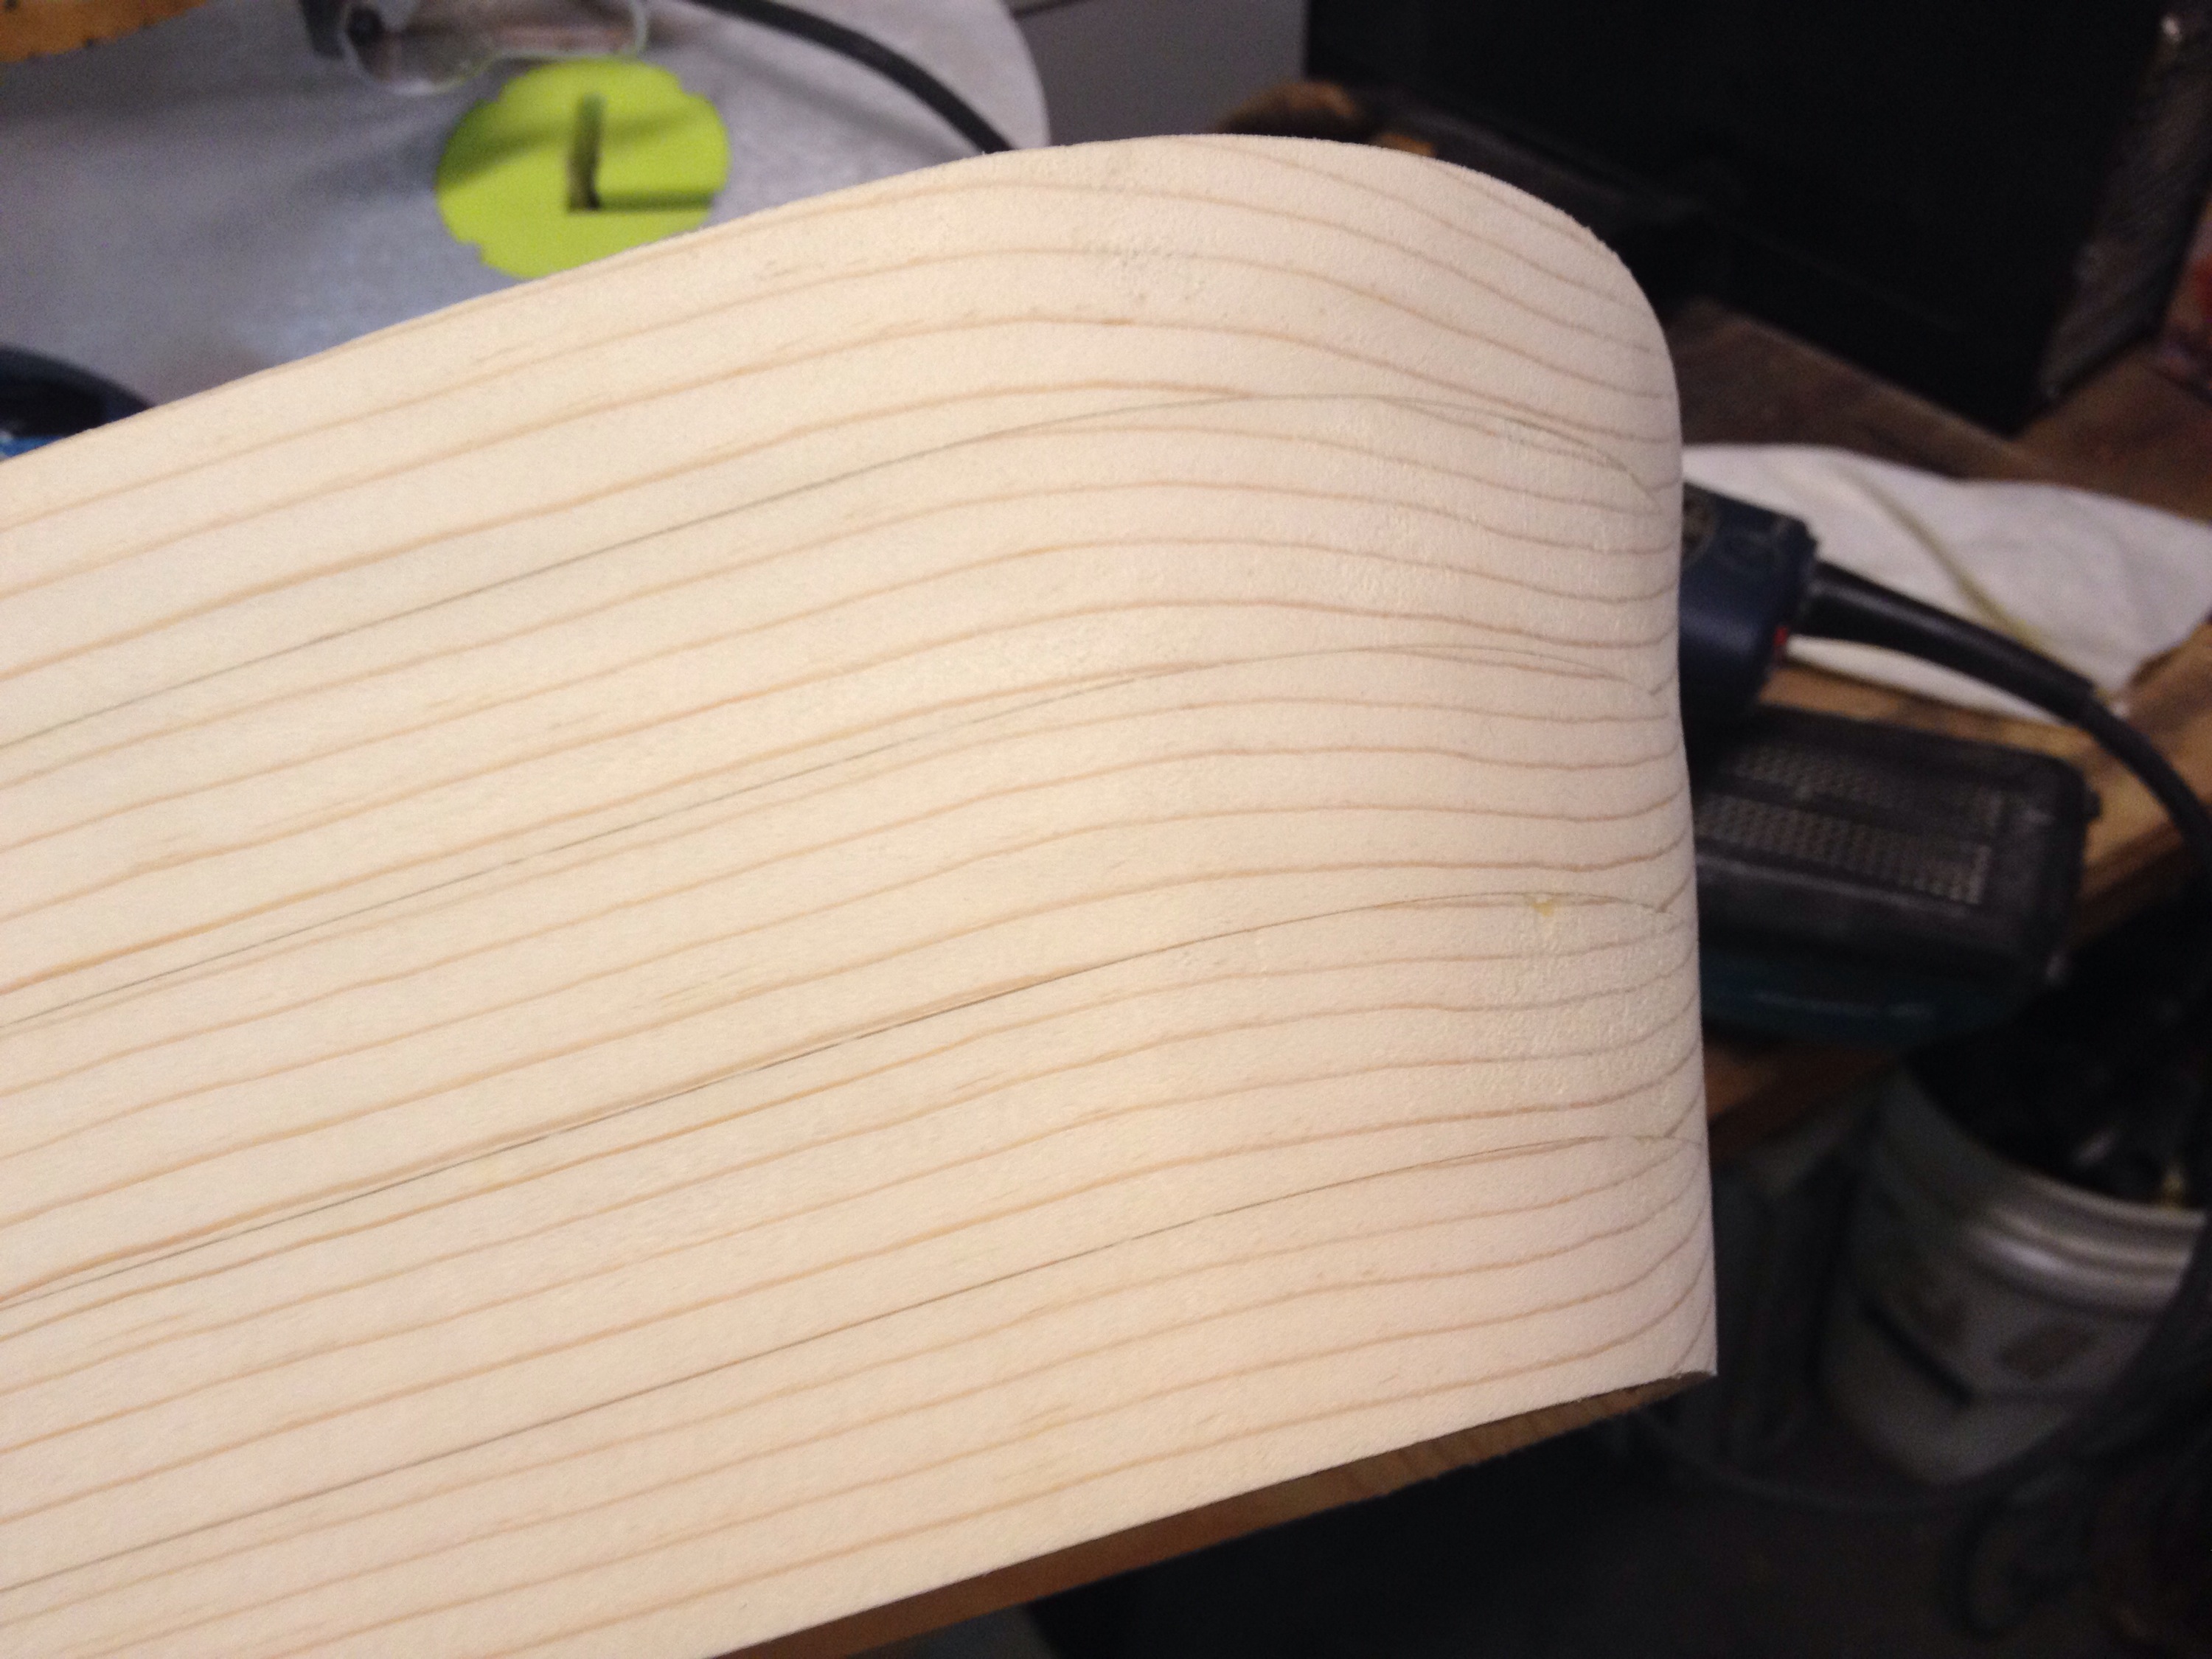
Sand the outside of the bowl
Now to the last round of sanding – the outside of the bowl. Here again, you may want to start with a 36 grit to get the edges all knocked down. Then move into 80 for smoothing, 120 to make a fine finish, and lastly 220 to make it super smooth! You may want to round off the top and bottom edges of the bowl as well – that’s a personal preference.
This step should go quicker since you can use a power sander since it’s much easier to access all edges. But make sure you take your time and sand it nice and smooth. The outside is the portion of the bowl that will be seen the most and touched the most, so this is where it really counts!
At this point the last step should be a finish on the bowl and it’s all set for use!
Apply a Finish
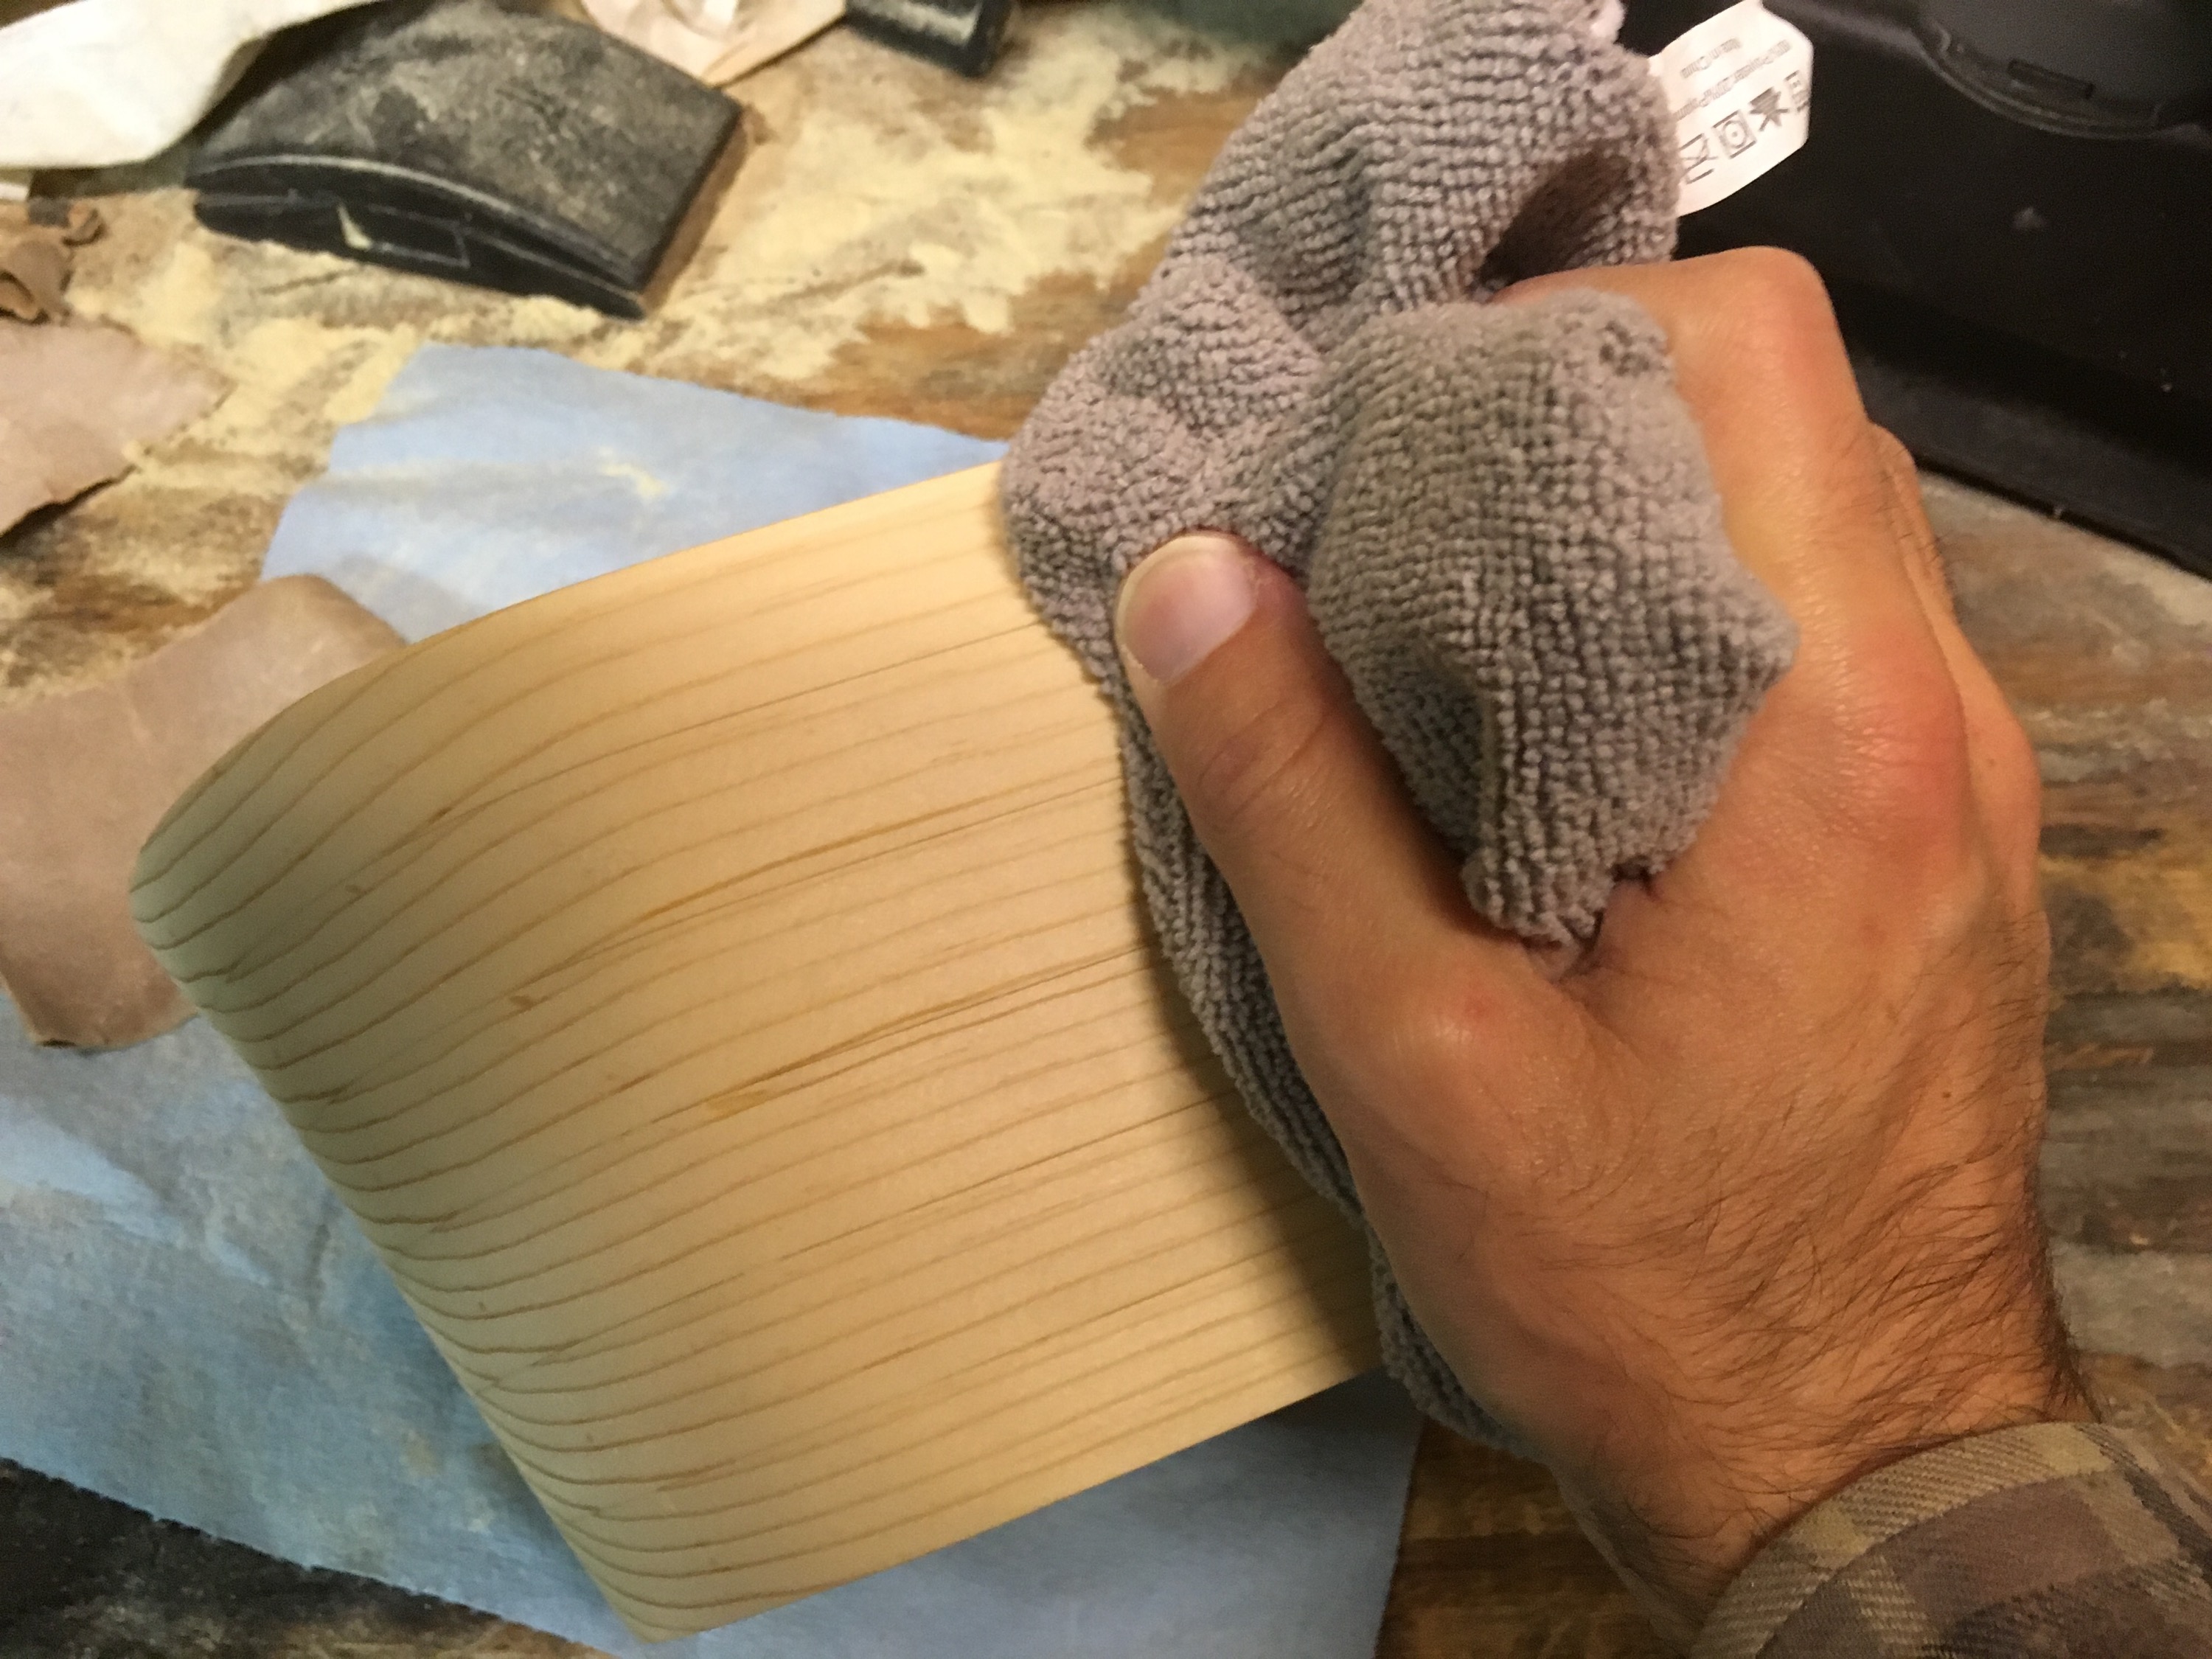
First thing is first – you need to clean up the bowl with a microfiber cloth to ensure all the sawdust is gone.
Depending on the wood and the finish you choose, you may want to use a wood conditioner first. However if you choose to do this, I’d suggest you ensure it is a food-safe product – well that is if you intend on putting food in this bowl.
I do intend on using my bowl in the kitchen to hold fruits and vegetables, so I wanted a food safe finish. My research indicates that there are a few options that are safe for cookware. For this project, I’m going to use standard cutting board oil. This is relatively inexpensive, and if it’s safe enough to cut meat and vegetables on, it’s going to be safe enough to simply hold fruits and veggies!
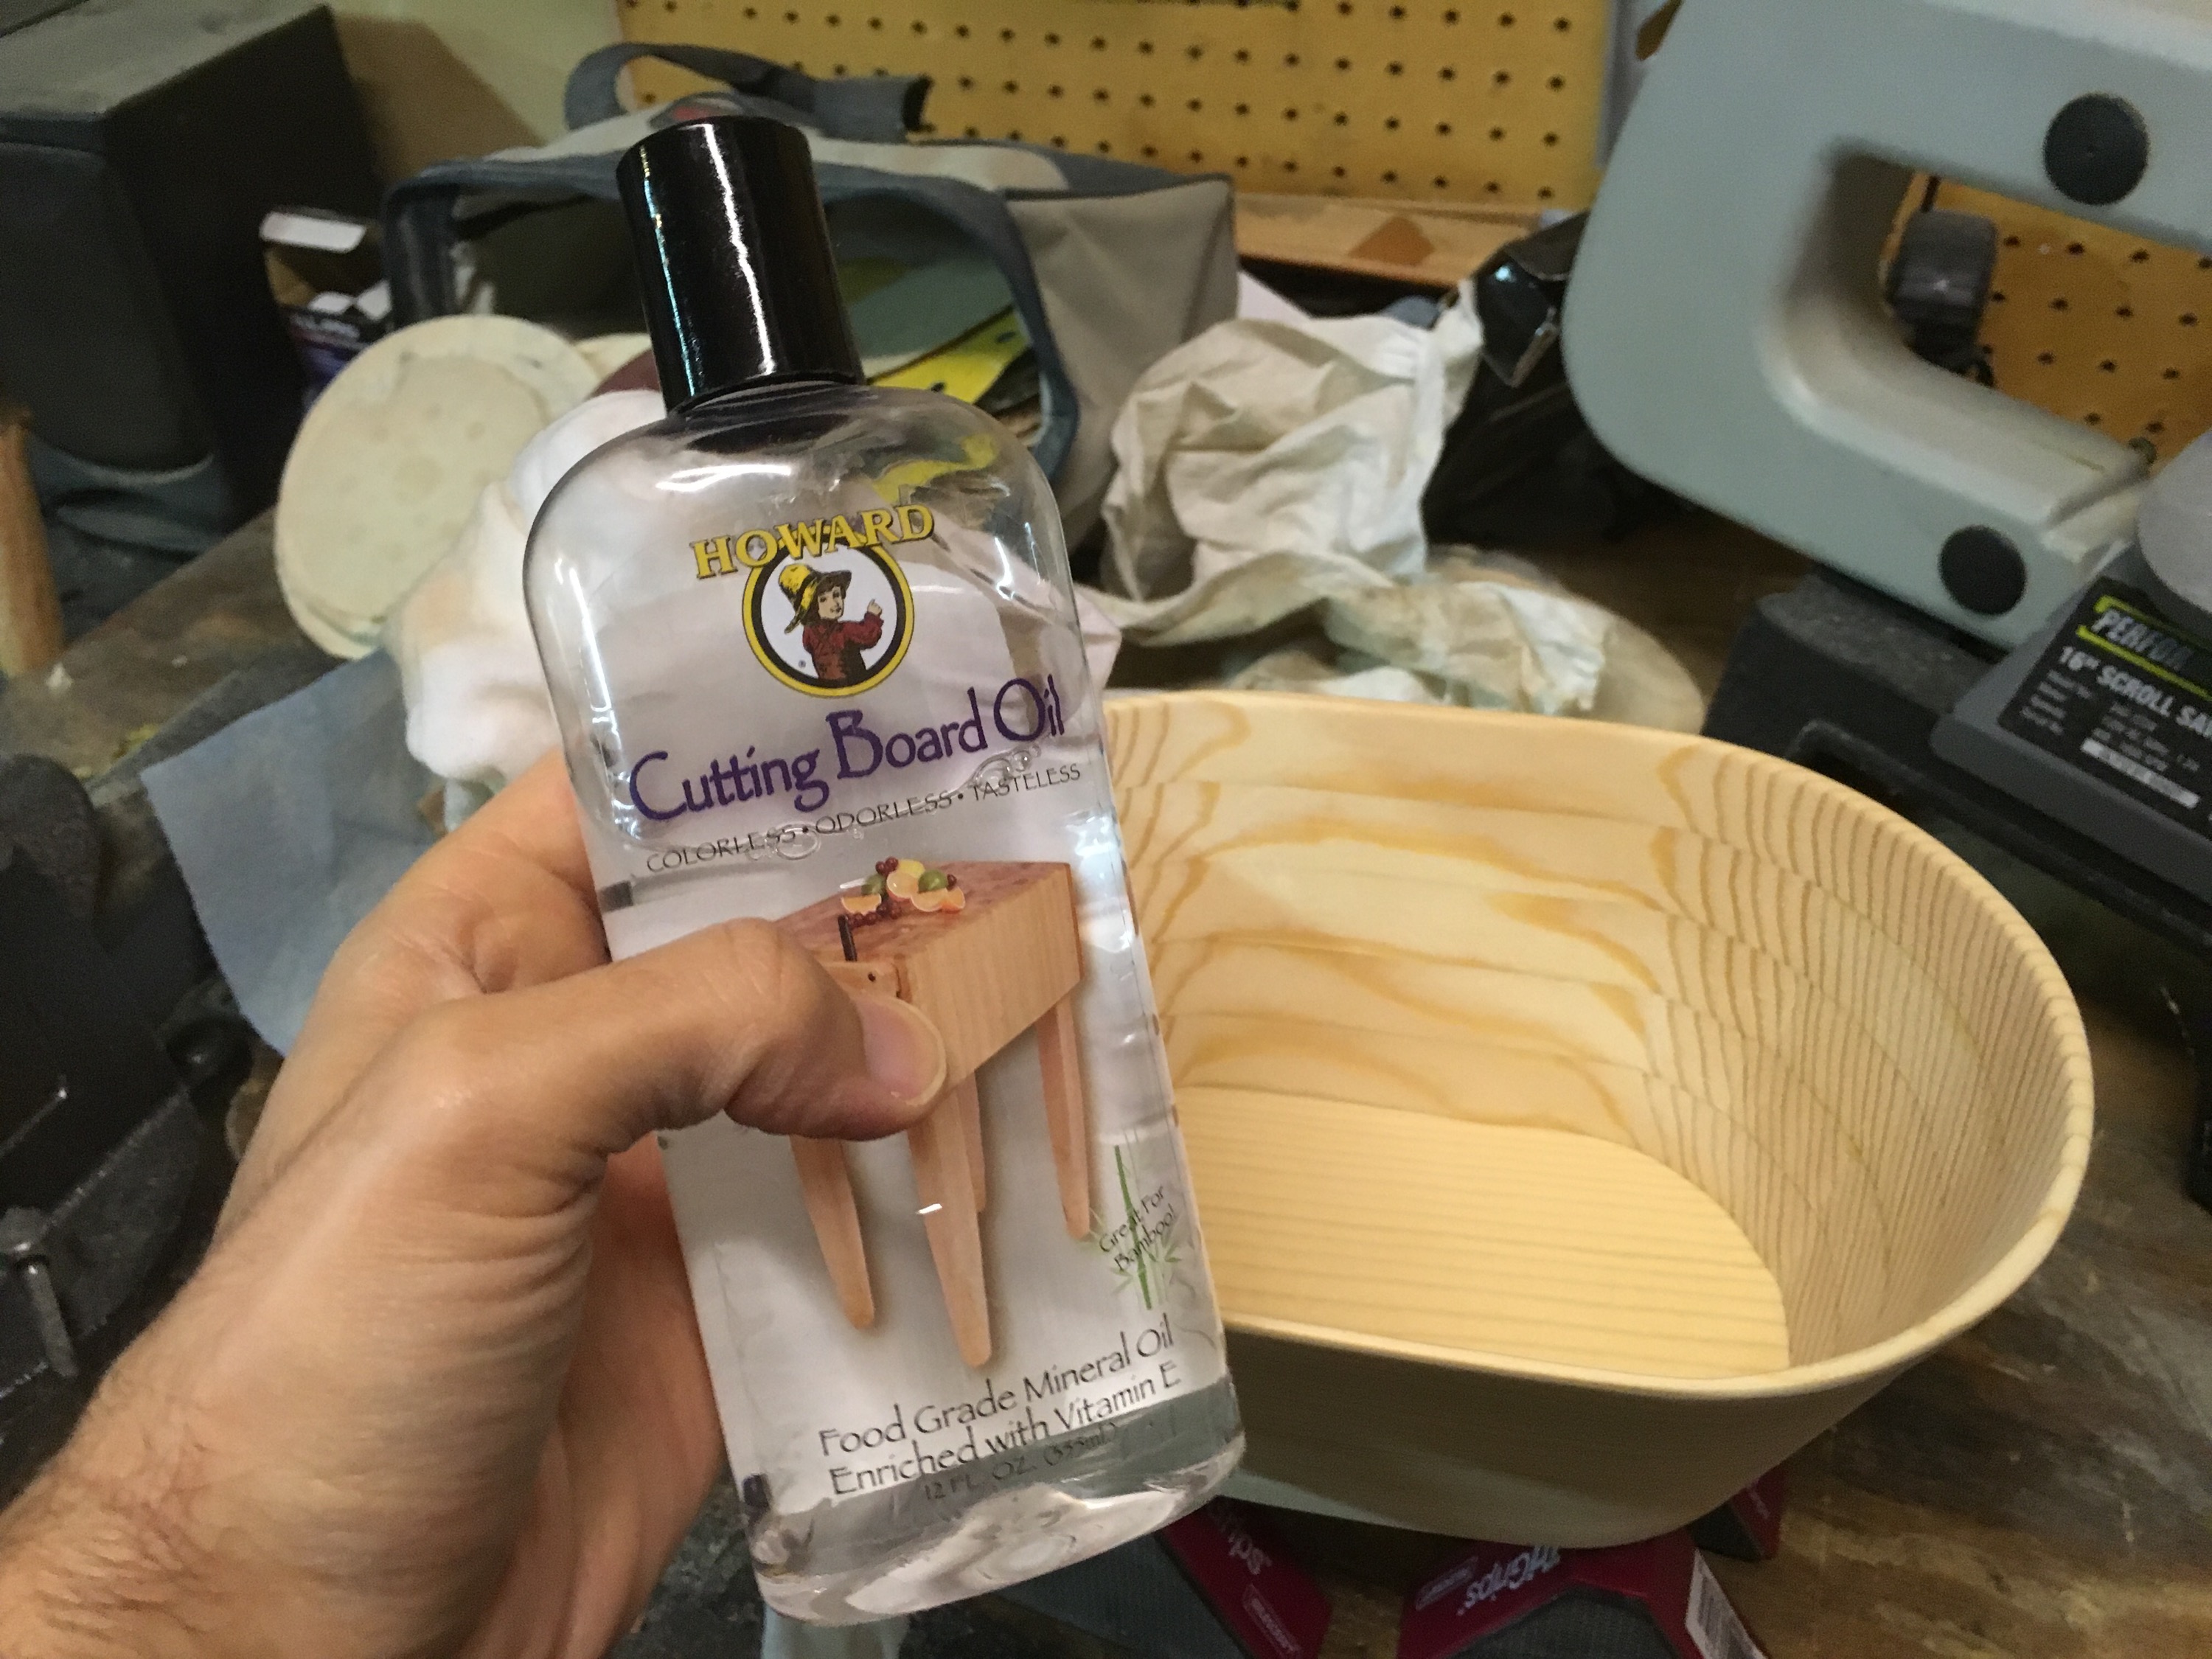
Apply the finish you choose according to the directions. This oil is simply rubbed on with a rag. I applied 3 coats.
Use and Enjoy
The last step is to enjoy the bowl you made. My main goal was to store sweet potatoes or citrus fruits so they aren’t rolling all over the counter top. This would also make a great gift for friends or family members.

