XAMPP is a great tool for setting up a webserver quickly and getting a PHP based site up and running. But getting PHP to reliably send email through can be a bit of an issue – especially for keeping the emails out of junk folders. Thankfully Gmail can be configured to send the emails easily and are a huge help in keeping emails out of the recipients spam folder.

Gmail Password Configuration
Gmail has had two methods for connecting PHP applications to Gmail.
- Less Secure Apps
- App Passwords
Less Secure Apps
This method used an account username and password to connect PHP application or XAMPP sendmail to Gmail. This is the same username and password used to login to the web interface and email clients. Google has deprecated this connection method as of May 30th, 2022.
To help keep your account secure, starting May 30, 2022, Google will no longer support the use of third-party apps or devices which ask you to sign in to your Google Account using only your username and password.
Google [https://support.google.com/accounts/answer/6010255?hl=en]
App Password
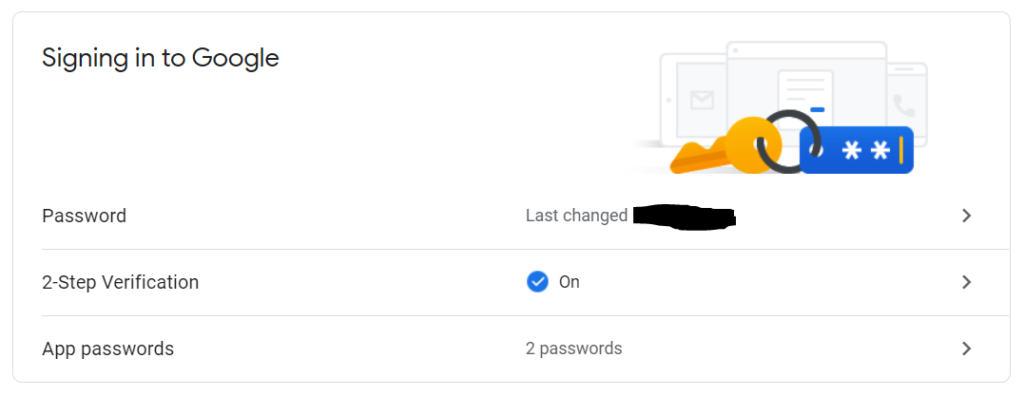
App Passwords are designed to be additional username / password sets for specific uses. It is best practice to make an App Password for each application. This allows for clear segregation of connections. One caveat to App Passwords is that the Gmail account must have 2-Step (or 2 factor) Authentication enabled. But, in this day in age, that is best practice anyway so this shouldn’t be a big hurdle.
Gmail App Password Reference: https://support.google.com/accounts/answer/185833
Gmail Account Setup
Before XAMPP can be configured, the Gmail account needs to be setup correctly. As noted above, the Less Secure Apps method is deprecated by Gmail and thus this tutorial will only use the App Password method.
- Confirm 2-Step Authentication is Enabled
- Create an App Password. Google documents this process well, and it may be subject to change, so follow their directions here: https://support.google.com/accounts/answer/185833


Configure XAMPP to Send Email through Gmail App Password
Now that the Gmail App Password has been obtained, XAMPP needs to be configured. XAMPP is pre-packaged with sendmail – an application that will handle the email sending function from PHP.
XAMPP has a sendmail configuration file that needs to be edited, however there isn’t an easy button to find it in the XAMPP Control Panel like the other configuration files. To find the configuration file, go to the installation directory of XAMPP in Windows Explorer. There is a button in the XAMPP Control Panel on the right that says Explorer that will open it, else it’s typically installed at C:\xampp. Then go into the sendmail directory and open file sendmail.ini in a text editor – the default is Notepad.
A quick note about .ini files. A colon character means that any text after it is a comment and will be ignored by the application. These comments are left there for humans to read. These comments are great to keep so it’s easy to reference what the sample configuration was. It’s best practice to copy the line, create a new line and remove the colon from the beginning of the new line with the modified configuration.
Look for line ; smtp_server=mail.mydomain.com Just below this line, add configuration for the XAMPP application. For all Gmail configuration the server is smtp.gmail.com
; smtp_server=mail.mydomain.com
smtp_server=smtp.gmail.com
Next look for line ; smtp_port=25 and configure the standard Gmail SMTP port of 587.
; smtp_port=25
smtp_port=587
Lastly look for lines:
; auth_username=
; auth_password=
Here is where the Gmail accounts email address and the App Password that was just generated will be used.
; auth_username=
; auth_password=

[email protected]
auth_password=app-password-from-gmail-configuration-steps-above
Save the sendmail.ini file to lock in the configuration.
In the main XAMPP Control Panel, restart Apache by clicking the Stop and then Start button.
Now XAMPP and sendmail are configured to send email through Gmail.
Logging
Sendmail can be configured to write some log data which will be useful to know what is occurring with your mail sends. In the sendmail.ini file uncomment by removing the leading ; (or add) these lines and save the file.
error_logfile=error.log

debug_logfile=debug.log
The log files will be located in the XAMPP Sendmail directory – typically C:\xampp\sendmail.
debug.log
The debug.log file will be verbose as it logs the email message header information, subject line, full body of the email, etc. As the log type suggests – this should be used for debugging and typically should be disabled on a production environment. Given that it logs the full email body this could lead to a security risk as well as sensitive data may be logged and stored in plain text on the server (depending on the contents of the emails sent of course).
error.log
The error.log file is likely wise to run on production environments as it’ll indicate critical issues like miss configurations, invalid credentials, etc. and would be very important to know when errors of these types occur.
Test PHP Script
This sample PHP script will loop through recipients to test sending email. Save this file within the XAMPP htdocs directory and call it by URL in the browser to test if sendmail with XAMPP will send the emails. If the configuration is setup correctly, the email should be received in the recipients inboxes momentarily.
<?php
$recipients = ['[email protected]','[email protected]'];

$subject = 'Test Email from XAMPP';
$fromName = 'Test Senders Name';
$fromEmail = '[email protected]';

$message  = '<html><body>';
$message .= '<p>This is a test email.</p>';
$message .= '</body></html>';

$NL = "\r\n";

echo "<h3>Emails Sent To:</h3>";
echo "<ul>";
for ($c=0; $c < count($recipients); $c++)
{
	$to = $recipients[$c];

	$headers = "";
	if( strpos( $message, '<html' ) !== false ) {
		$headers .= "MIME-Version: 1.0".$NL;
		$headers .= "Content-type:text/html;charset=UTF-8".$NL;
	}

	$headers  .= "From: " . $fromName . " <" . $fromEmail . ">" . $NL;
	$headers  .= "Reply-To: " . $fromName . " <" . $fromEmail . ">" . $NL;

	if( mail( $to, $subject, $message, $headers ) ) {
		echo "<li><b>" . $to . "</b> (<i>success</i>)</li>";
	} else {
		echo "<li><b>" . $to . "</b> (<i>failed</i>)</li>";
	}
}
echo "</ul>";
Troubleshooting
If the email isn’t being received, there are a few things to check and consider.
XAMPP and Apache keep an error log that often has clues as to what isn’t working as expected. This file is typically located at C:\xampp\apache\logs\error.log and can be viewed in a standard text editor like Notepad. A log viewer program like SnakeTail is great for watching log files. As new entries get added to the log file it will adjust and scroll the view. But the log file is a great first place to start troubleshooting any issues.
The other common issue to consider is if a firewall is blocking the mail from being sent. Windows has a firewall as well as the router and other network hardware on the network. Ensure that outbound traffic through port 587 is allowed.
