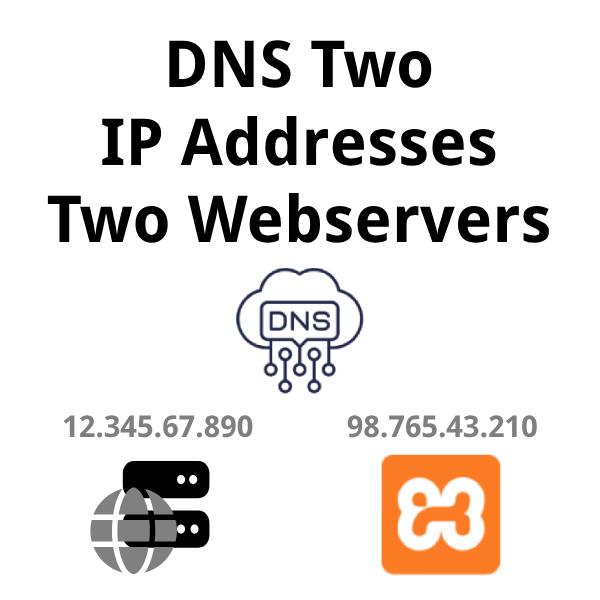
This post is a tutorial on how to configure a domain name to serve content from two (or more) different webservers. Configuring of the DNS and servers needs some configuration but with the right setup multiple servers – including XAMPP – will be using a Cloudflare SSL.
In the case of this tutorial the primary server is a paid hosting service. The secondary server is running on a self-hosted machine using XAMPP (which means it’s running Apache). The DNS is hosted at Cloudflare.
The leading motivation for this setup is to be able to apply a SSL to the XAMPP server. Cloudflare already provides an SSL for the domain, so why not lean on it to protect the XAMPP server? There are other methods to put an SSL into XAMPP hosted sites… but self-hosted certs via OpenSSL aren’t sufficient these days. Using Let’s Encrypt would likely work. While it’s a good option, it feels like extra work since the SSL in Cloudflare is there and will take minimal effort to set this up.

Contents
Configuration Overview
A subdomain is configured via a DNS A record that will point to the secondary XAMPP webserver. This provides the power of Cloudflare, it’s SLL/TLS configuration, etc. If correctly configured, the primary web server has no effect – nothing changes. Everything just keeps humming along as it should while the new secondary server from XAMPP gets protected by Cloudflare and adds the new service securely to the internet.
A request will be made to Cloudflare via the TLD (ie. example.com). The DNS configuration in Cloudflare will recognize the subdomain in the request and route that request to the XAMPP server.
What is Cloudflare?
Cloudflare is a 3rd party network that provides a CDN, WAF, SSL’s, DNS, domain name registrar, and so much more. In other words – it’s a layer that sits between a webserver and it’s visitors. It improves speed, security, and stability for websites and services. Cloudflare’s huge network is a protective blanket over a vast majority of the internet. Their services start at a free tier offering such services as a free SSL – which is of course critical for this tutorial.
Learn more about Cloudflare and their services on their So what is Cloudflare? page.
What is XAMPP
XAMPP is a webserver that runs on a Windows based machine. This webserver package of software includes the following key components:
- Apache: handles the request for a webpage and routes it to the correct processing on the computer
- MySQL: a database to store dynamic data, typically used in building websites
- PHP: A programming language popular for making webpages (ie. WordPress)
There are other components to XAMPP as well but these are the key ones critical to this tutorial. It is assumed that for the XAMPP portions of this tutorial that a basic XAMPP installation is up and running. More information can be found at the Apache Friends website.
A Word about SSL Certificates
An SSL is a certificate that ensures trust. This is done in the form of digital files that identify where the certificate came from. There are a handful of Certificate Authorities (aka CA’s) that provide these and the browsers have given trust in those companies. This is a service offered by the companies and thus why they will typically charge for a SSL certificate.
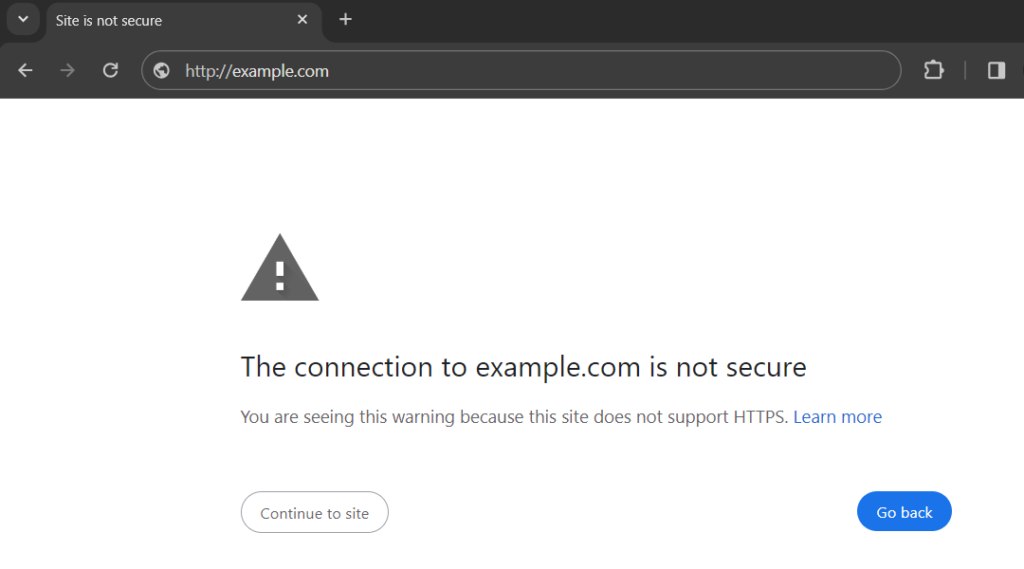
Alternatively a self-signed certificate can be generated on most any machine. This is typically done with OpenSSL. This certificate functions the same on the servers, however the organization that signed it is NOT from a trusted CA. For that reason modern browsers do not trust self signed certs and thus the browser shows a Not secure warning. The browser is expecting an SSL certificate from a trusted Certificate Authority (CA).

It is possible to tell the browser to trust the self-signed certificate however that will only be for that local machine – not all visitors of the XAMPP server. So again – a self signed cert isn’t going to really do much here.
Cloudflare SSL/TLS Encryption Mode
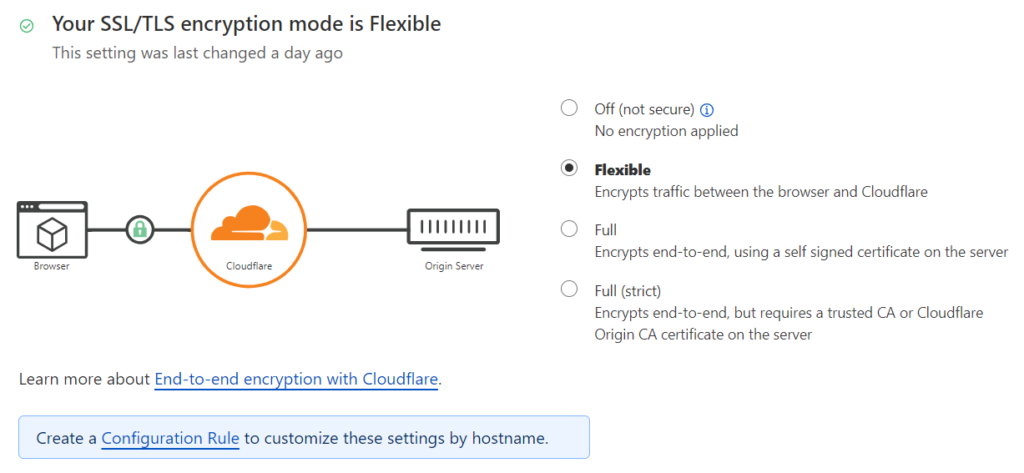
Cloudflare handles the SSL (Secure Sockets Layer) between Cloudflare and the visitor. This means that the communication between the origin (or the content being served via either Cloudflare caching or the webserver) and the visitor is encrypted and thus secure and unlikely to get intercepted by a bad actor. Modern web browsers are requiring this else they show an ugly “This website is not secure” warning. That’s not a good way to build trust with visitors…

Cloudflare can also be configured to communicate between Cloudflare and the webserver (ie. paid hosting solutions, XAMPP, etc.) with encrypted communication. There are two options here:
- Full: The webserver has a self-signed certificate (ie. OpenSSL)
- Full Strict: The webserver has a trusted certificate
Typically no certificate exists on the XAMPP server, and thus the Flexible option which ONLY encrypts the traffic between Cloudflare and the visitor will be needed. The communication between Cloudflare and the webserver(s) will NOT be encrypted. While not ideal, that’s a much more difficult area for bad actors to hack and the browser doesn’t complain about this configuration.

Cloudflare Configuration Best Practices
Assuming the primary web server has a proper SSL and thus the encryption mode is typically set to Full or Full (Strict), it would be best to not have to change this setting. Thankfully Cloudflare provides a feature called Configuration Rules that allows for this situation. The Configuration Rules will allow for changing of the SSL encryption mode for specific requests only.
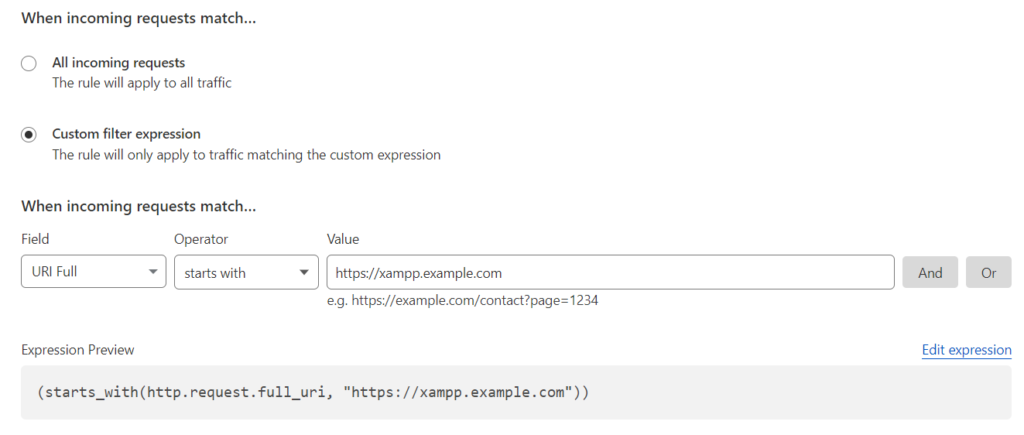
Leave the SSL/TLS encryption mode configuration set as is. Then in the Cloudflare admin go to Rules -> Configuration Rules and click the Create rule button.
Set a rule name. Select Custom filter expression. Then set the Field to URI Full, Operator to starts with, and Value to the URL to the XAMPP server which will be a subdomain – such as https://xampp.example.com

Next scroll down on the page to the SSL section and click the Add button and choose Flexible from the Select SSL/TLS encryption mode dropdown.
Last, click the Deploy button and the rule is set.

With this setup the primary domain will still be using it’s standard SSL configuration but the XAMPP subdomain will now be using a different encryption mode.
DNS Configuration of Web Servers
This tutorial will not go into detail on how to setup the primary server. There are too many variables at play here in terms of servers, hosting services, etc. But there is one crucial point to discuss on the DNS configuration – which should be used/needed in essentially all scenarios.
The CNAME needs to be configured to the TLD (ie. example.com) and the A record needs to be configured to the IP address of the primary webserver. This isn’t anything unique here – typical setup for webhosting. In this configuration, a request to example.com will be routed to IP address 12.345.67.890. The visitor can use the memorable domain name and DNS will do the magic routing in the background.

The next step we want to achieve here is to be able to serve content from a different XAMPP webserver at a subdomain from an alternate IP address. That is accomplished by adding an additional A record for the subdomain. This allows for the same trusted and memorable domain name to be used but by adding the prefix of a subdomain completely different services will be serving the content.

In this example, navigating to xampp.example.com will now route traffic to the secondary web server which is hosted on XAMPP (as denoted by the chosen subdomain of xampp but of course could be set to any name necessary). The Content column indicates which IP address to use depending on the www. or xampp. subdomain of the request.
Subdomain vs Subdirectory
Some get confused on the subdomain vs subdirectory discussion. Simply put a subdomain is what comes before the primary domain in the URL. And a subdirectory is what comes after the slash (/) just after the primary domain in the URL. Remember the word directory means folder. Thus what comes after the slash is a sub-folder (or directory) thus the naming scheme
| URL | Protocol | Subdomain | Primary Domain (TLD) | Subdirectory |
|---|---|---|---|---|
http://www.example.com | http | www | | not applicable |
https://www.example.com | https | www | example.com | not applicable |
https://example.com | https | not applicable | example.com | not applicable |
https://www.example.com/blog/ | https | www | example.com | blog |
https://shop.example.com | https | shop | example.com | not applicable |
This tutorial is to use a subdomain at an alternate IP address. There may be times it is desired to use a subdirectory at an alternate IP address instead. However, that scenario isn’t common practice and isn’t how DNS typically works. DNS records point a TLD and subdomain to an IP address and all content that lives within that that subdomain-TLD combination comes from that IP address (aka webserver). While there may be some shenanigans that could get an alternate IP address to serve at a subdirectory level, that will not be discussed here.
XAMPP Virtual Server
At this point in the tutorial, an SSL is protecting a subdirectory via a Cloudflare Configuration Rule. And the DNS record is sending traffic for that subdomain to the secondary XAMPP hosted IP address. The next step will be to get XAMPP configured to respond correctly.
What needs to be done here is a Virtual Host needs to be configured in XAMPP. The Virtual Host is used to tell XAMPP to respond to requests coming from specific hostnames differently. By default all requests coming into Apache – the web server software in XAMPP – come from the same IP address. A Virtual Host provides a mechanism to separate all of this seemingly same traffic and treat different request sources differently. It does this by looking at the host name of the request and matching it to a ServerName or ServerAlias directive in the XAMPP/Apache httpd-vhosts.conf file. This allows different request paths to respond differently. In the example of this tutorial, we are configuring XAMPP to respond to xampp.example.com.
In the XAMPP control panel under the Apache line click the Config button and choose <Browse> [Apache]. This opens the Windows Explorer. Double click on the conf directory and then extra directory. Then open the httpd-vhosts.conf file in any file editor (ie. Notepad).
Add this block to the file. Ensure to modify this to match your specific configuration. The most important being the ServerName – setting it to the subdomain and TLD being configured here.
The ErrorLog and CustomLog entries are option and can be named how you’d desire. The sample here is the common default naming scheme.
1 2 3 4 5 6 | <VirtualHost *:80> DocumentRoot "C:/xampp/htdocs/" ServerName xampp.example.com ErrorLog "logs/xampp.example.com-error.log" CustomLog "logs/xampp.example.com-access.log" common </VirtualHost> |
Notes:
- The log paths are relative to the the Apache log directory which is typically located at
C:/xampp/apache/ - Since XAMPP doesn’t have an SSL tied to it, it still responds at
httpwhich is port80and thus the*::80directive in the opening tag.- Remeber from above – Cloudflare will talk to XAMPP without an SSL but Cloudflare will add the SSL protection when communicating to the vistor
- Comment out undesired lines with a leading hash symbol (
#)
Test the Implementation
With all of these steps executed the configuration is complete and ready to be tested. At this point two different webservers – one being XAMPP – should be serving under different subdomains and two different IP addresses using these same top level domain.
