Something about the ocean, coral, and sea life is appealing to many people. So many people love to bury their feet in the sand at the beach. Love the sound of the waves moving in and out. The cawing of the seagulls. This is why we often decorate our rooms to match.
I’m not unique here. And that’s why I created these custom made coral and sea shell picture frames to decorate our master bathroom. I thought I’d share this tutorial on how to build coral art work with sand and shells for yourself.
Contents
The Backstory
Over four years ago I worked on a bathroom remodel in my house and had a vision of the stereotypical beach theme to polish off my hard work. I completed the remodel and “my bathroom” (you know – the small one in the basement that I volunteered to use to allow my wife to have the not-much-larger one that was more convenient to use in our house) was coming together. I found some bath towels, a floor mat, toothbrush holder, etc. to complete the project. But not quite… I needed wall decorations and I had a vision of what that should look like. Not something to buy, but to make.
Now here’s the funny twist in my rambling story. I came up with a plan on how to build the artwork. I found and purchased the picture frames and nearly all the supplies. And then my wife and I accepted a reality we tried to convince ourselves we didn’t need to accept – this house isn’t working for us. Recently my wife gave birth to our set of twins, who joined our already family of 3 and this house wasn’t laid out or the proper size for our growing family. And so, long story short, we sold the house and moved to a house much better suited for our family. To this day – still one of the best decisions we’ve made. (For me likely my second best decision I’ve made – second to proposing to my now wife.)
As you can imagine, my dream of making my coral wall art was put aside. Not forgotten, just far from a priority. Until now. This summer has been a nice summer of progress on many projects both new and old. The kids are at an age that they get excited to be a part of my projects or at least play on their own as I get some progress made. So this fall before it got too cold to be out in the shop (Minnesota winters get brutal…) and the polyurethane needed for this to cure properly I put aside the family projects and worked on this long lost coral reef art project to enhance our master bathroom.
The other thing to mention here is that I work for a company that sells saltwater aquarium supplies. In the saltwater hobby, coral is a large focus of the enthusiasts. The company offers us all the opportunity to have a tank at our desk. While I’ve had a desire to have an aquarium in my house for many years, I’ve never done it and didn’t have a clue what it would take to maintain a tank, grow coral, etc. until working here. But I setup a tank, put in a few small coral frags, and saw where it would go. After about a year, I had very impressive coral growth going on. Many of the experts I worked with were amazed at how well my tank took off. They were also baffled given my “lack of effort” on tank maintenance. By most standards my tank should have failed from about day 30. But it defied the odds and did fairly well.
Looking at my tank at work every day I kept envisioning the coral in that tank as part of my picture frame coral art. But I didn’t want to kill the coral. Well as we know, a good thing (my beginners luck at keeping a reef tank) will often come to an end. An unfortunate event happened… My tank started to get overtaken by an algae. I attempted a chemical treatment – a more aggressive treatment than I should have… and my coral quickly took a turn for the worse and died. Ironically when I first planned this project the coral was healthy and booming. It died sometime after I moved – while this project was set aside. So putting the project on hold allowed me to source the final piece I needed – the coral! Not the way I had hoped to acquire it, but it is what it is at this point.
Ok – now you’re caught up on the back story as to why this project came about.
The Plan
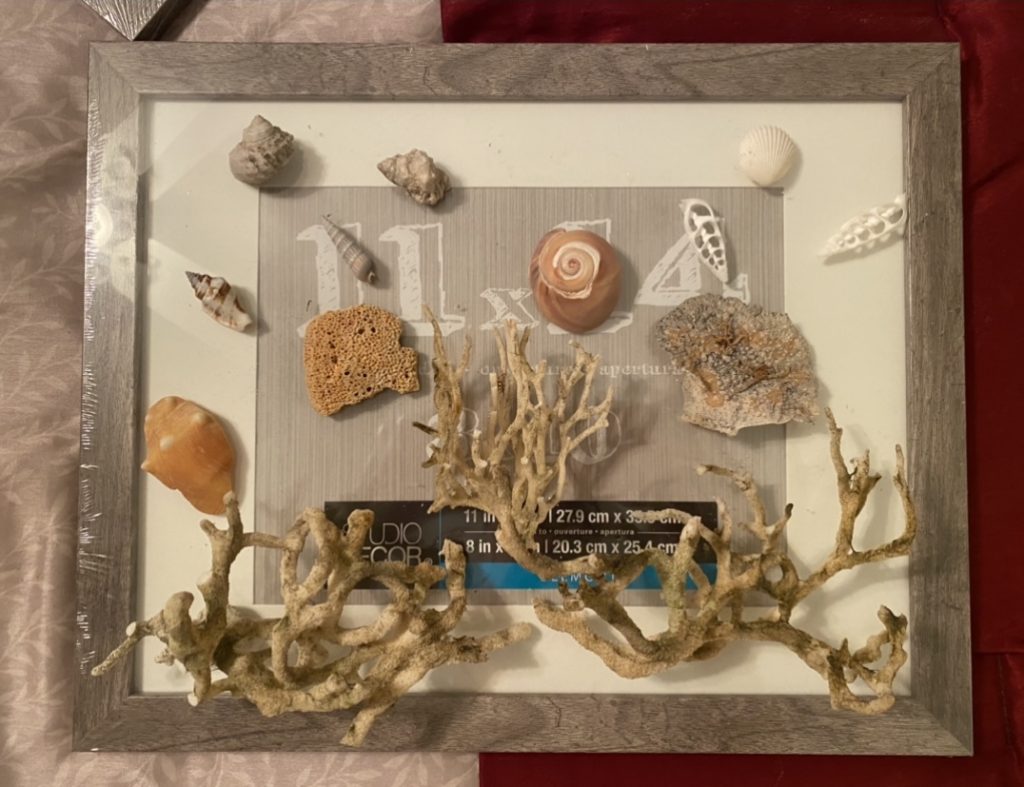
The desired look is to have a natural beach look with shells and coal pieces poking out of the sand. I picked a weathered wood picture frames to get the feel of drift wood. My wife and I have both collected sea shells from our various travels throughout life. And the coral I was able to acquire from the demise of my reef tank mentioned above.
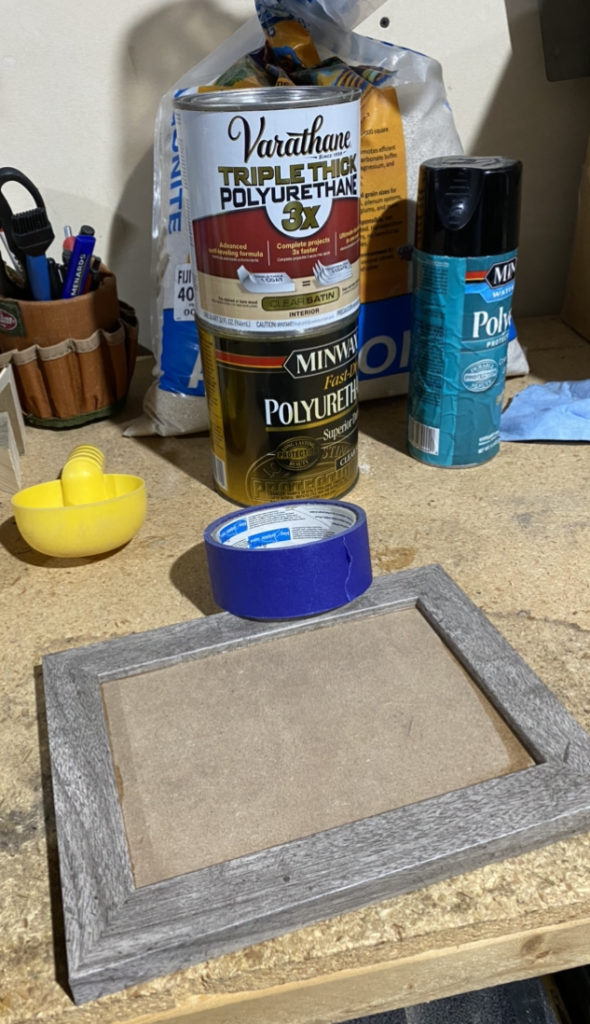
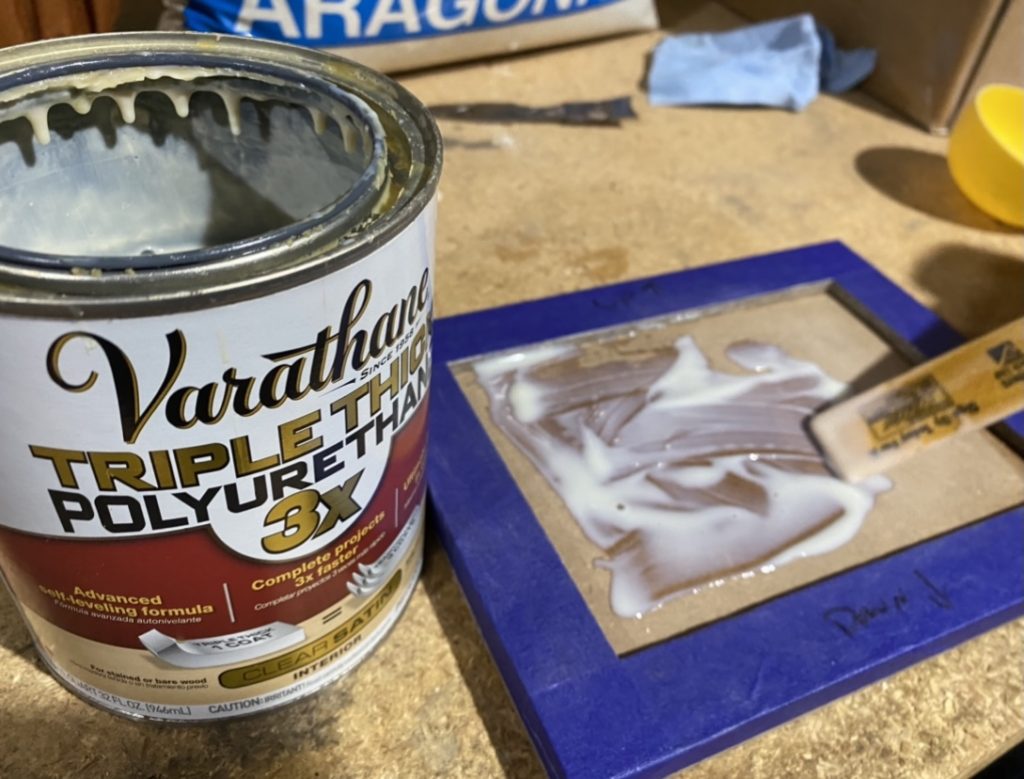
The real key here is how to get it all to hold together. That secret is one I’ll take with me to the grave. Ok.. just kidding. The secret ingredient here is polyurethane. This is essentially a glue. It is white in the can and dries clear – leaving a solid film finish on wood. But when mixed with sand, it acts as a glue to bind all the granules together and bind the entire art project into beautiful art.
If this is a project you’d like to make as well, you of course may find your own source of materials. Make it personal to you. Take a trip to find your shells. Maybe you or a family member have a beach cabin you could acquire some sand from. That cuts down on cost, makes it easy to acquire, and brings in a personal element to your piece of art.
Materials List
There are of course many places to source your materials. The links on the materials list above are just to help you get started.
Size Considerations
I made two different sized frames. 5×7 and 11×14.
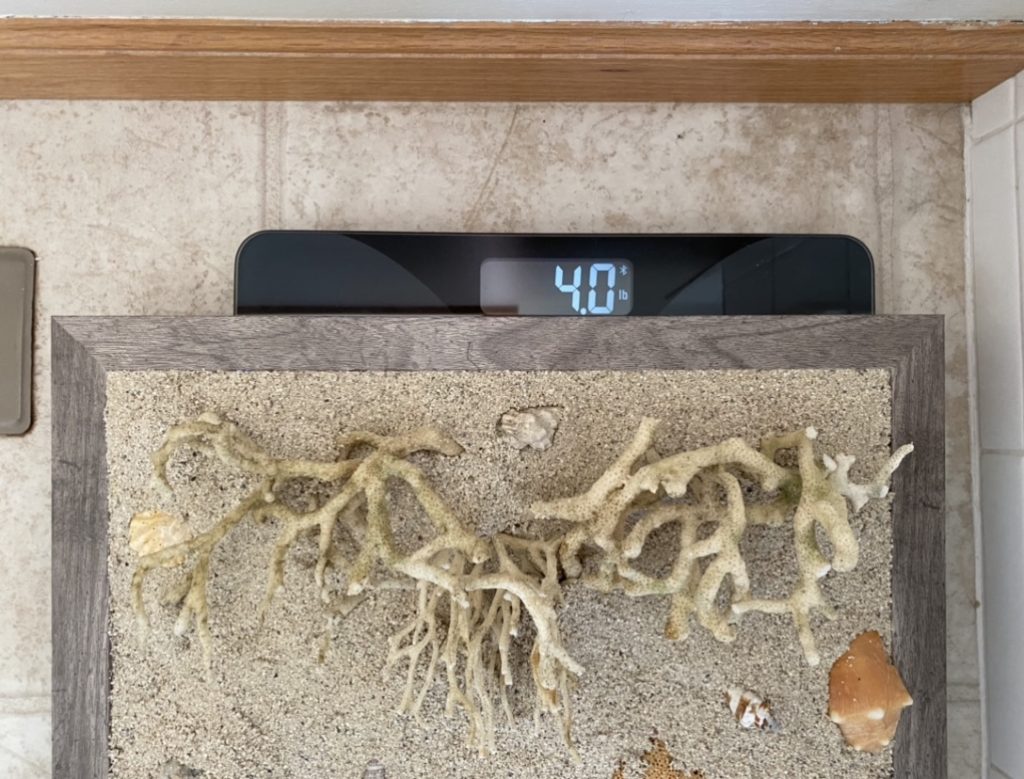
Of course pick the sized frame for your space. But keep in mind that you’ll be adding a good amount of sand, polyurethane, shells, and coral. This all adds weight. For me, the 11×14 frame ended up weighing in at 4 pounds. As a wall hanging that will work, but it’s getting up there in weight. And more than I trusted the standard frame hangers for. That is why a frame hanging kit is part of the materials list.
Start Building
That’s enough talking about the prep work. Now onto discussing how I went about building these frames.
Plan your layout
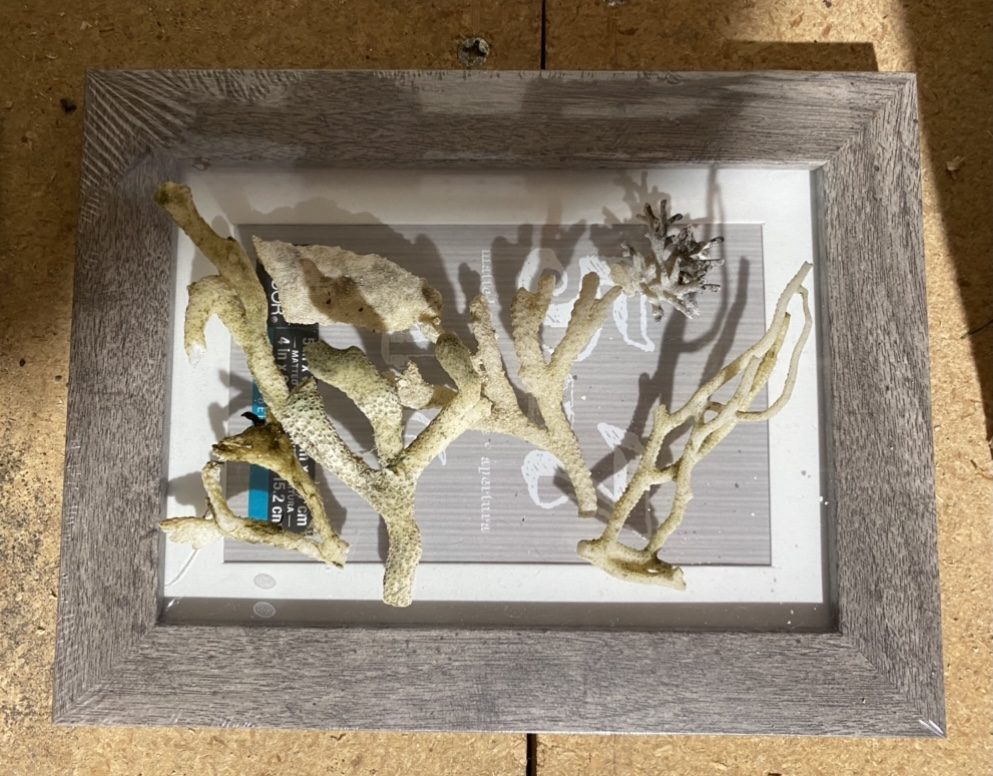
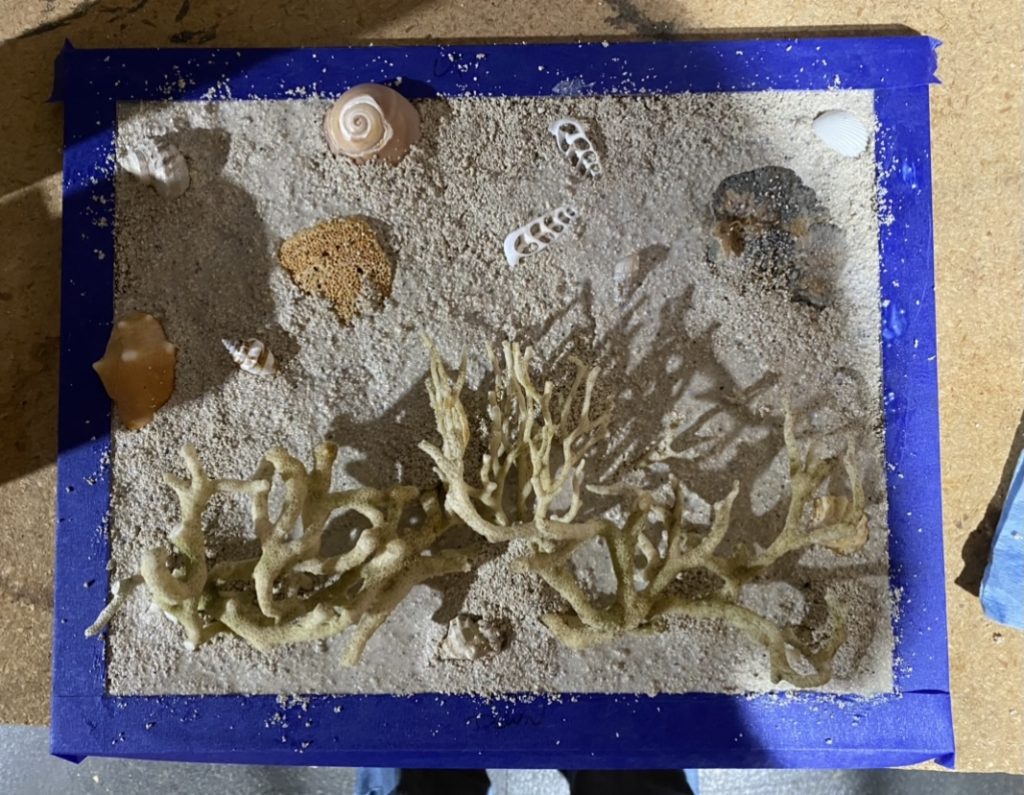
Before you do any work, plan your layout with your shells and coral pieces. Take the time now to work out the look, spacing, etc. before you are working with polyurethane that wants to dry on you. Take your time and move things around until they fill the space in the frame nicely. Work right on top of the frame. It’s not the same as having the sand in place, but close enough.
I found that what I had planned on using for shells wasn’t enough. So this gave me time to acquire what I needed from a stash we had elsewhere in storage and work out those issues now.
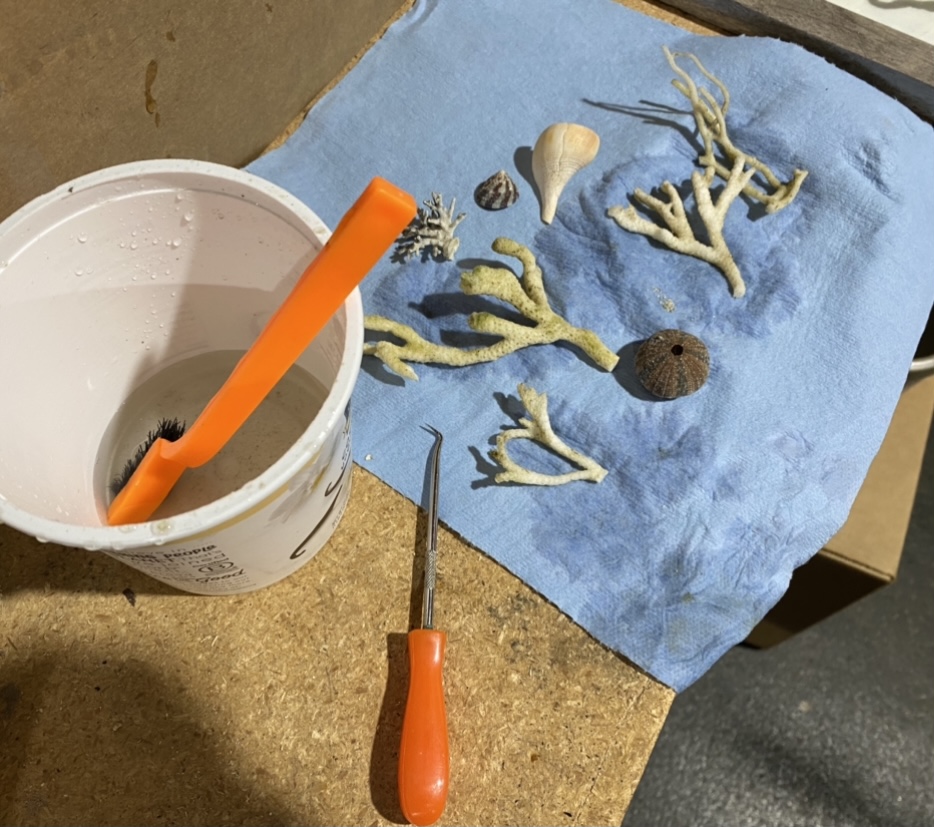
Once you’ve found your layout/design, TAKE A PICTURE!!! This will give you a reference to look back to while you are working and ensure you get the final art to look like you had planned.
Aside from a reference picture to look back at, the other piece of advice I have is to find somewhere that you can set the shells and coral in the same layout. On your workbench, desk, table, wherever – set them in the same layout. It’ll make it easier so you aren’t hunting for which piece matches which in your photos. This little extra step will be very useful during assembly.
Prepare the Picture Frames
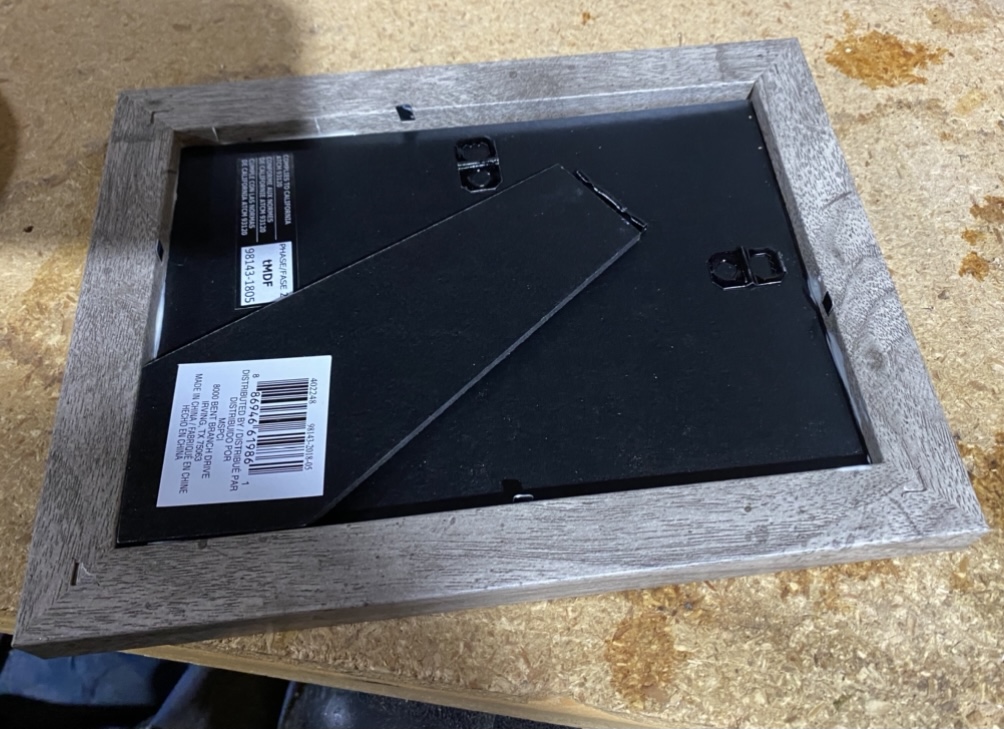
The glass from the picture frame isn’t needed for this project. So take the glass and matting (if your frame came with it) out.
If the “inside” surface of the frame backer board is smooth/glossy, use sandpaper to lightly scuff it. This will ensure a better bond between the backer board and the polyurethane and sand as polyurethane and glues have a hard time bonding to shiny/smooth surfaces.
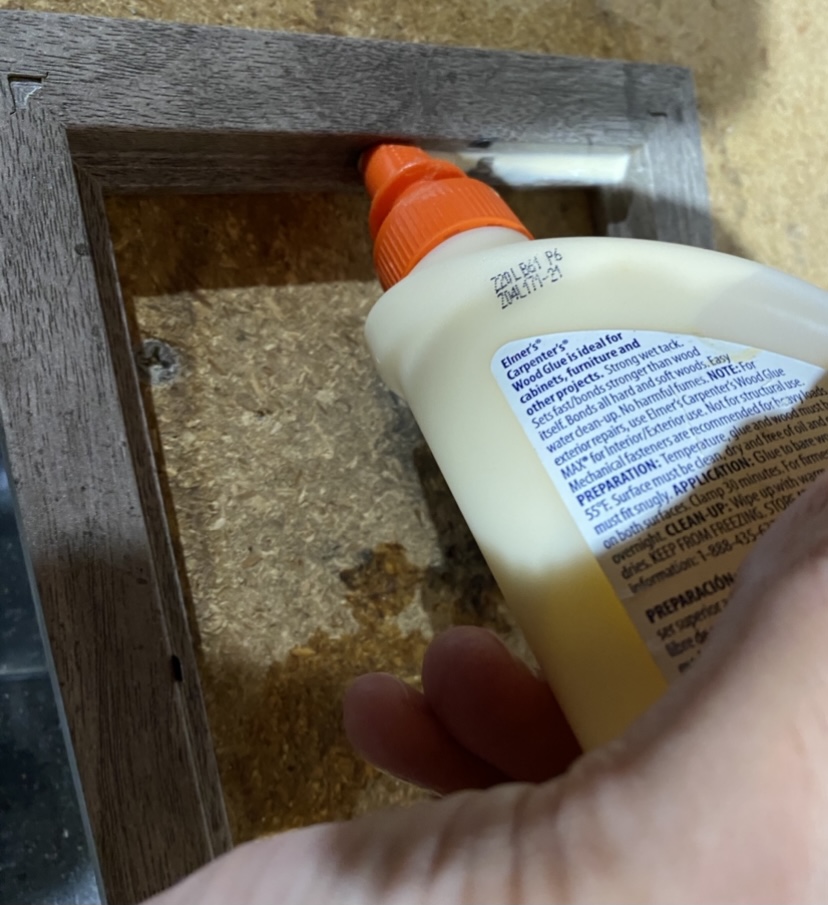
To ensure that the frame has as much strength as it can, use the wood glue to glue the frame backer board to the frame itself. Then fold the metal tabs into the back to help hold it in place.
Let the glue dry.


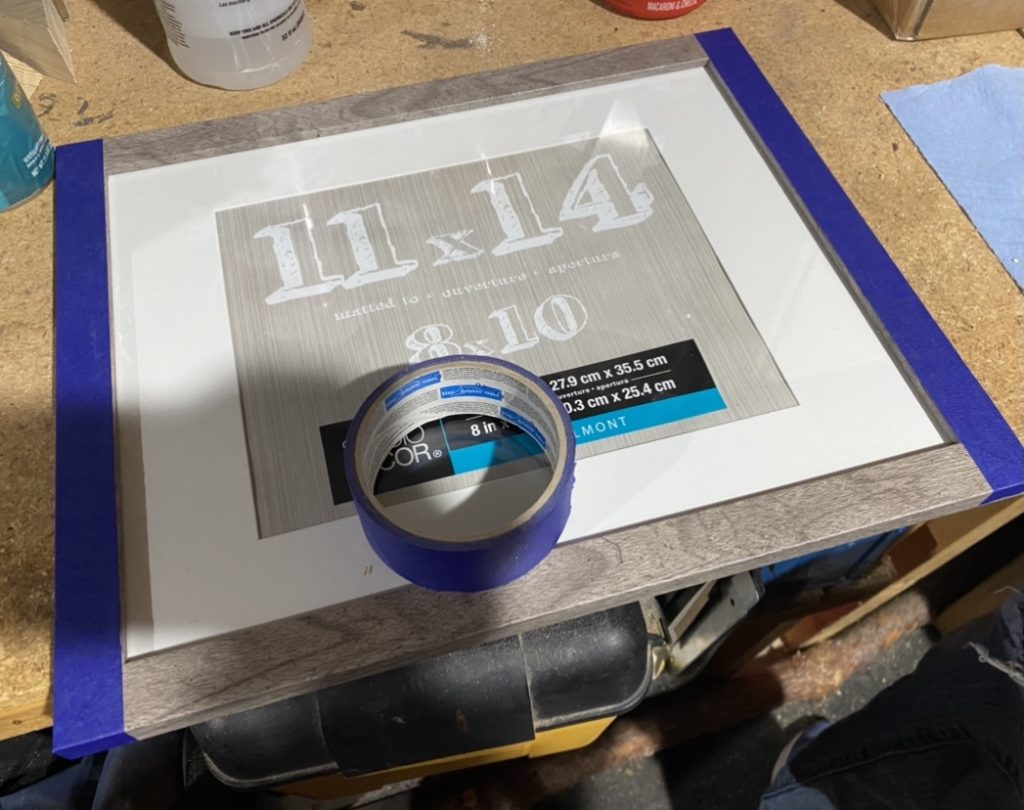
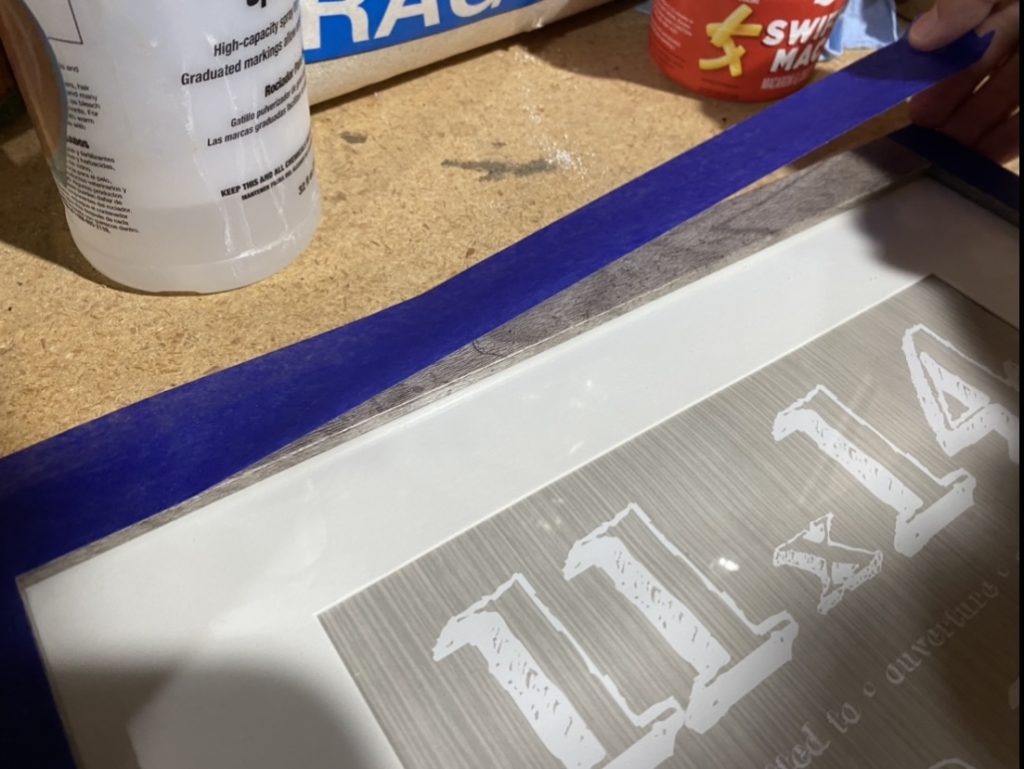
Protect the frame with masking tape
Lay some masking tape down on the front faces of your picture frame. This will protect the frames from getting chipped, scratched, etc. Also as you add in the sand, it’ll ensure you don’t get “sand-creep” (sand getting “glued” to the frame where you don’t want it). This quick extra step will prevent some headaches in the long run.
Take a moment as you’re laying it down to ensure it’s flush with the inner edge of the frame. Go slow, have some patience.
I personally used the blue masking tape – that’s what I had on hand. The standard “yellow” or green would work just fine as well. The key here is that masking tape isn’t super-sticky and thus will peel off without leaving a residue or affecting your frames.
Prepare the Coral and Shells
Shells and coral are all unique shapes and sizes. Take some time to prepare them now before you start working with the polyurethane.
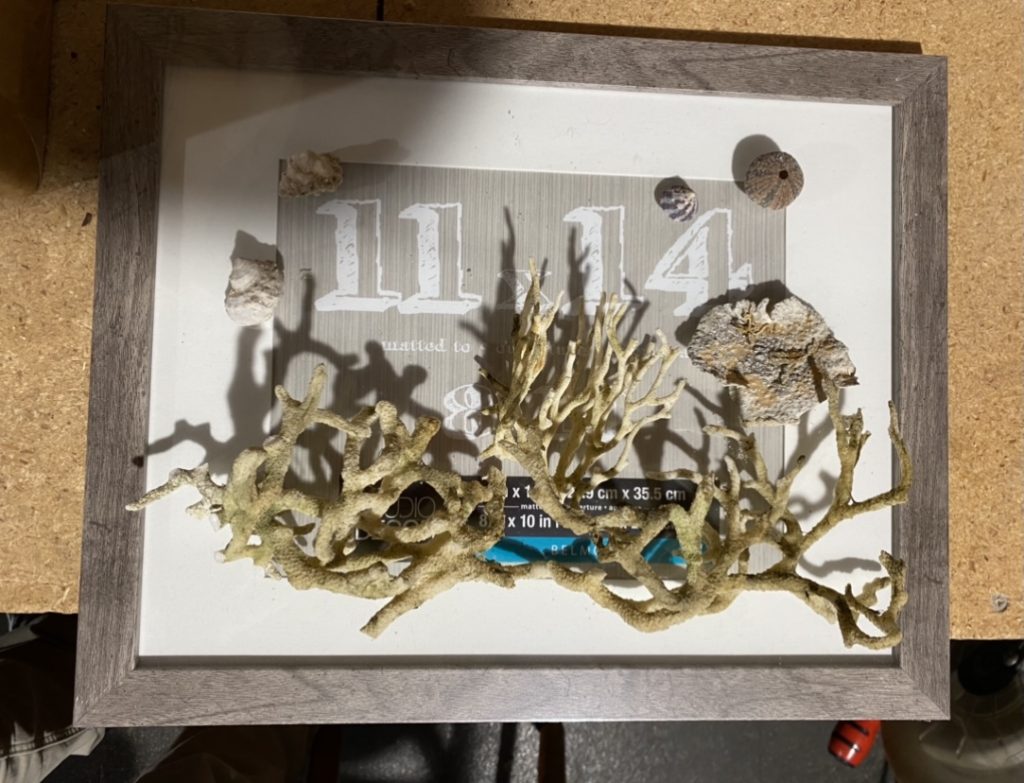
This is a good point to do a “dry run” at this point. Put sand into the frame and start to layout the coral and shells in the sand. For my design, I wanted some pieces to be slightly burred, some to be hanging over the edge of the frame a bit to “break dimension”, etc. and so I played with that here.
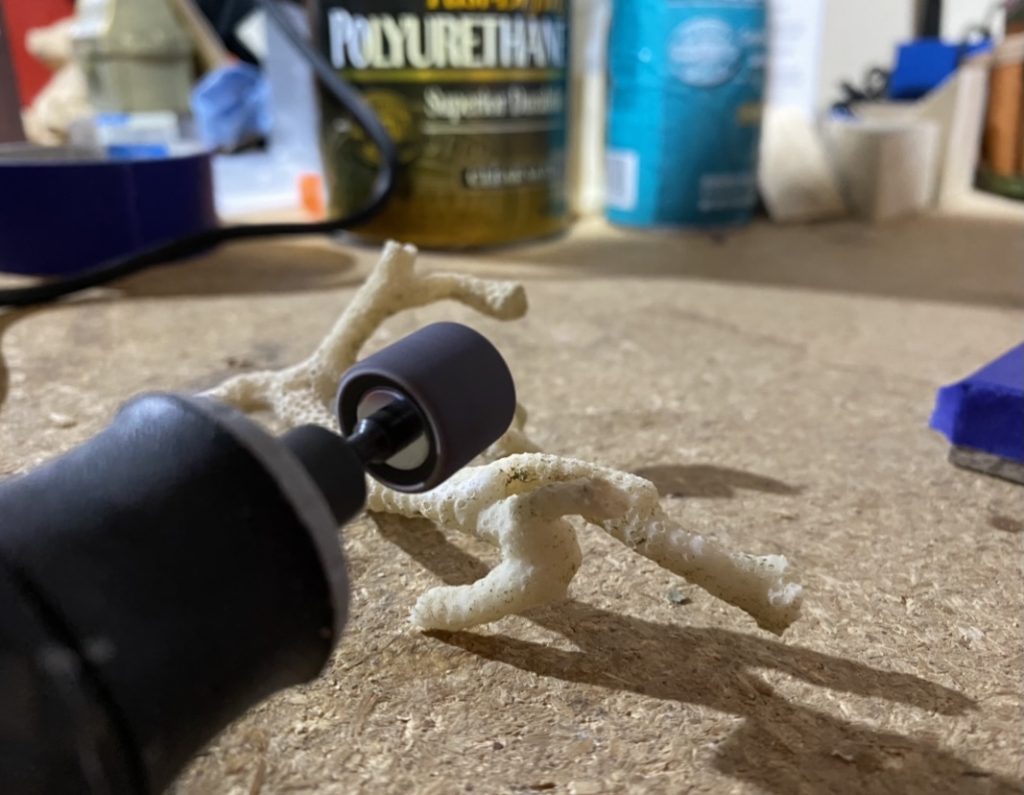
What I also found in this process is that some of the corals didn’t sit or lay how I had hoped. And so I had to modify the pieces a bit to get them to sit how I needed them. There are several ways to do this. Coral is fragile enough that it could just be “broken” by hand, but you risk it breaking in ways you didn’t expect. So you can also use a hacksaw, sandpaper, or Dremel tool. I didn’t have much that needed to be modified and was able to flatten out a few spots with a sanding drum with my Dremel.
Cleaning the Coral and Shells
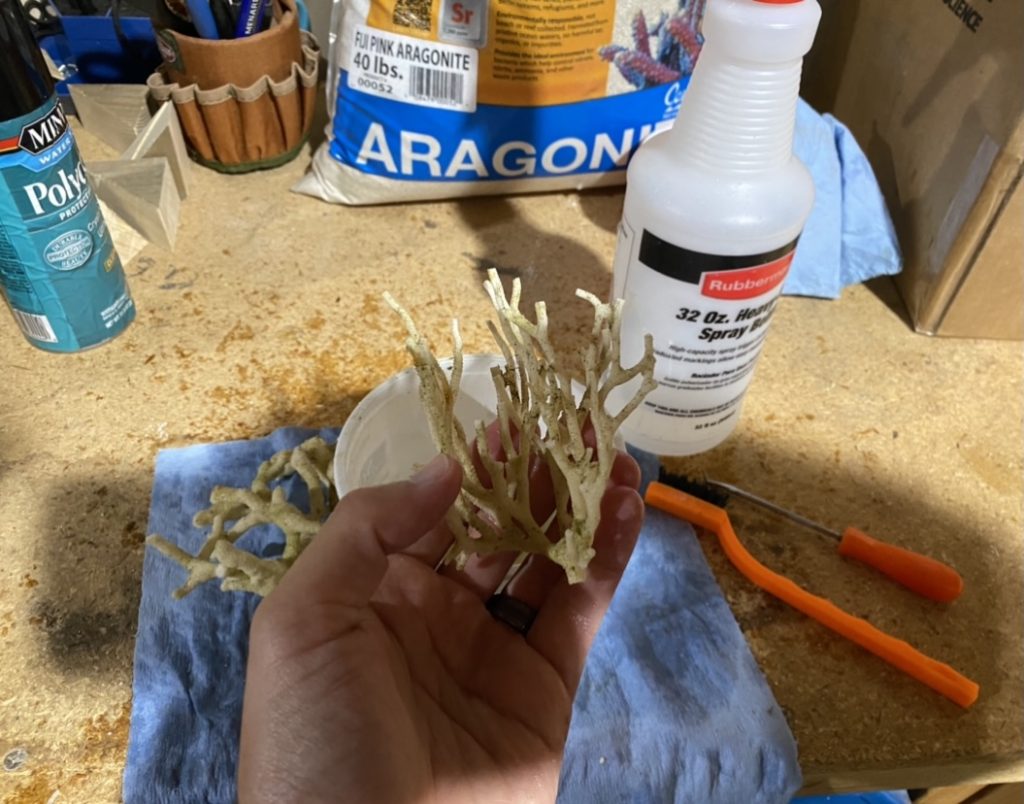
It’s about time to make the sand, coral, and shells into permanent art. This means it’s the last opportunity to ensure all the pieces are looking their best.
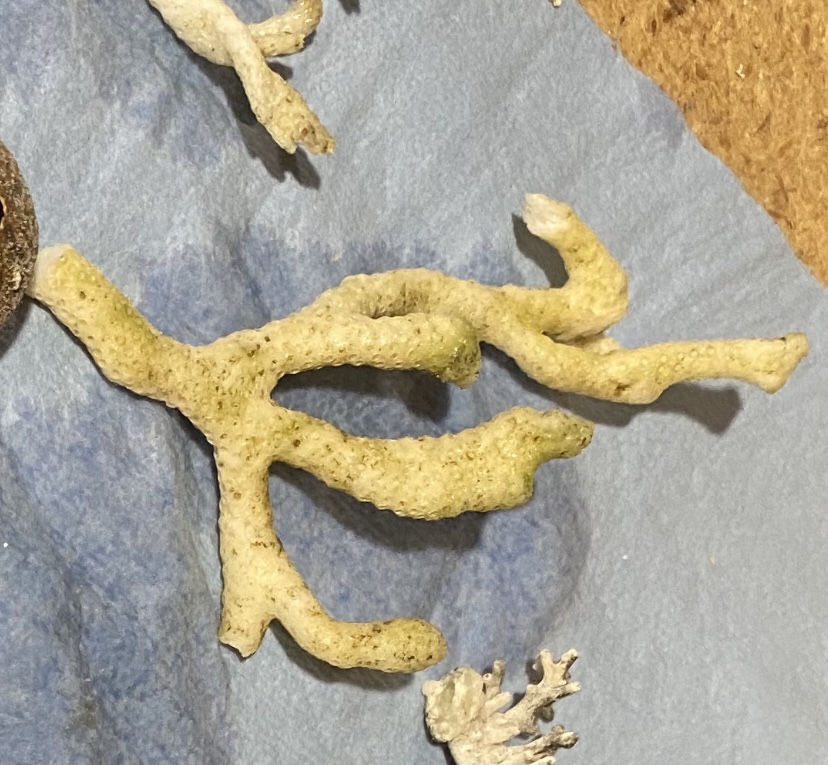
My coral came from my aquarium that at one point had some algae growing in it. And thus the coral had green dried algae on it still. On the one hand I like this – it added some color, realness, and uniqueness to the overall look. On the other-hand, some of it was pretty bad. So I wanted to clean it up a bit.
I started with a pick tool and pulled off what I could by hand. I then switched to a bleach water solution and brush to gently scrub off undesired algae and get the desired cleanliness and look.
My shells were clean already, but you may want to look yours over and do some cleaning of them at this point.
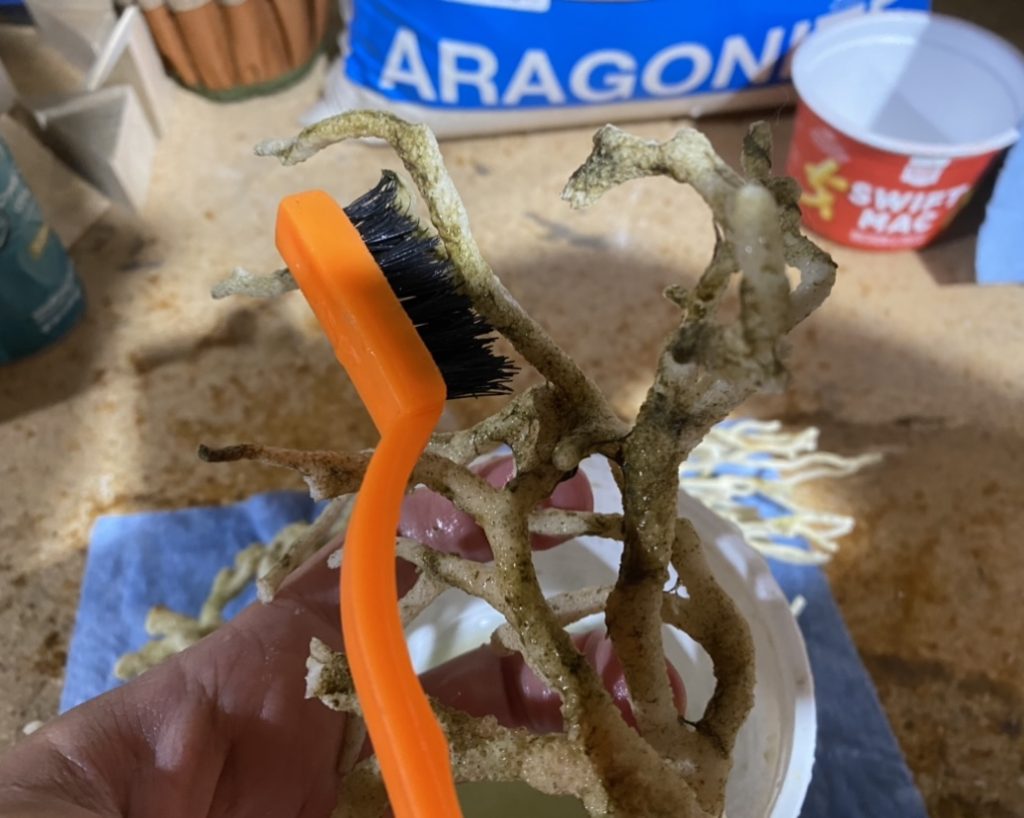
NOTE: for the bleach water solution I did 1 part bleach to 5 parts water. That said, I feel like water only likely would have been just fine. Bleach will whiten the corals a bit more, so you may want to try water only first and see if you get the results you are looking for. If not, then try a bleach water mix.
Mix Polyurethane and Sand
It’s time to start assembling the frames now that the prep work is done. If you did a dry run, take the sand back out of the frame before you proceed.
Notes before you begin:
- It is important to ensure all of the sand gets coated well with the polyurethane. If there is uncoated sand it’s simply loose sand that will fall out. This means a good amount of poly will be used and a lot of mixing will be done.
- When the mixing of the sand and polyurethane is done, the sand should be “wet” with polyurethane but not “soupy”.
- Think of the consistency of oatmeal – its wet but not runny.
- Use one stick for polyurethane only – do NOT get sand on it. This “wet” only stick will prevent getting sand into the can of polyurethane, ensuring that it can be saved for future (non-sand related) projects.
- Use one ort two sticks for sand. These sticks should never go into the can of polyurethane.
- The polyurethane has a working time of up to 1 hour before it will start to harden up. That is plenty of time to do the work, but of course ensure you planned enough time to get this step done before the polyurethane dries.
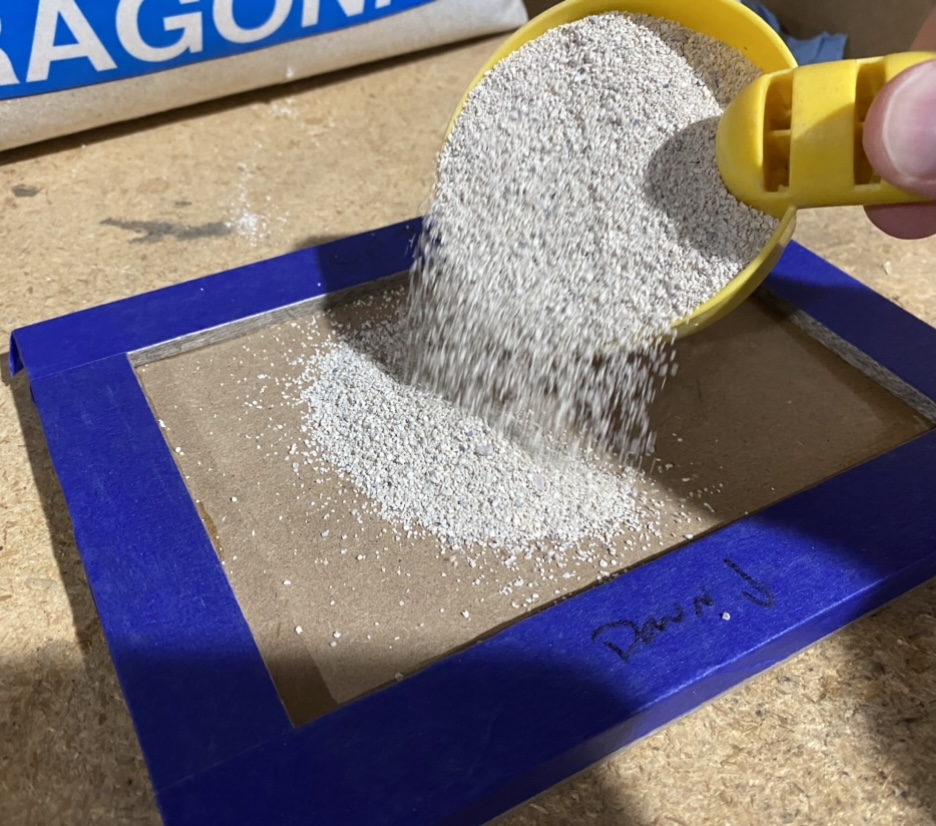
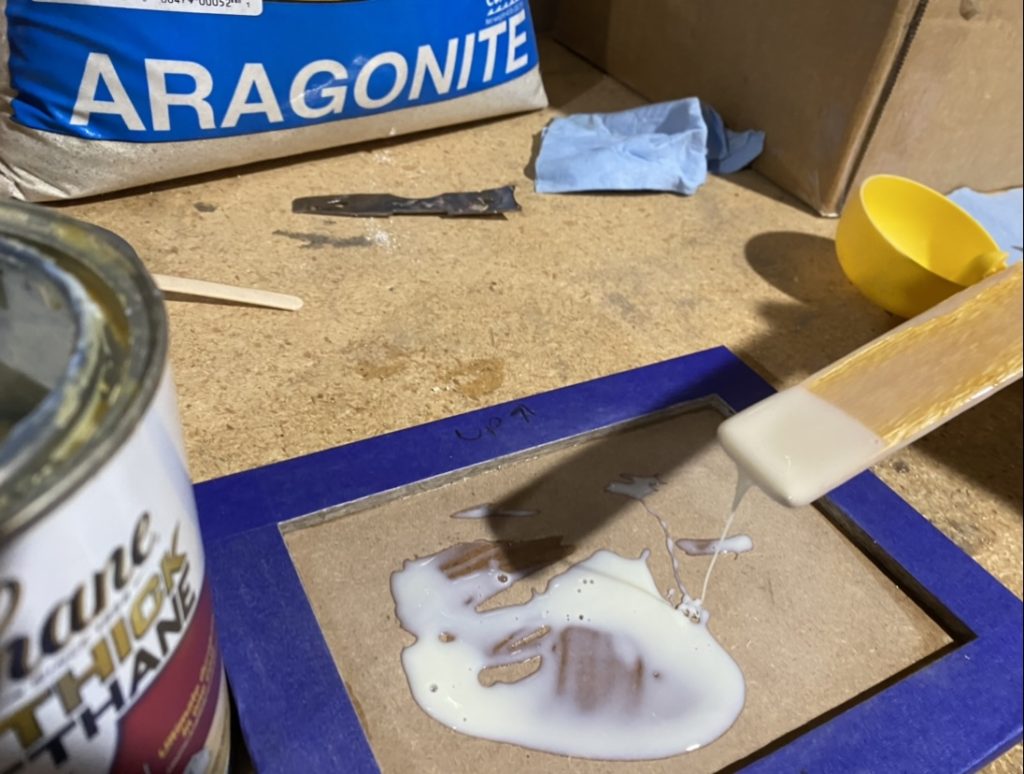
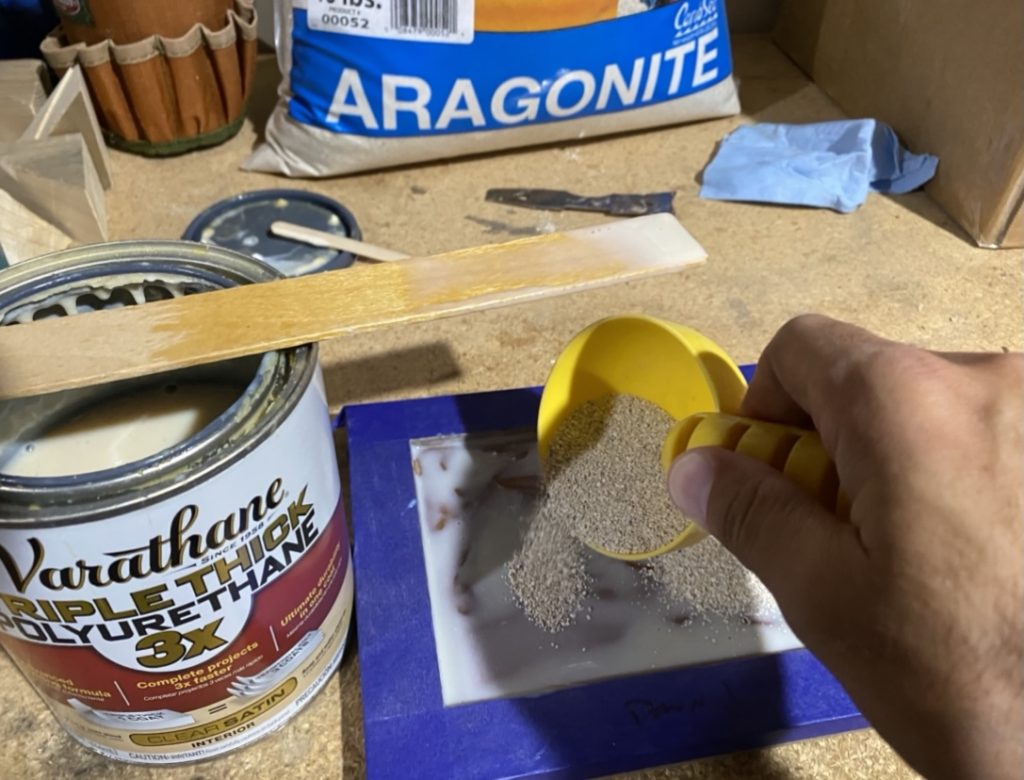
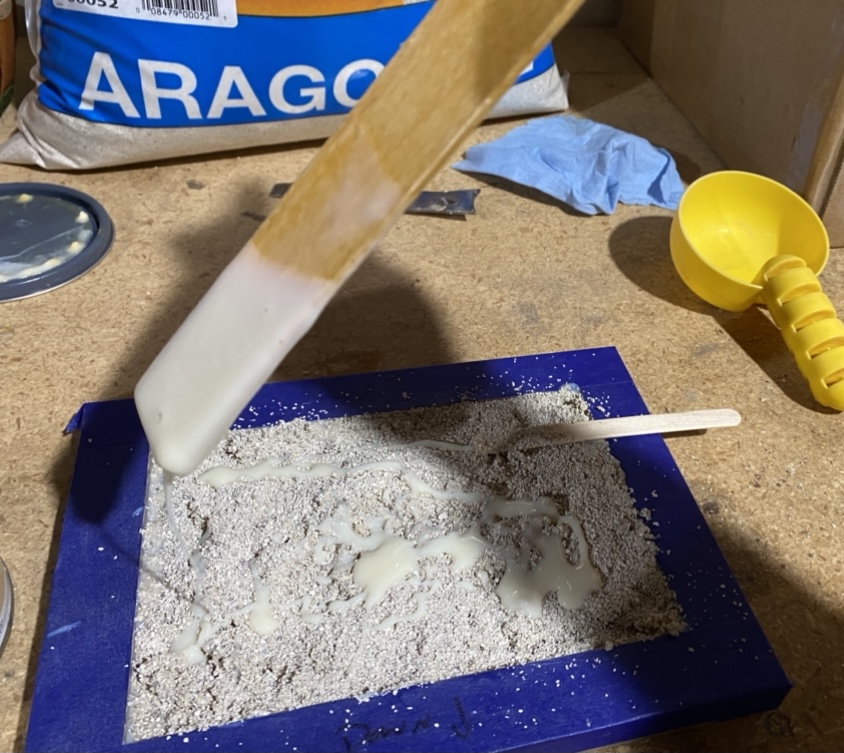
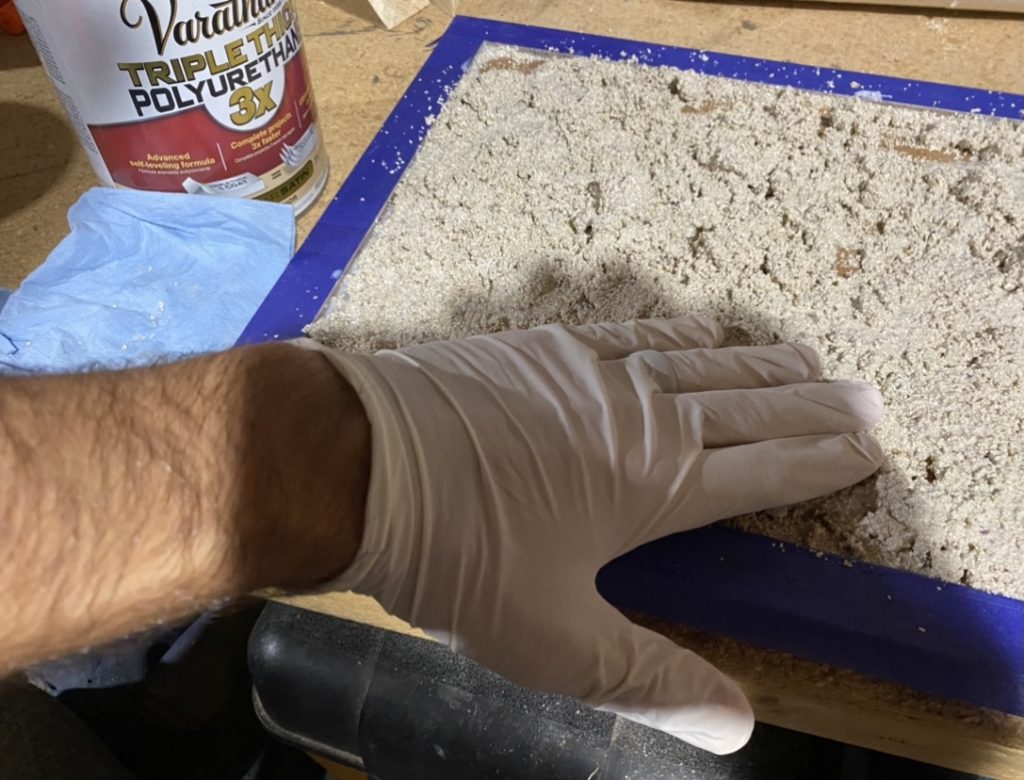
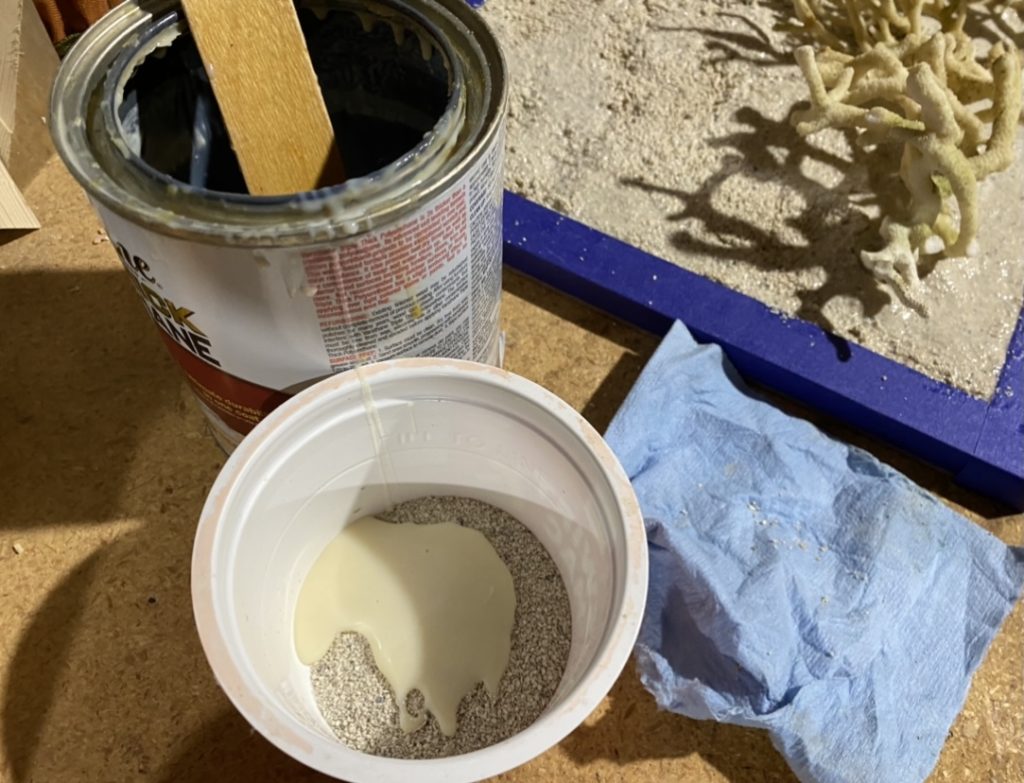
Start by putting a dollop of polyurethane into the frame. I used a paint stir stick to help here. You can pour the poly in or kind of scoop it into the frame with the stir stick. Spread the poly around with the stir stick to cover the bottom. This first layer is important to help bind the sand and the frame back.
Now cover the polyurethane with a coating of sand. Use a popsicle stick to mix the two together in the picture frame.
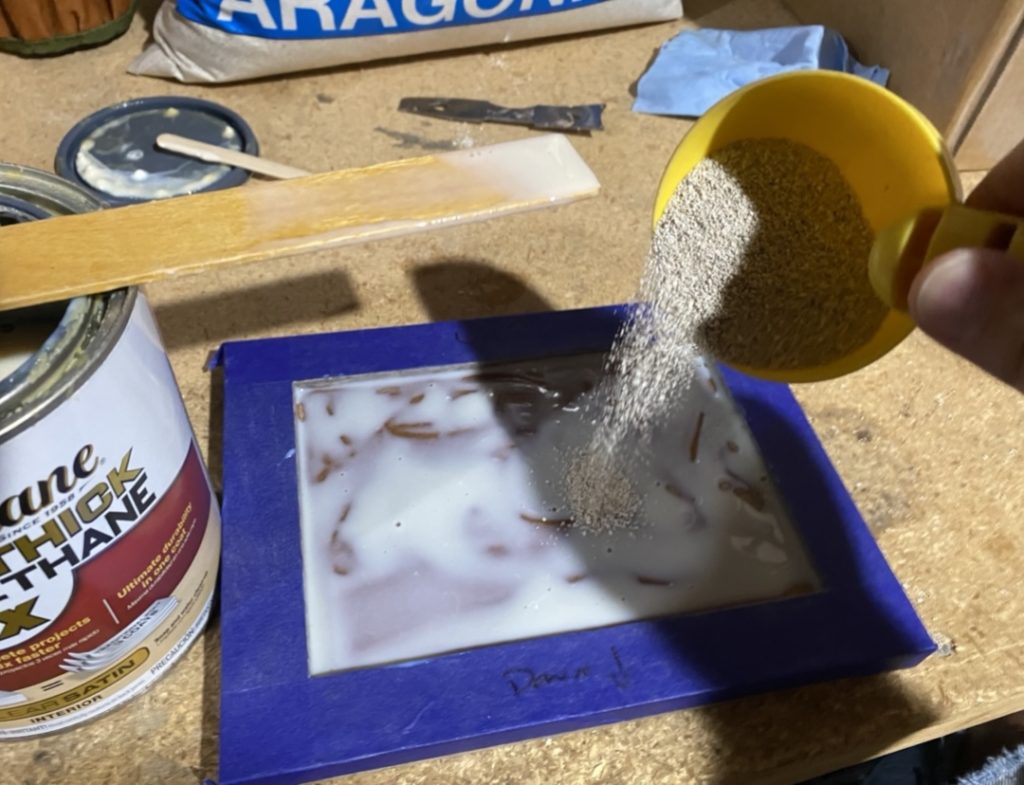
Once that sand is well coated, repeat again by covering the whole frame area with more polyurethane. Then coat with sand and mix again. Continue to repeat this process until the level of the sand comes up to the top edge of the picture frame.
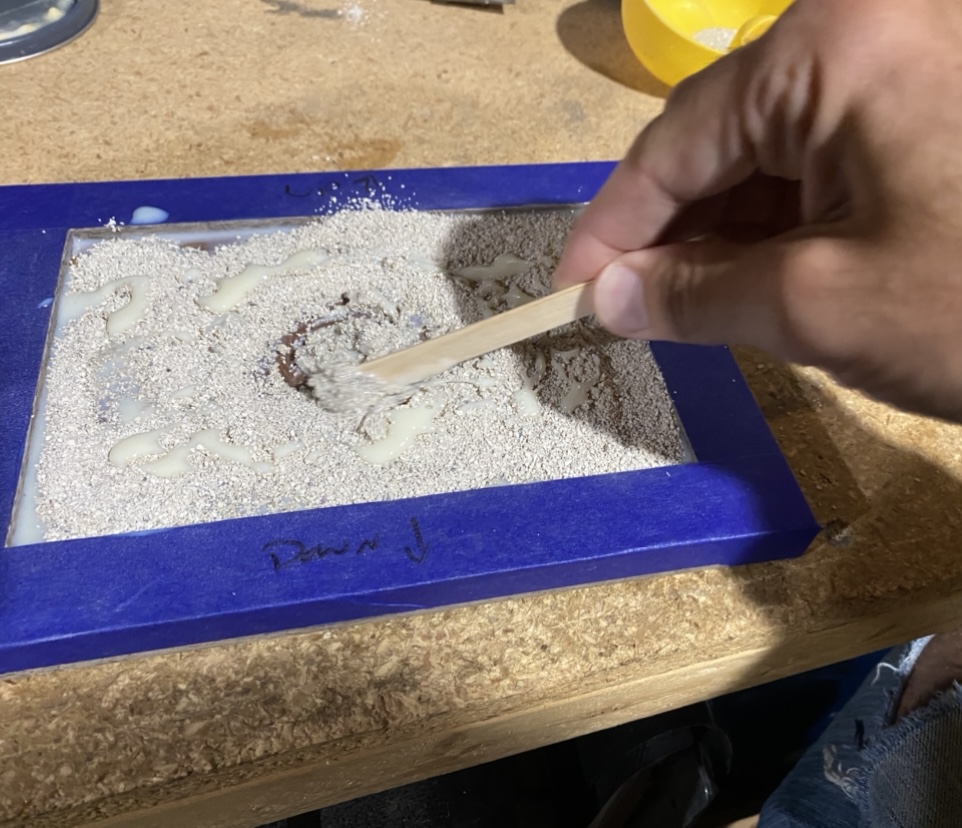
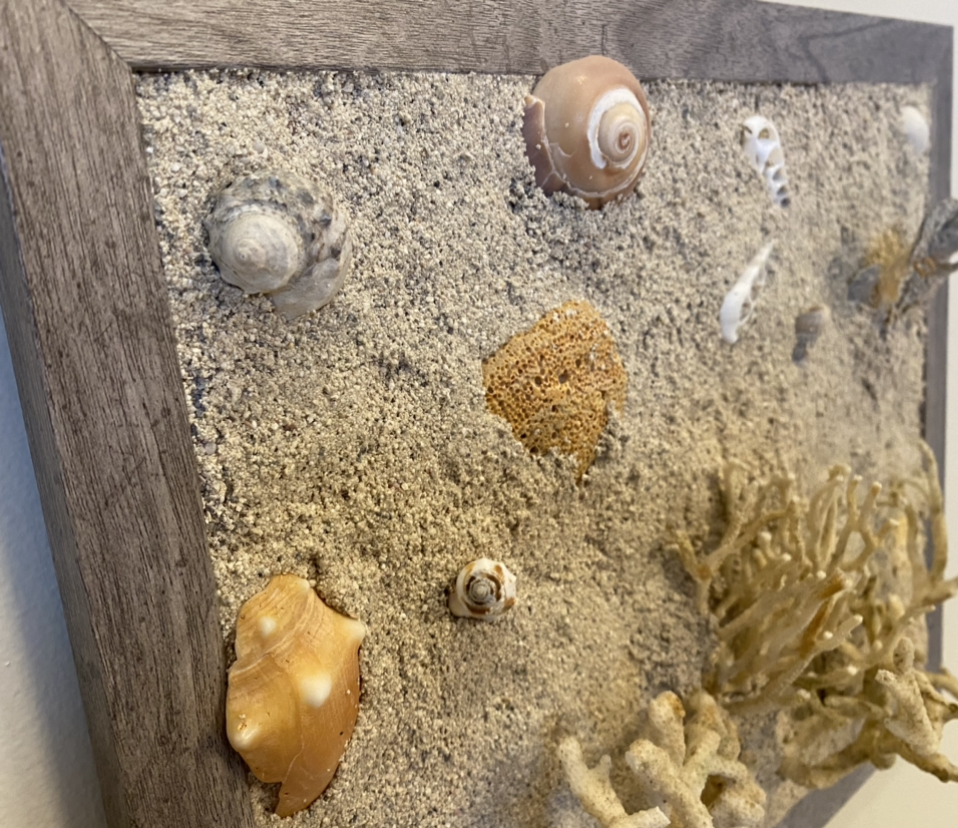
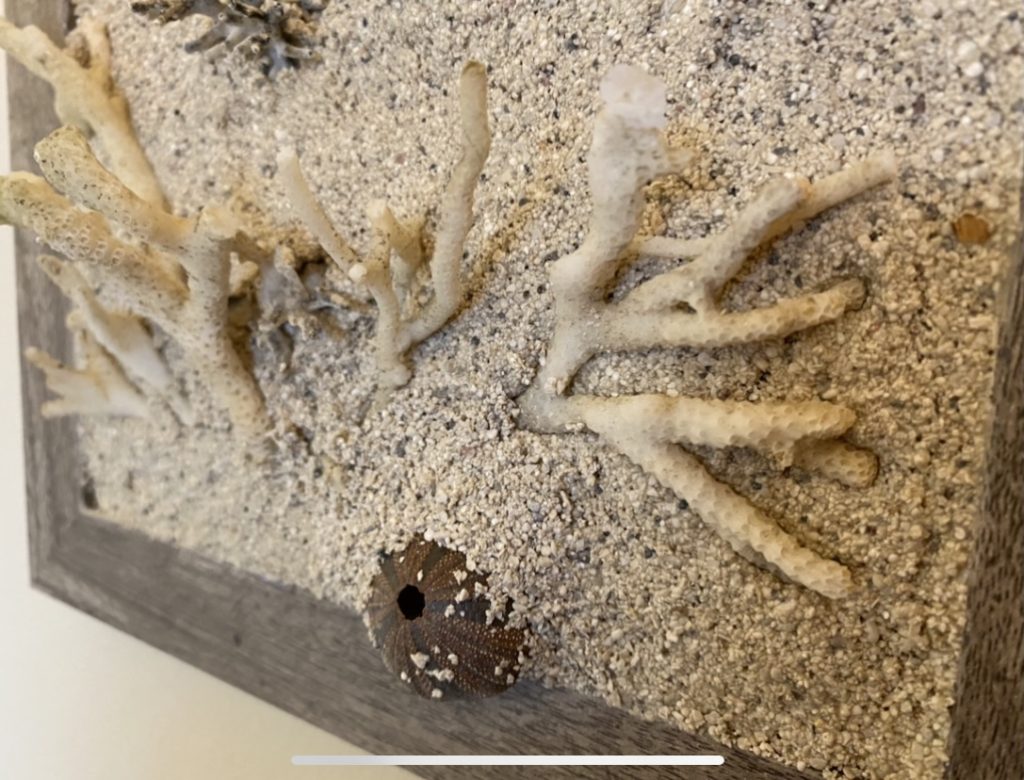
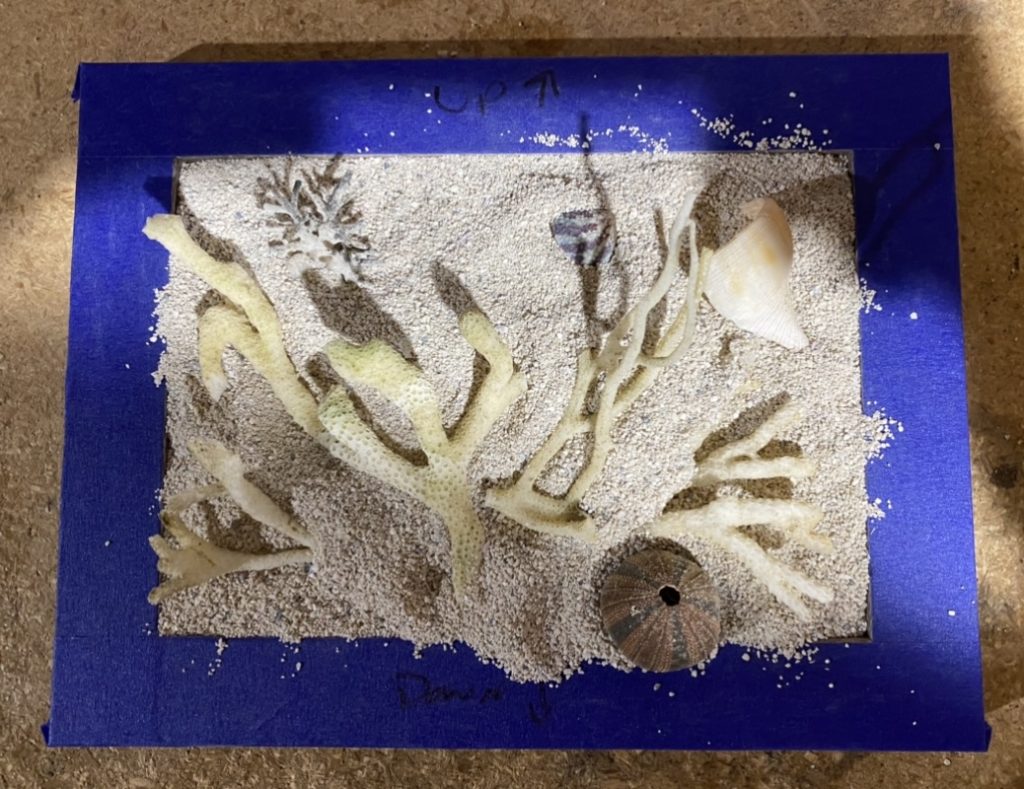
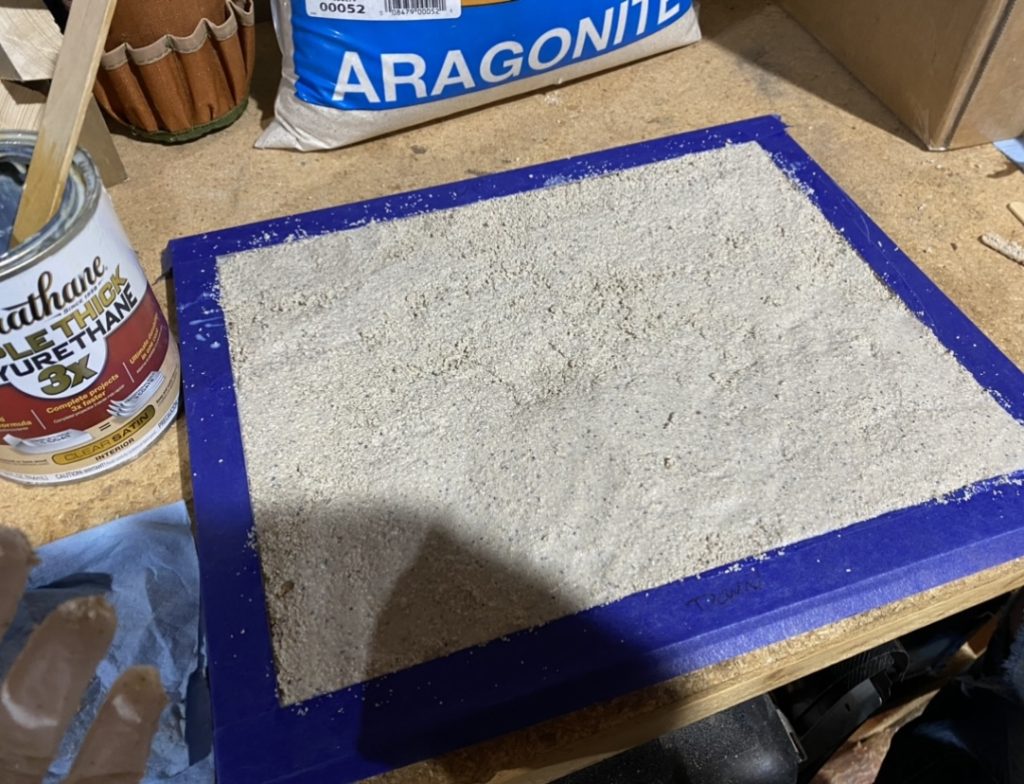
At this point do any “sculpting” of the sand to get your desired look. Maybe flat all across the entire frame is desired, or maybe some “hills” and “valleys” are desired. Feel free to get creative here based on the desired look and corals/shells that will be used.
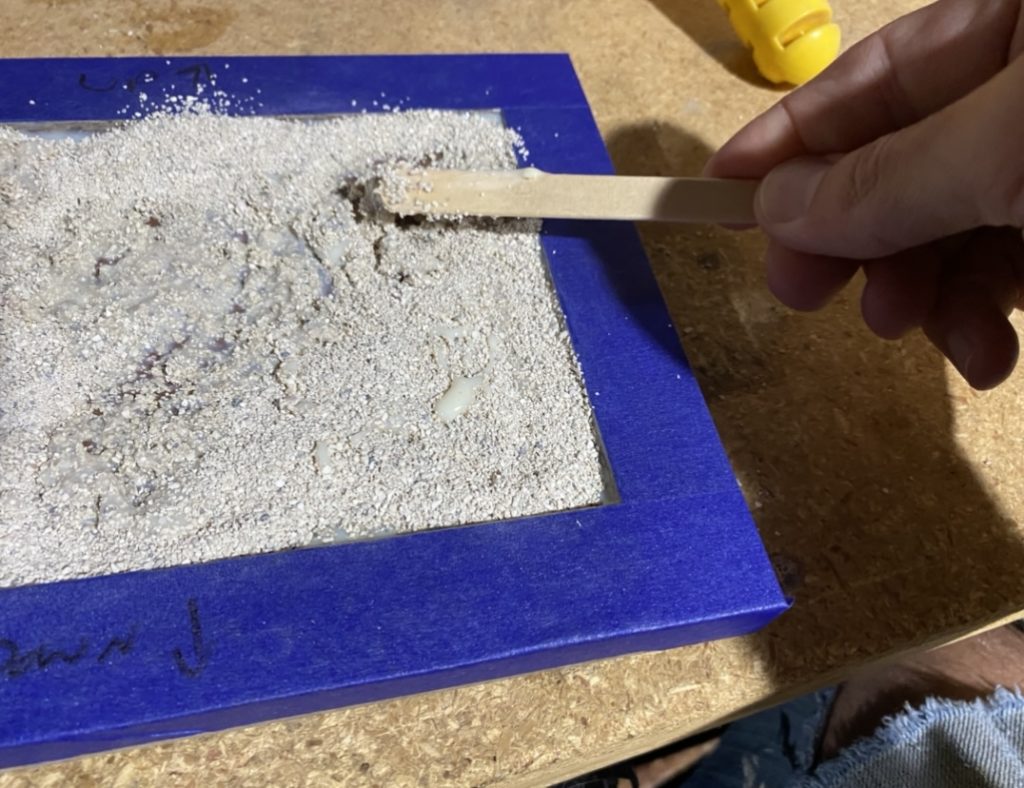
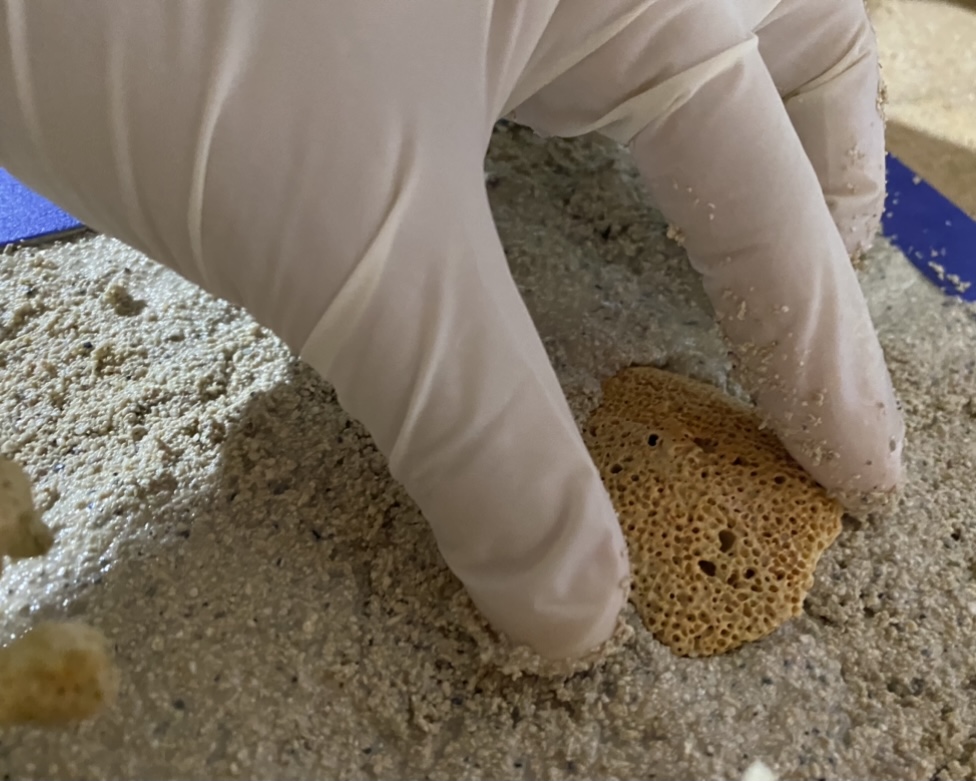
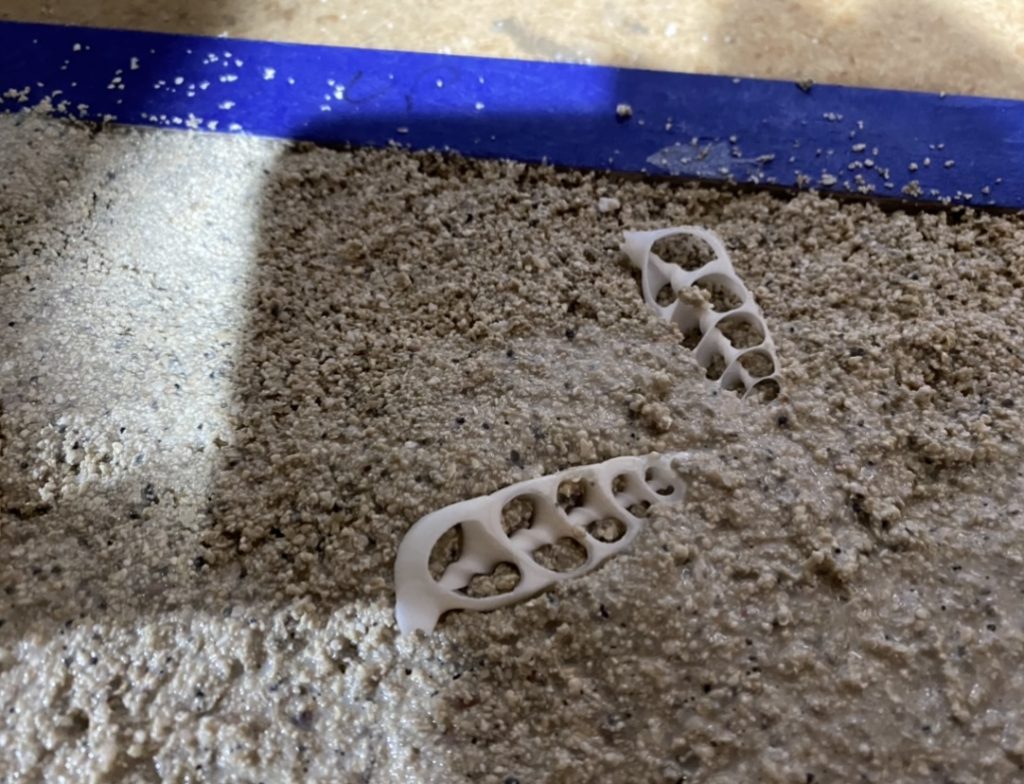
The sand bed should now be ready to start placing corals and shells into it. Press the coral and shell pieces into the wet sand. Use your fingers or popsicle sticks to push the sand up against and over the edges of the coral or shells to “lock” them into place. The polyurethane and sand being “glued” in place is all that will hold these pieces into your frame. So ensure that they are locked into place well.
This is where the reference picture taken earlier can be very helpful. As the polyurethane dries time is of the essence and having pre-meditated the layout and look reduces stress and makes this step go much smoother.
If more sand is needed, at this point it’s best to mix the sand and polyurethane together in a plastic cup/container to make some patch sand. Use the patch sand to pack around shell and coral pieces as needed to ensure they are “locked” in place, or to build up areas that look low or un-natural. Work it in well with your hand or popsicle stick to ensure it blends into the sand bed and looks natural.
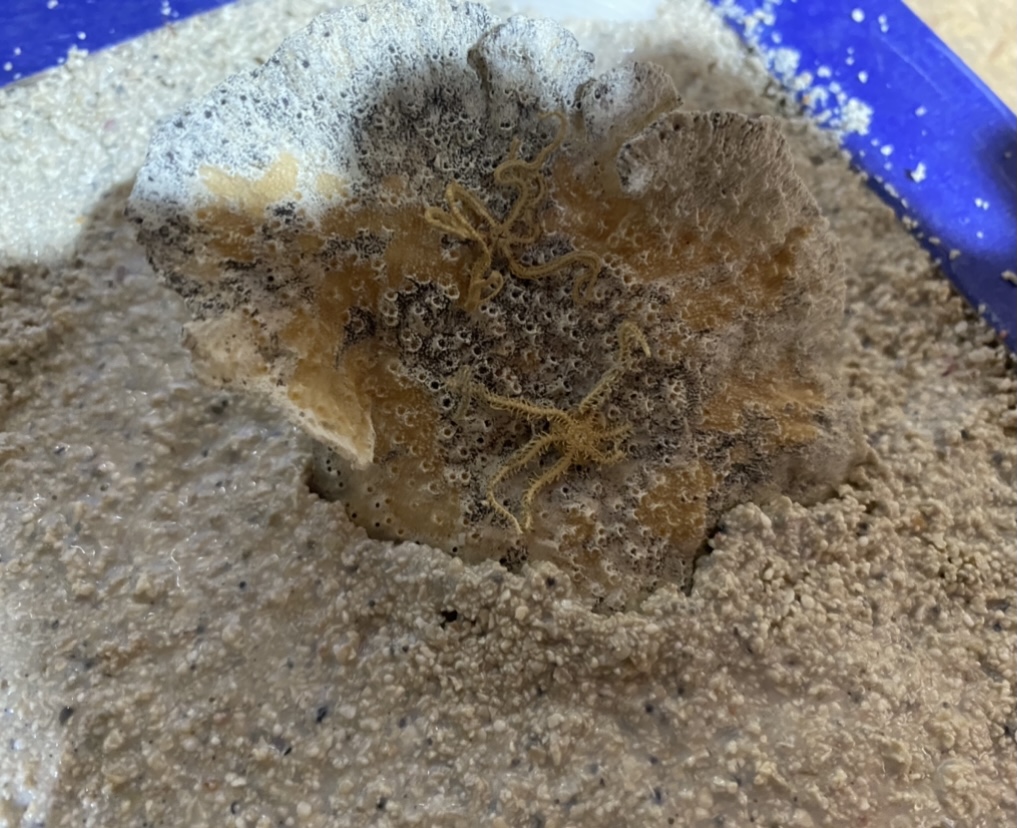
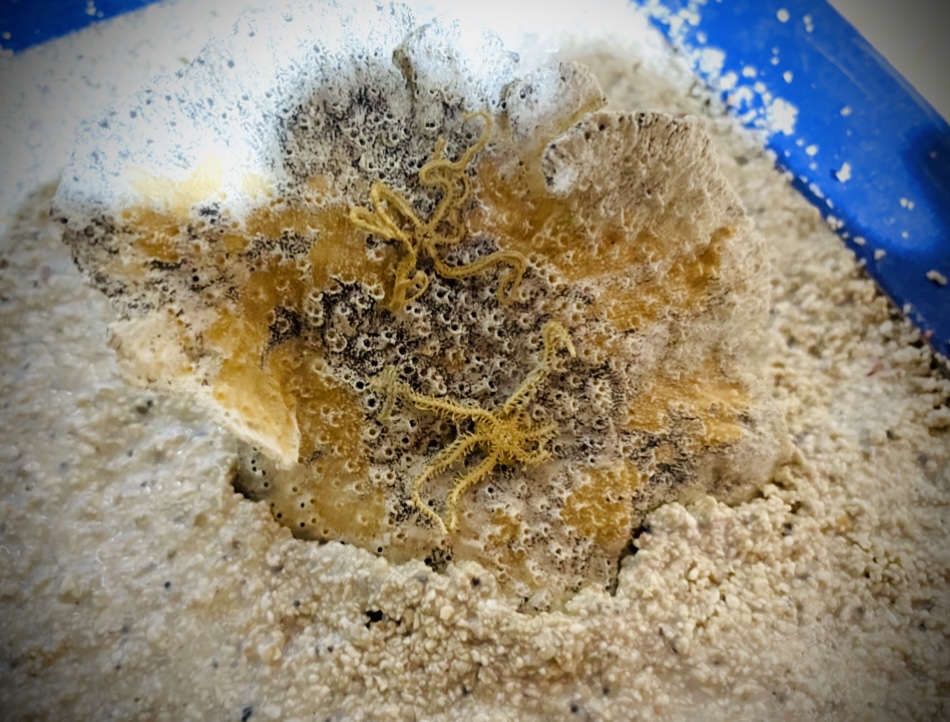
I had one brittle star (small starfish) that was placed on top of a table coral. This is very delicate and can break easily. So I was hesitant to brush any polyurethane onto it. Thankfully they make a spray can of polyurethane. I had an older can laying around that honestly hardly had anything in it. But it was just enough to get a good coating over the top of the brittle star, hold it in place, and should (fingers crossed) protect it long term.
Let the Polyurethane Dry and cure
This step is the patience step. Follow the directions on the can of course as they vary from brand to brand. But all will likely suggest you ensure it cures when the air temperature is in a certain range. But essentially just let it sit flat for days. A LOT of polyurethane was used – more than the average usage of polyurethane which would be a thin coat. In this case, a half-inch thick swamp of polyurethane is mixed with sand and objects. Be patient. If you rush this step, you may regret it in the long run as it may not hold as expected.
Another reason to wait is that polyurethane has an odor to it while it is off-gassing. I typically don’t mind smells much, and due to it being cold outside I brought these into my basement office to cure. They took a good 2 weeks to off-gas – I was surprised it took so long!
Hanging the Coral Picture Frame Art
A typical picture hanging on the wall contains the frame, glass, and a piece of paper (the picture). This coral sand artwork however contains… well… coral, sand, frame, shells, and gobs of polyurethane. That all adds up in weight.
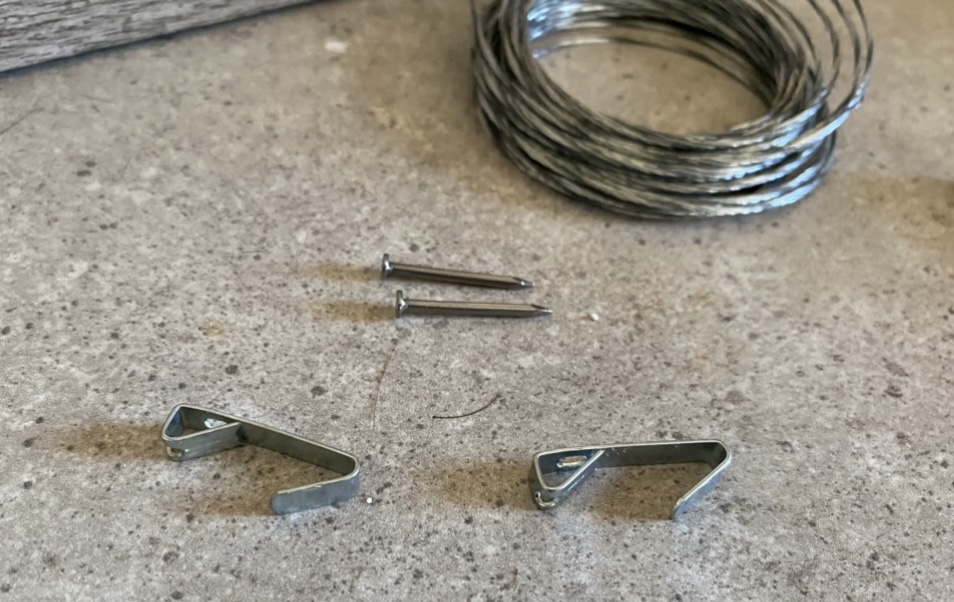
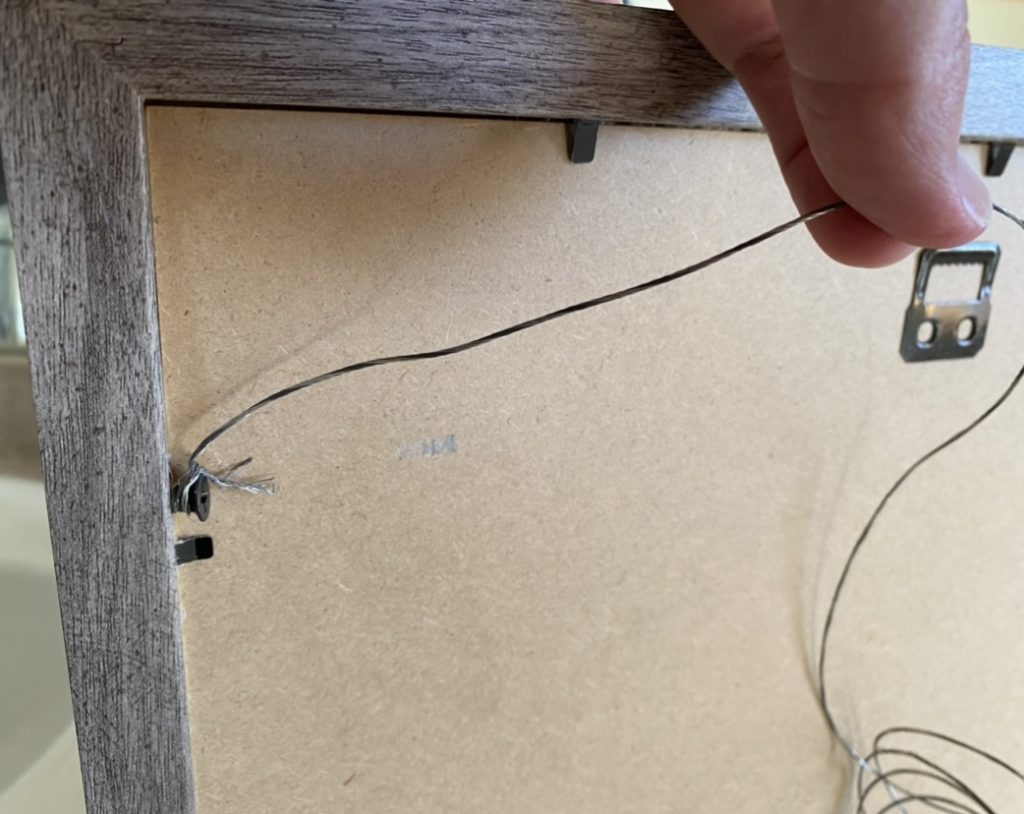
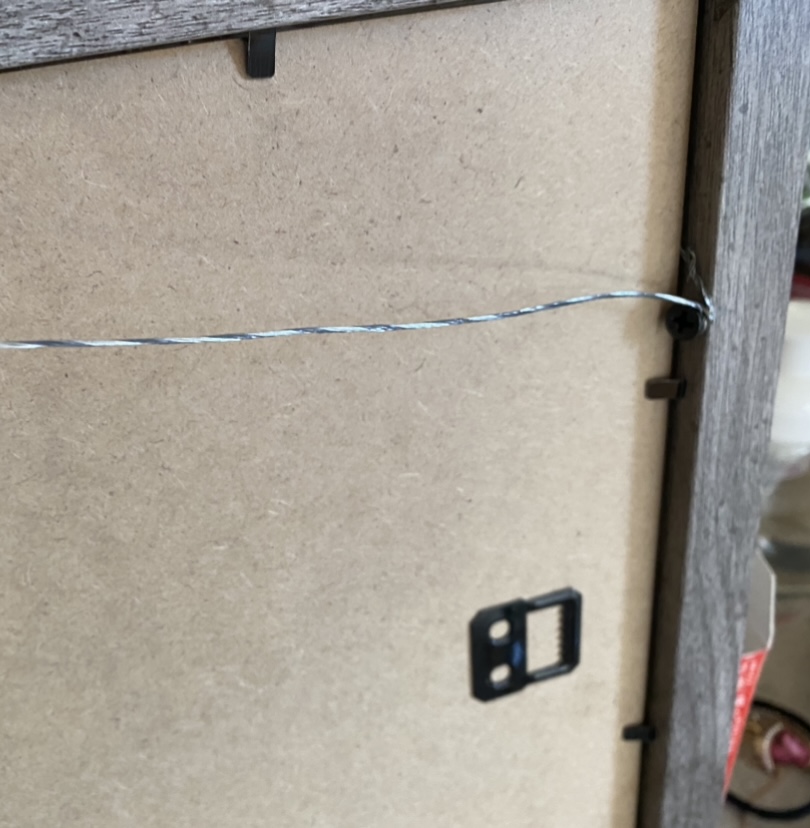
The frames I used had standard simple hangers. How much weight will they hold? I have no idea. Do I trust them with a heavier pieces? Not really. The 8×10 frame I made isn’t very heavy. I didn’t weigh that one, but the 11×14 frame weighs in at 4 pounds. I felt that was too heavy for the stock hanger. For that reason I added a cable hanger on the back screwed into the frame itself with 1″ screws. That then got hung on two nail-in hangers. That extra touch helps me to sleep better at night.
Now maybe this section is out of place… as I realized AFTER I had completed all the artwork that the weight was going to be a concern… So I was using a drill and screwdriver on the back of the frame with the finished art on the front and nearly dropped it a few times as I had to stand it up on end since I couldn’t lay it down on it’s face… So you may want to consider adding the hanger BEFORE you do all the above steps.
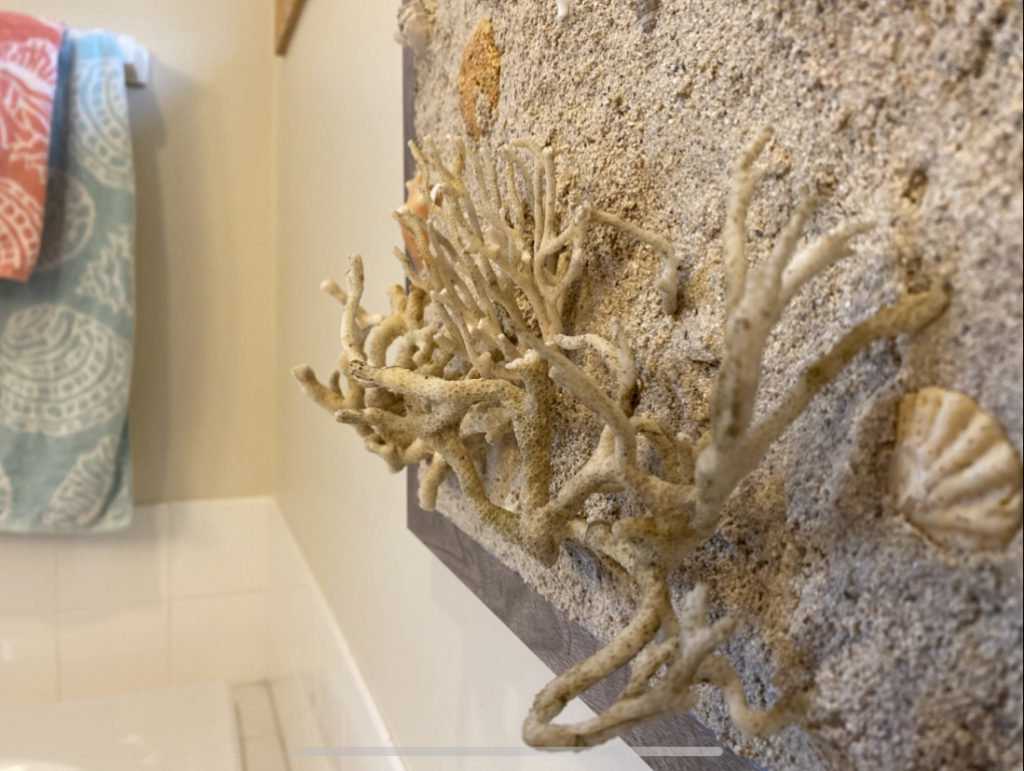
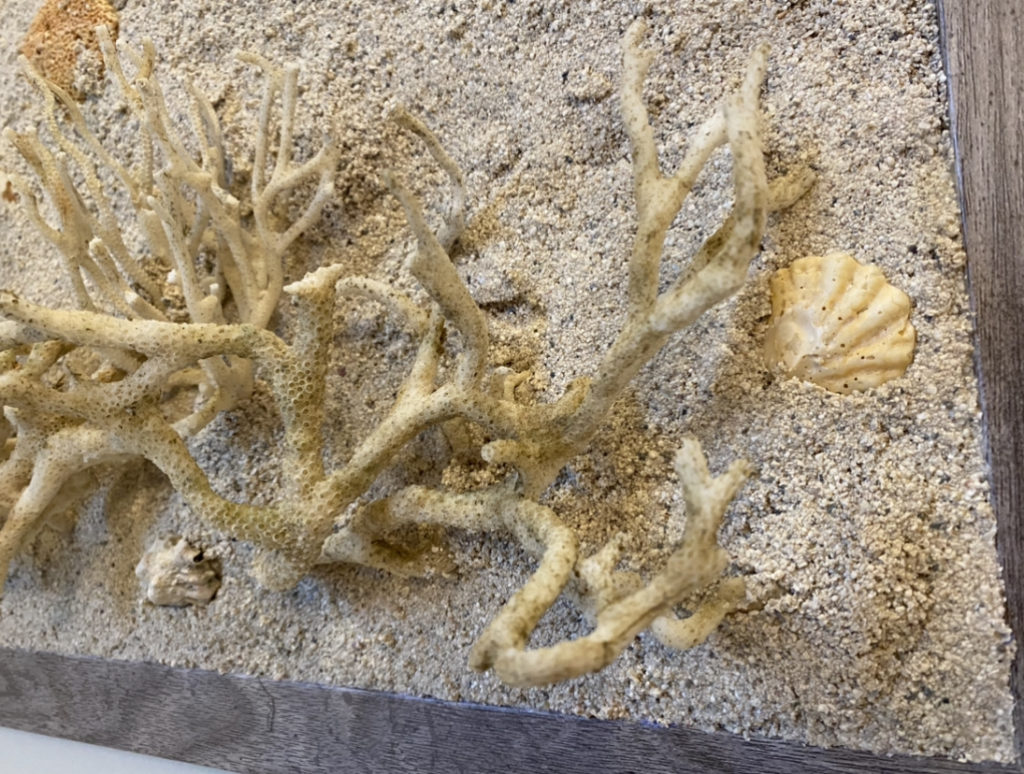
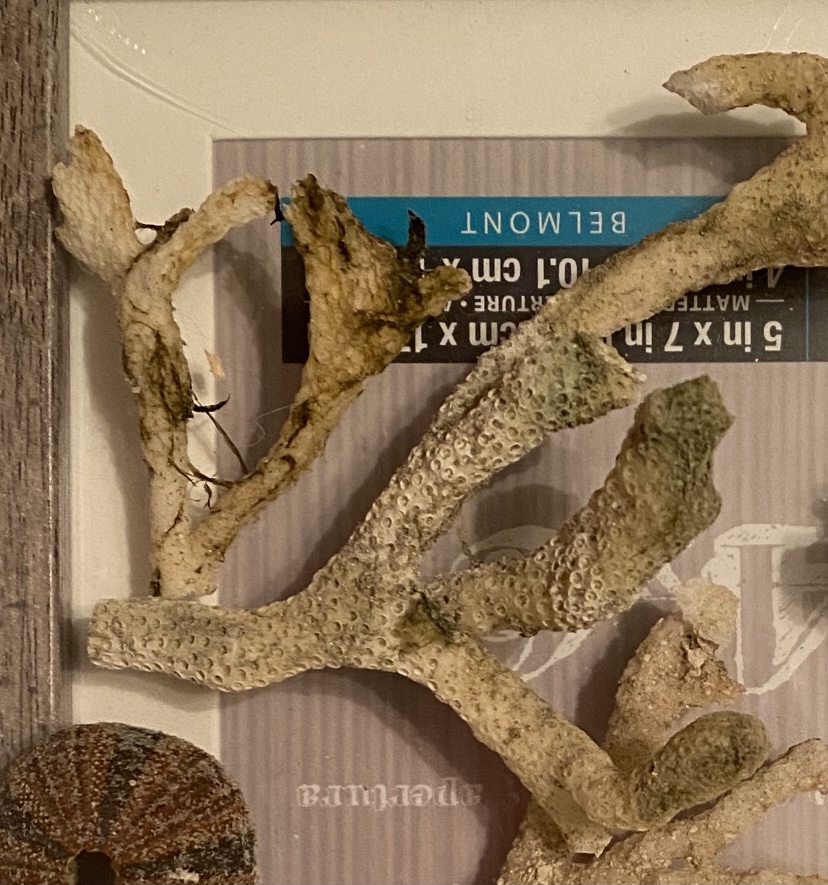
Enjoy the Coral Reef Picture Frame Art
With that all that is left to be done is enjoy the coral art without the need to do water changes, buy salt, worry about phosphate, levels, etc. This maintenance free coral reef is now ready to bring the joy of the ocean to your home!
And I’m going to wrap this up with some beauty shots for you to enjoy!