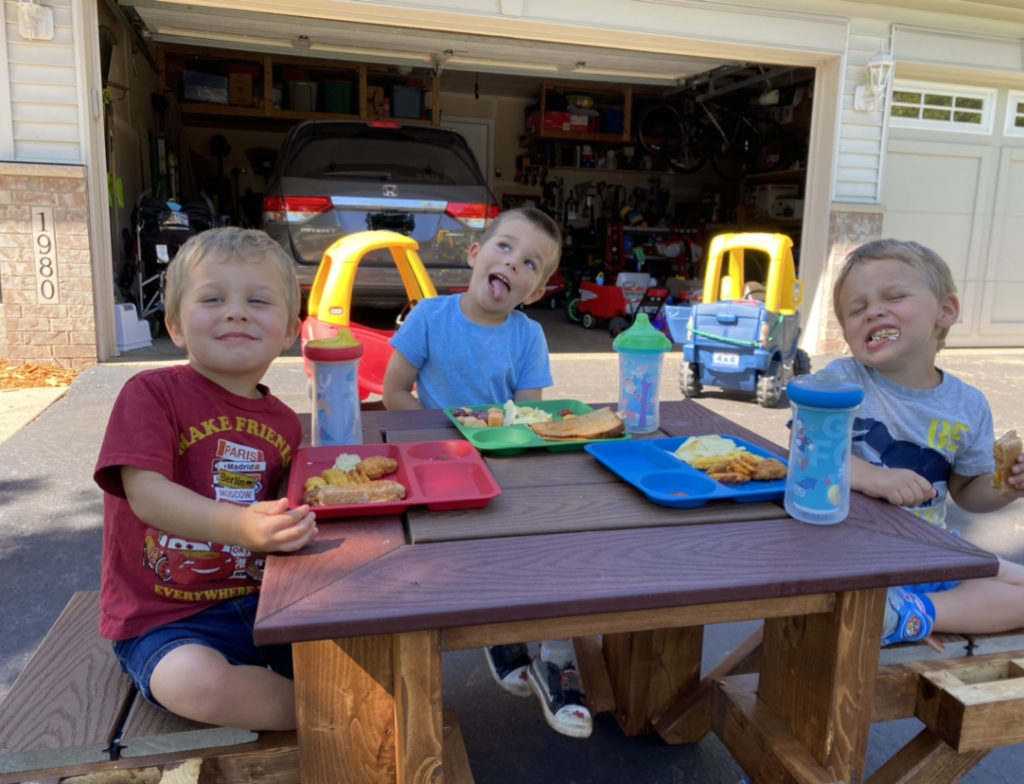
The kids LOVE eating outside in the summer months. The nice weather, the picnic or grilled meals, and the opportunity to run and play when done or in-between bites. We have a Step2 kids picnic table, however I’ve found two major issues with it. First, the top has rounded edges and so the plates tend to fall off of it easily. Secondly – and more importantly – it has 2 benches and I have three kids. The benches are wide enough and there are enough seats, but if my kids sit next to each other there seems to be fights and food falls on the ground.
I figured the only way to fix this is to separate them – they each get their own sides to sit. I looked at the marketplace and there really aren’t any great options in a kids sized picnic table. So I felt I really had only one choice – as often – to make it myself.
In my research I came across a great resource, Ana White, who has created an adult size version of a picnic table that is exactly what I’m looking for. You can find her plans here: https://ana-white.com/woodworking-projects/square-picnic-table I’ll pass all credit of the concept of my table to her, however I did come up with the kids sized scale as well as my own design flair.
The dimensions were designed for and tested with my 3 year old twins and my 5 year old. It’s the right size that the younger boys can get onto the seat easy enough and there is plenty of room for the older child to grow and still fit.
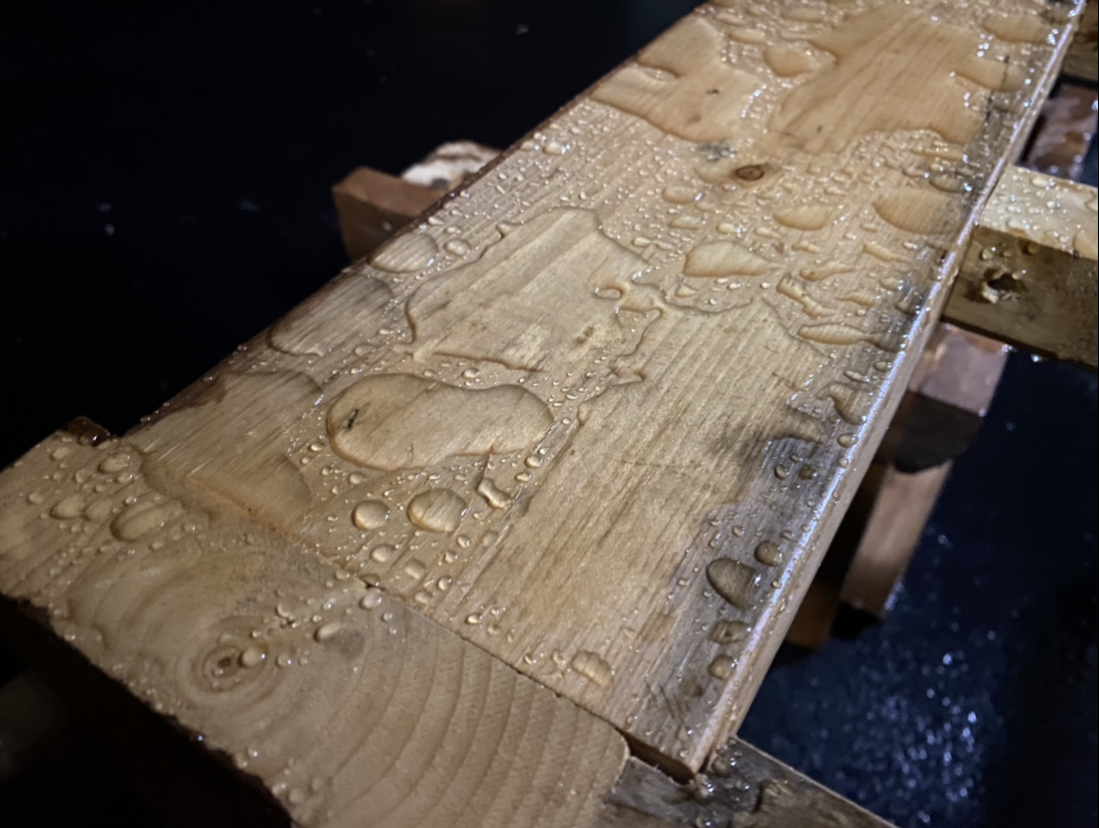
I recently built a deck using Trex decking materials. I had cutoffs and an extra board to work with – just enough to put together the picnic table for the kids. Additionally, the lumber yard used 2×6 lumber under the decking as “packing material”. These boards were perfect for building the frame and structure of the table. While the 2×6’s aren’t green treated, a good coat of spar urethane did the trick to weather proof the lumber.
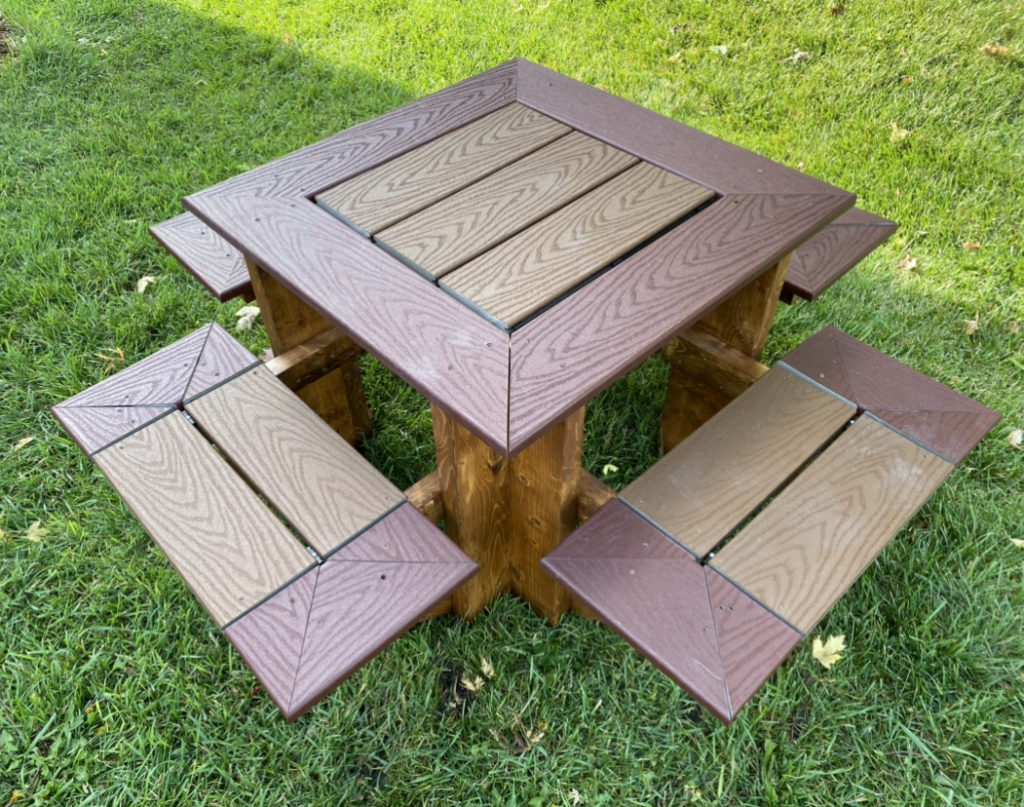
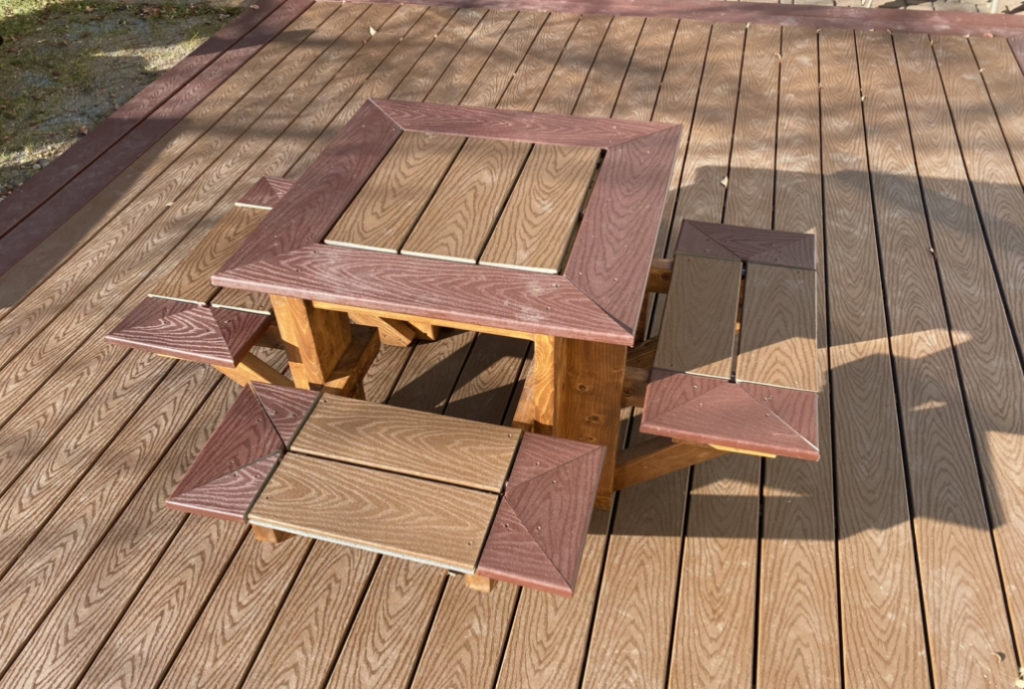
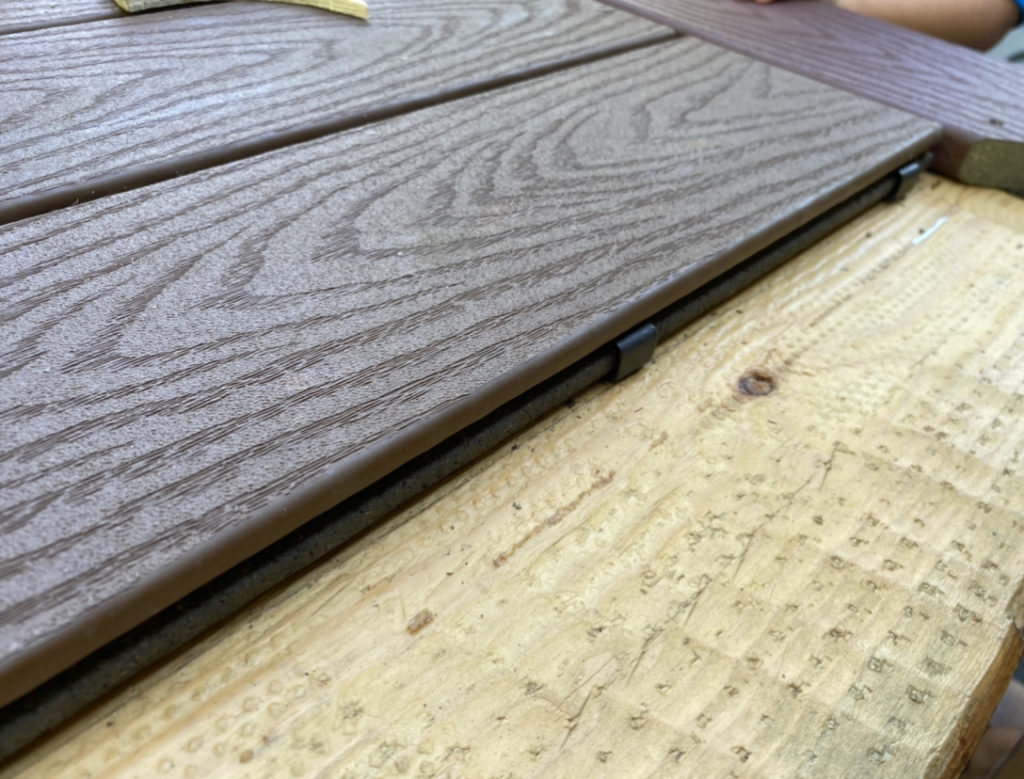
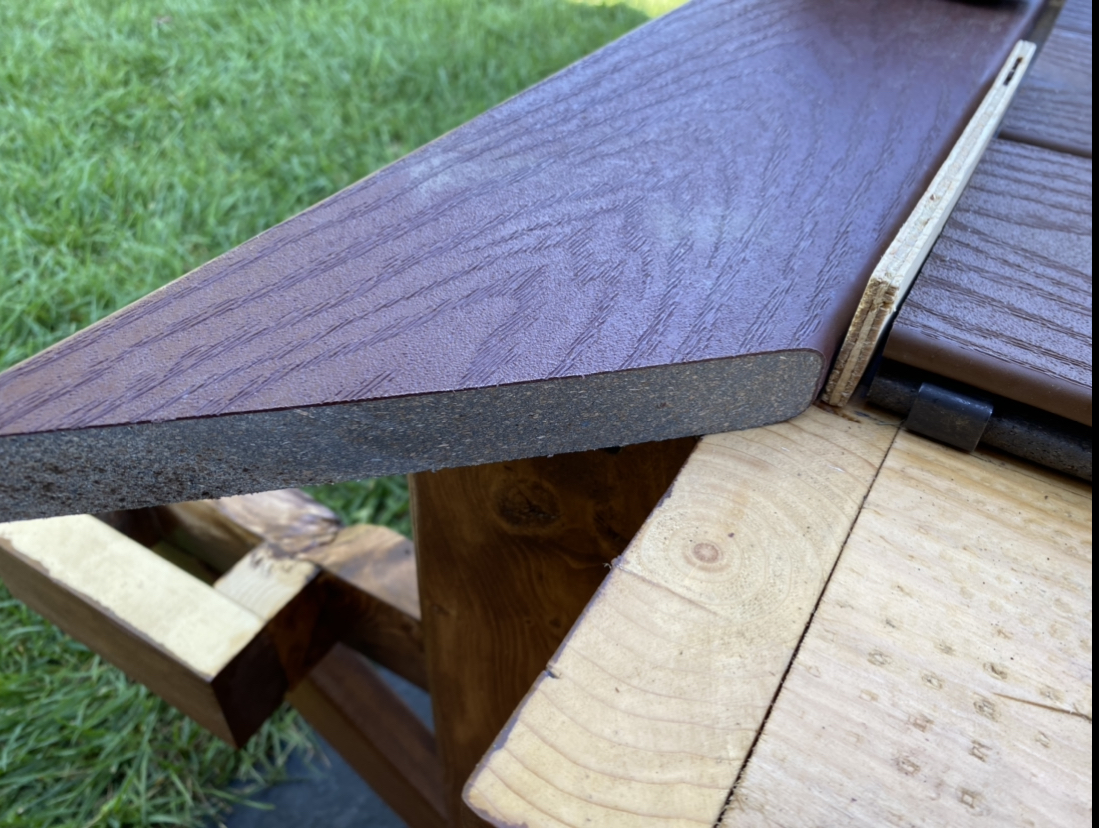
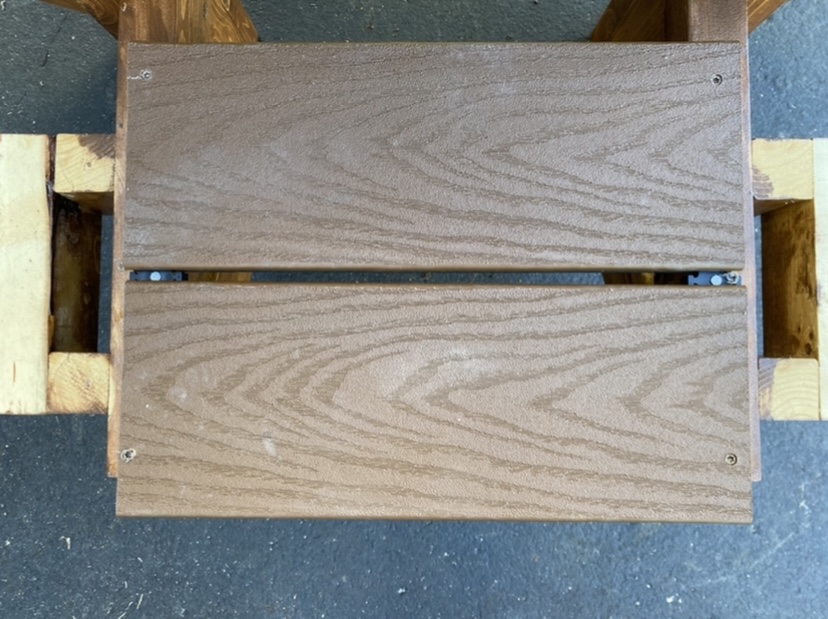
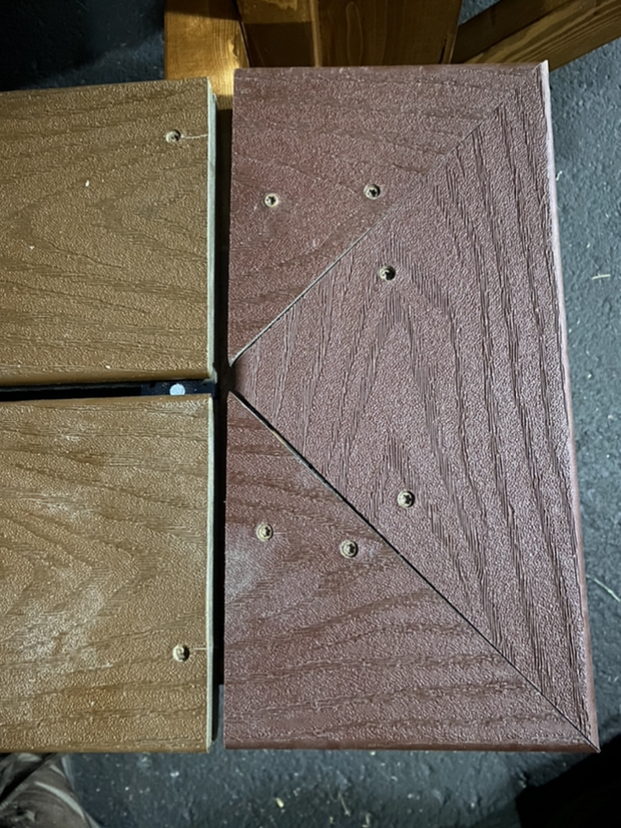
The top of the picnic table I designed has a single course of picture framing on the outside with a lighter color cross bar pattern on the inside. This matches the design used on the deck this compliments. The seats have two cross bars with a endcaps that have a diagonal cut through them. This design allows for the Trex decking finished edges to cap the outside. It really makes a stunning visual image.
The construction grade lumber substructure consists of uprights and a support for the top. The seats are constructed with horizontal supports mounted to the uprights reinforced by angled supports. The end result is a very robust and durable structure that really is overkill for the weight of the kids that will be on it. Several adults have sat on this picnic table as well and I have had NO concern about it’s stability. This kids picnic table is ready for the rigger that your kids will put it through!

Contents
Materials List
This list encompasses all the materials you’ll need. This does not cover the tools, applicators for the stain and urethane, etc. Most people have a collection of those supplies or personal preferences as to which tools to use, so I don’t feel it’s worth covering here.
| Qty | Size | Description | Used For |
|---|---|---|---|
| 2 | 5 1/2″ x 12′ | Trex Select 1″ Square Edge Board | Picture Framing, Seats |
| 1 | 5 1/2″ x 16′ | Trex Select 1″ Grooved Edge Board | Cross Bars, Seats |
| 3 | 2″ x 6″ x 12′ | Pine Construction Lumber | Substructure |
| 14 | Trex Hideaway Plastic Fasteners with Screws | Fastening Decking | |
| 14 | Trex Hideaway Start Clips | Fastening Decking | |
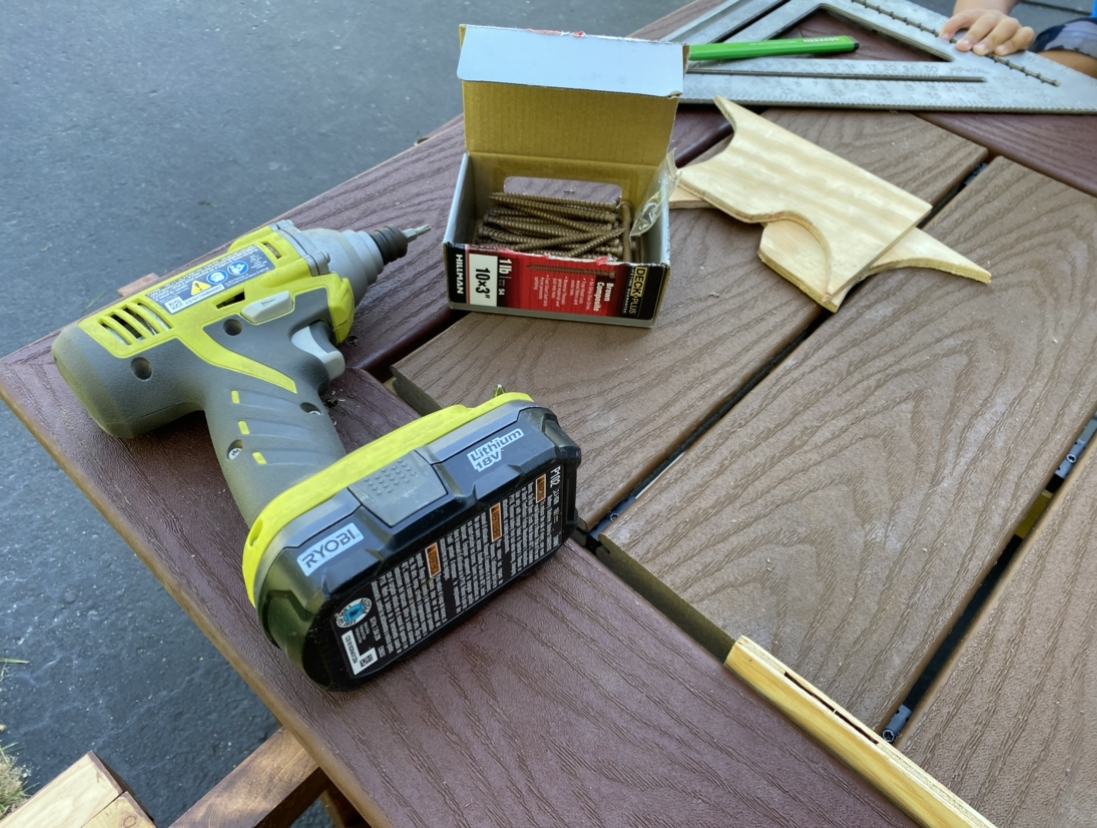
| 72 | 2 1/2″ | Composite Decking Screws (colored head to match Trex Select boards) | Fastening Decking |
| 160 | 2 1/2″ | Galvanized Construction Screws | Fastening Lumber |
| 1 | Quart | Stain | Finishing the Substructure |
| 1 | Quart | Spar Urethane | Protecting the Substructure |
Sourcing Materials
Materials can be sourced from many locations. The links in the materials list above are examples of the products used and one possible location to source the materials. There are many ways to source the materials and each come with a varying cost and convenience to obtain.
The lumber lengths are long and thus that makes transportation a possible hurdle. Many lumber yards and big box stores will do delivery and/or rent trucks, but those come at an added cost. However, there are ways to shorten the lumber at the store for ease of transportation. Many stores have saws and/or cutting services available. If not, bring a saw (hand saw or battery powered circular saw) with to the store and cut the long boards into smaller pieces in the parking lot. Be sure to have the cut list (see below) on hand if cutting the lumber at the store.
Here are some possible ways to source materials:
- One Mans Junk Is Another Mans Treasure
- Look on Craigslist or Facebook Marketplace for scraps and extras for sale
- Ask friends or family if they have materials they don’t need/want
- Freecycle
- Habitat for Humanity ReStore
- Local Lumber Yards
- Support local stores when you can. They are the backbone to our society!
- Big Box Stores
- Home Depot
- Menards
- Lowes
- Online eCommerce Sites
Blue Prints
The step by step instructions below should be a sufficient guide for building this kids picnic table. To accompany the instructions though, blueprints have been sketched as well.
Cut List
Use the cut list to optimize your lumber and obtain the pieces needed.
NOTE: The dimensions in these plans assume that a Full Kerf saw blade (1/8″ thick) is used.
Steps to Build
Follow the directions below to construct a square picnic table for your kids. This project will take a few days to build as there are several pieces to it and the finishing step for the sub-structure involves stain and a clear coat.
It is strongly recommended to use a countersinking bit before driving the construction screws into the pine boards to prevent splitting and cracking. This will ensure a long lasting and strong build.
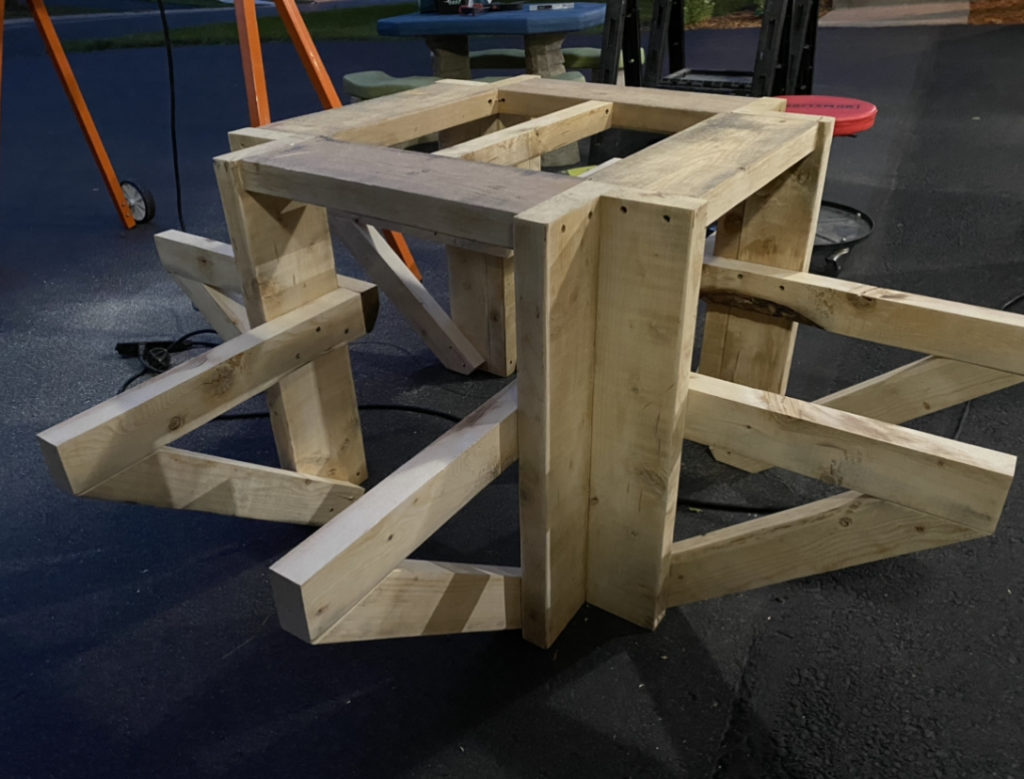
Picnic Table Substructure
The substructure was made of construction grade lumber – mainly on the basis that I had it available. Additionally I had a half quart of spar urethane that I could coat it with. If I were to build this again, I may have chosen treated lumber as it would not have needed the spar urethane, however I’m not sure I want my kids legs rubbing against the treated lumber, and them eating near it. It’s so full of chemicals that it makes me nervous about using it. The urethane dries to a hard film finish and thus I have less concern personally.
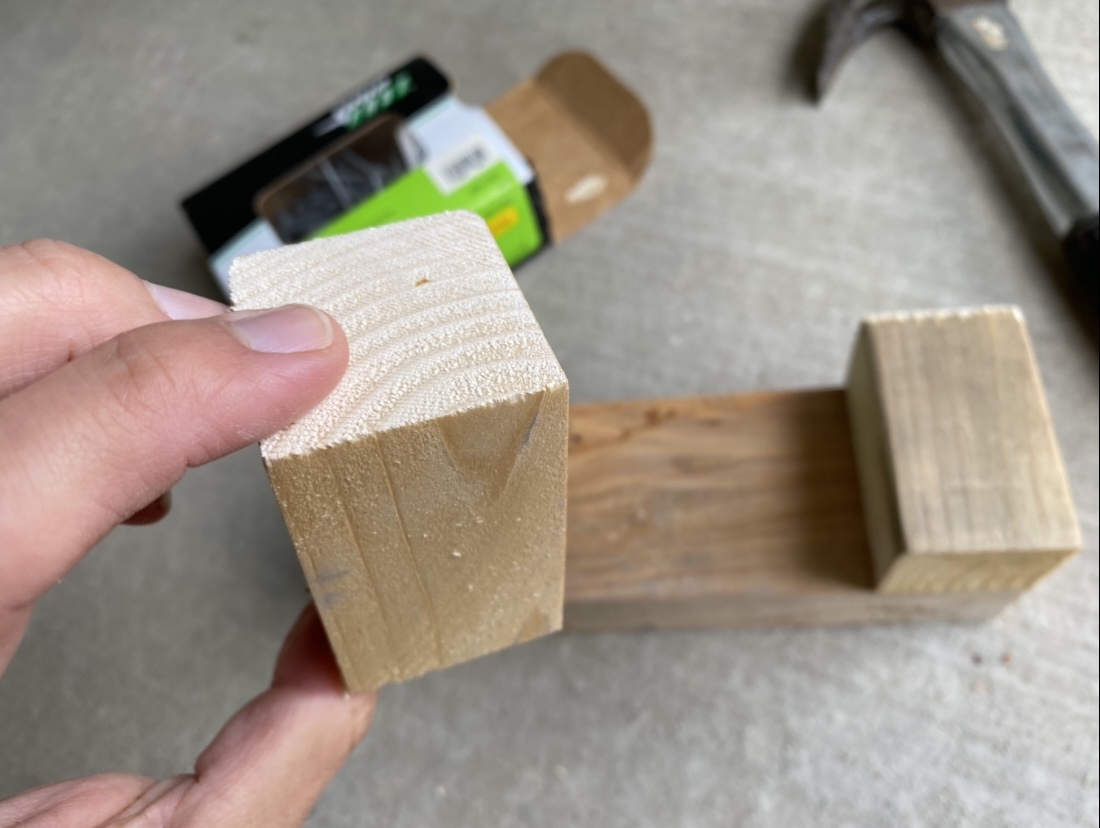
The Uprights / Table Legs
- Cut 8 pieces of 2″ x 6″ lumber at 22″ long for the upright supports.
- Rip 4 of the pieces lengthwise to be 4″ wide by 22″ long.
- Screw one narrow piece to one wide piece to create an L shaped leg using 3 construction screws. Repeat this until you have 4 legs.
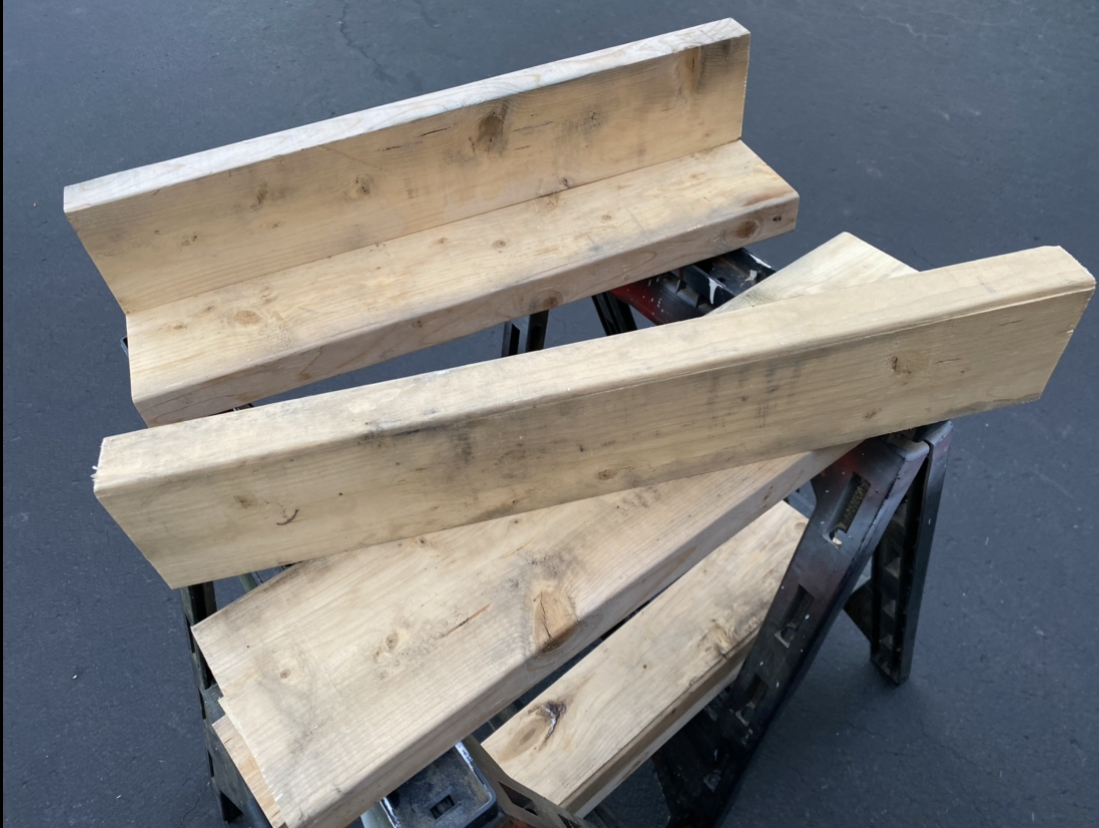
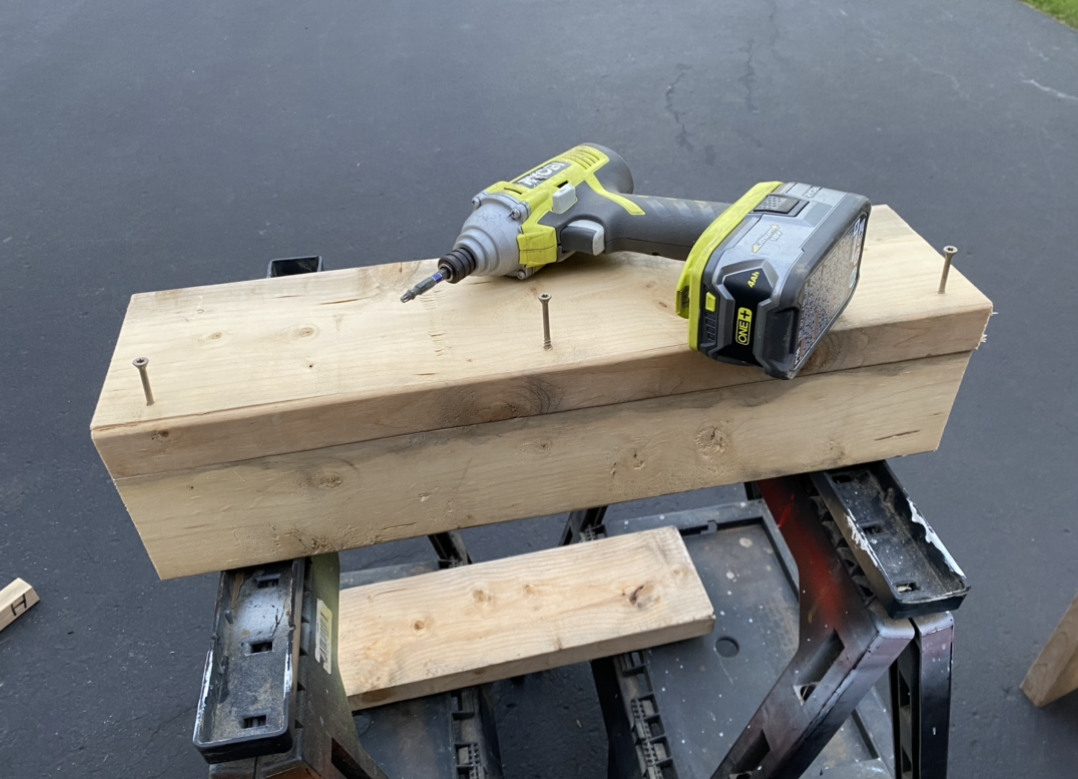
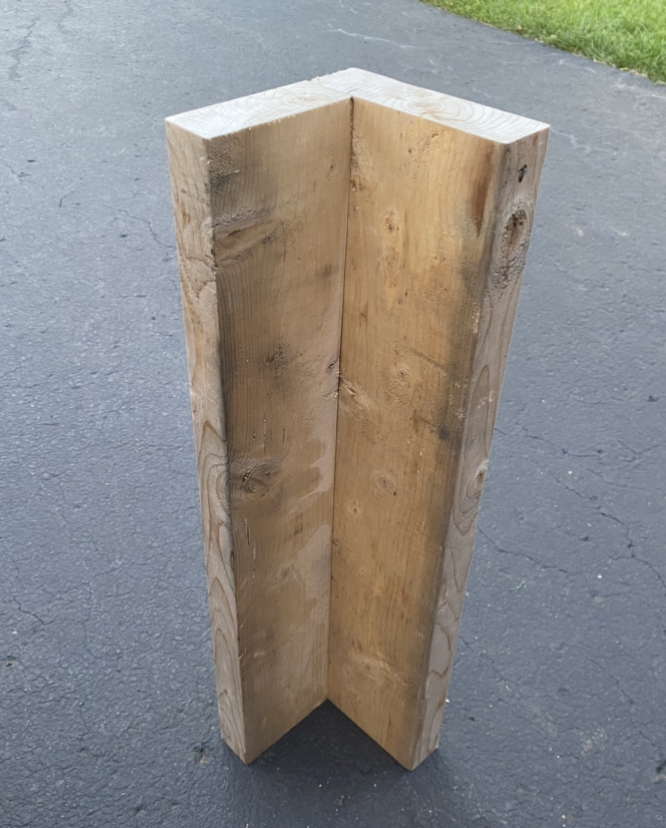
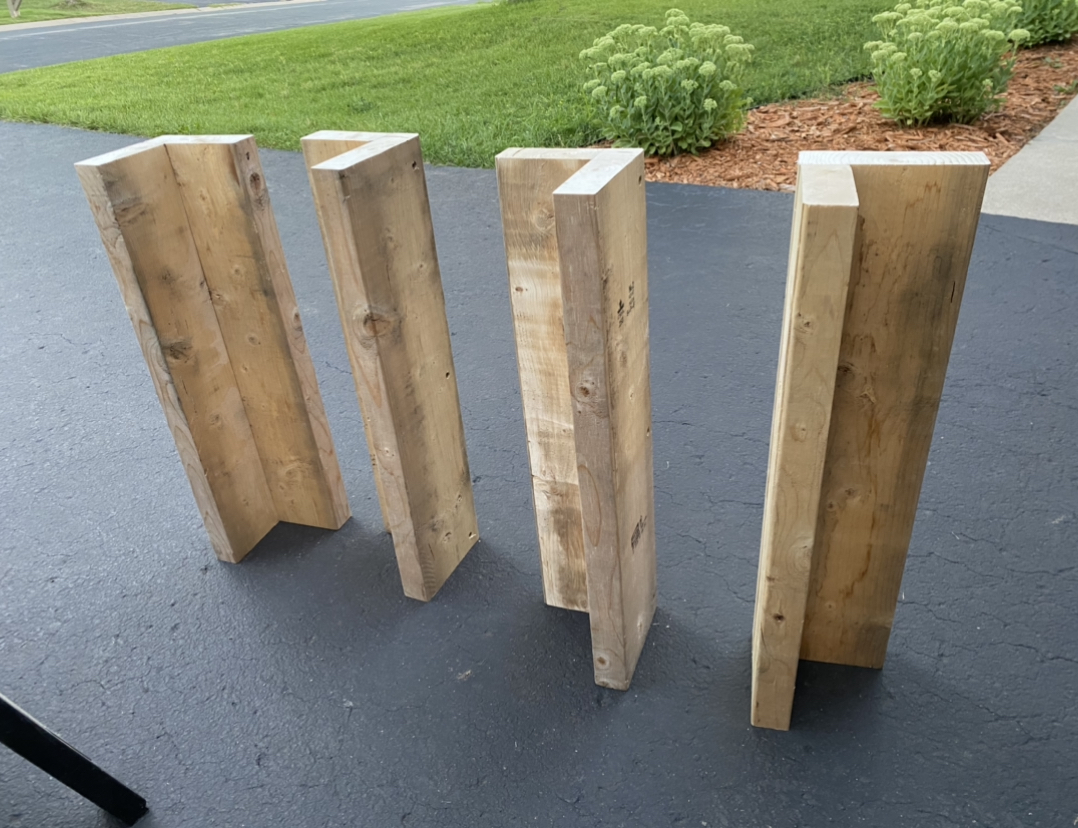
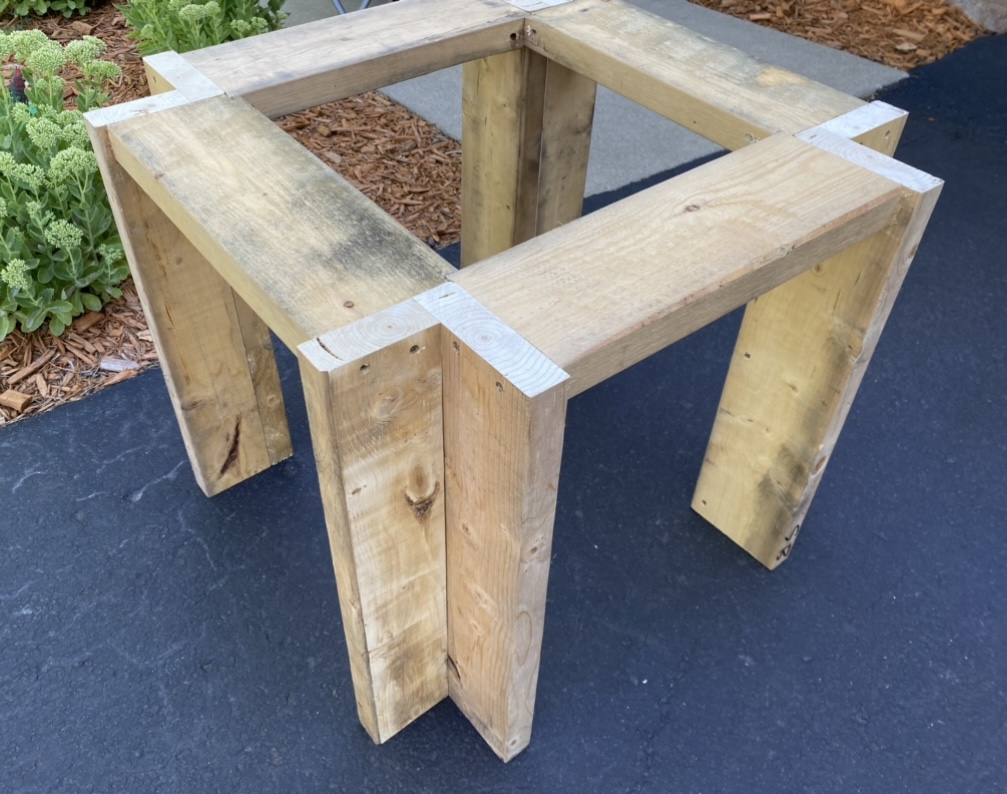
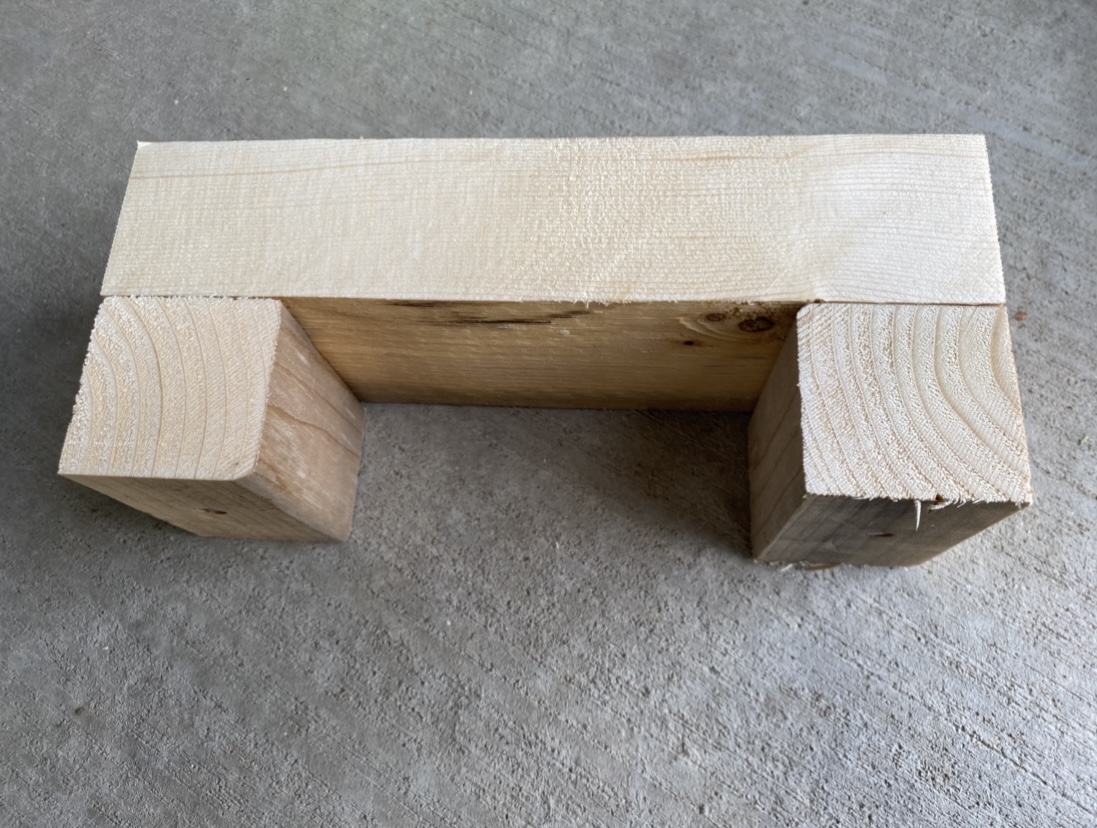
Table Top Supports
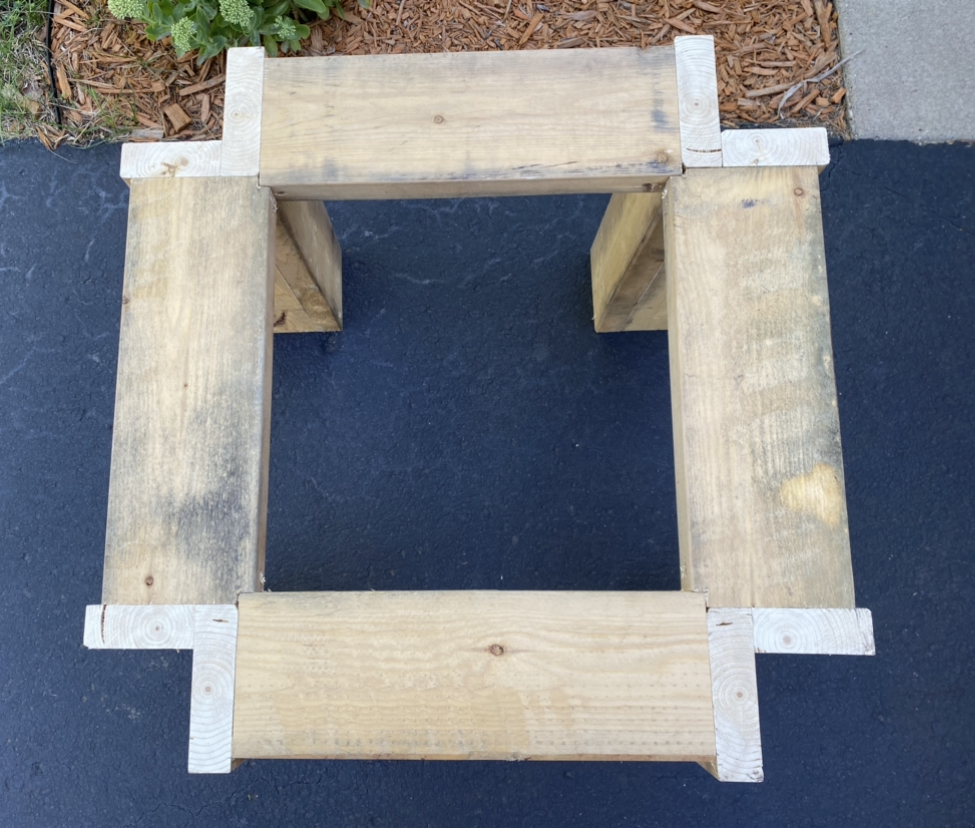
The next step is to connect the legs and build a frame for the table top to be mounted to. These will be made of 2″ x 6″ lumber. They get inset a little bit and thus two of the boards need to be notched at the corners for them to fit just right.
- Cut 4 pieces of 2″ x 6″ lumber at 16″ long for the table top supports.
- Cut a scrap cutoff piece from upright supports to 15 1/4″ long for the middle table top support.
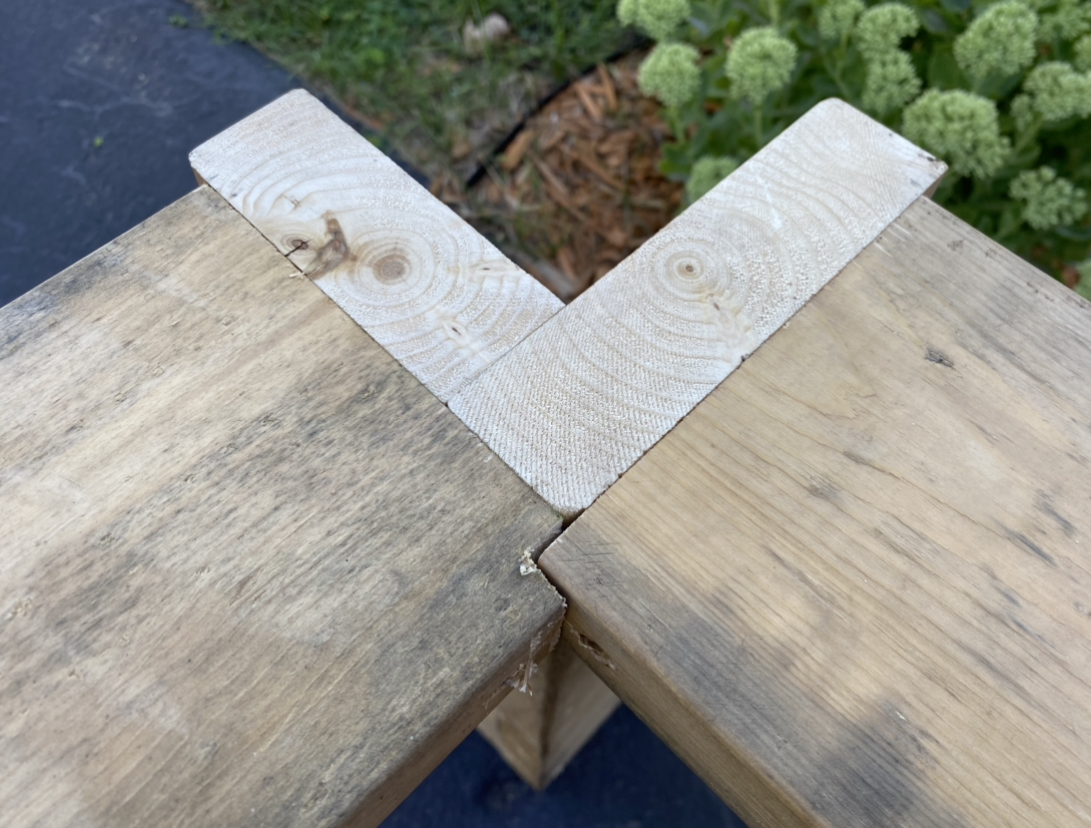
- Cut a 3/8″ by 3/8″ notch into the back corners of 2 of the table top supports.
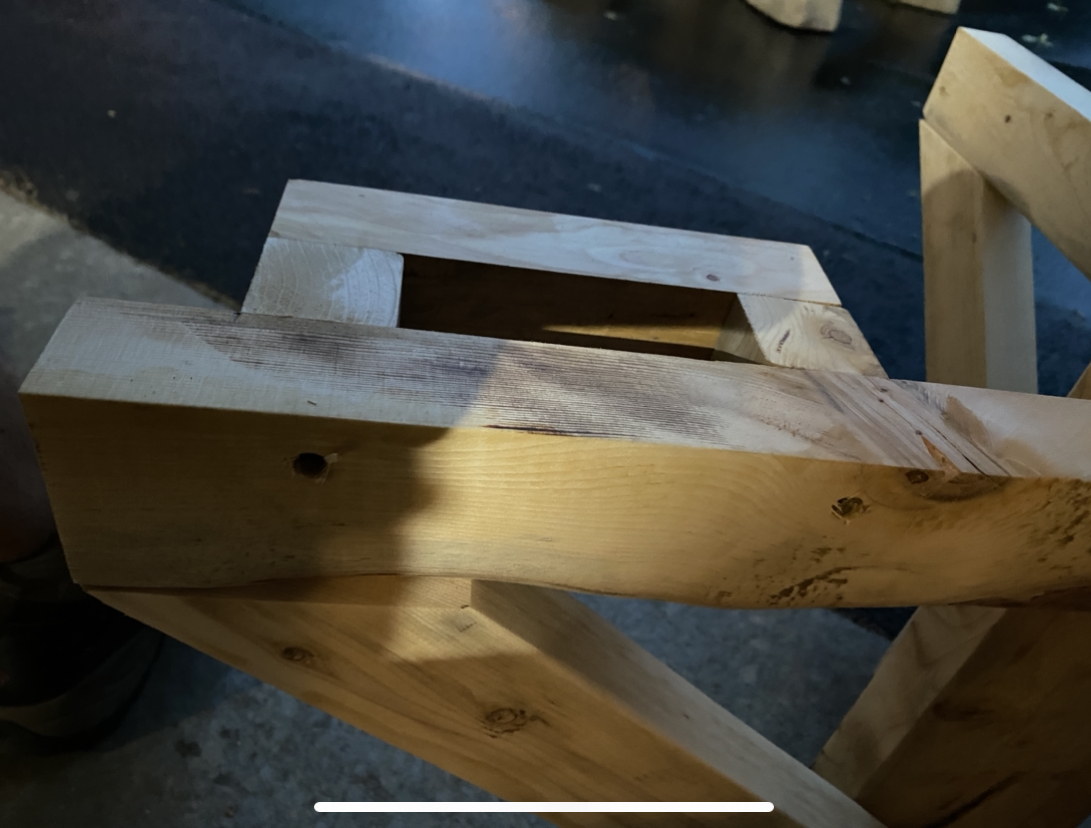
- Screw the table top supports to the upright supports – ensuring the top of the upright supports are level with the table top supports. Inset the table top supports 3/8″ from the front edge of the upright supports. The table top supports that were notched should be directly across from each other. Drive 2 screws from the outside through each leg piece into the table top supports and another screw from the inside into the upright supports at an angle.
- Screw the middle table top support in the middle of the opening, driving two screws at each end from both sides into the table top supports. The middle top support connects to the table top supports that do NOT have the notches in them.
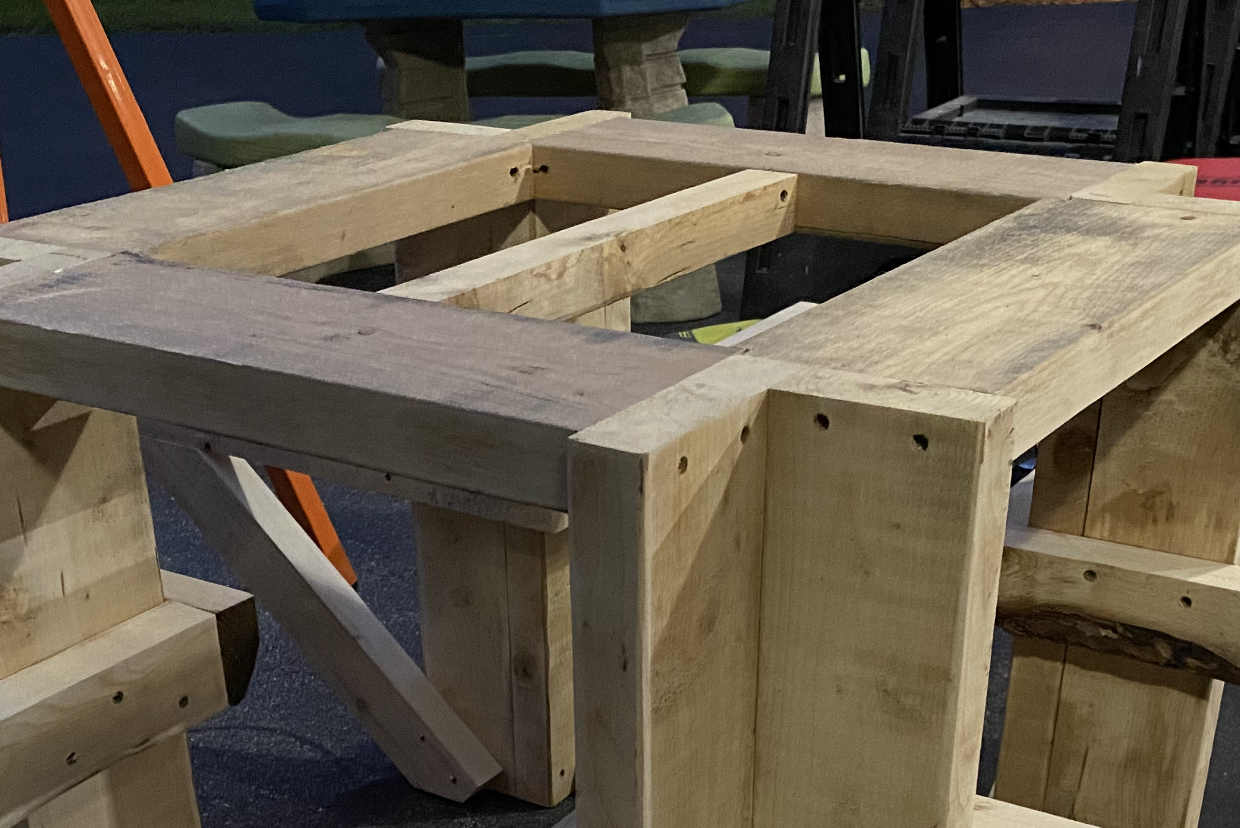
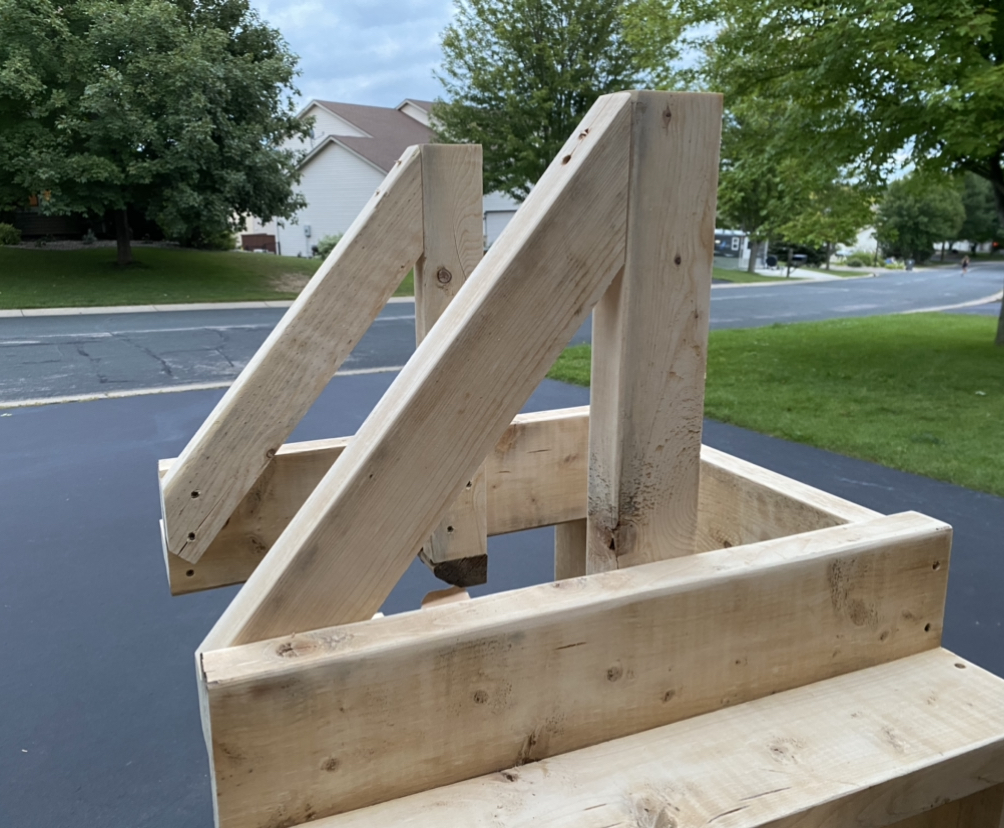
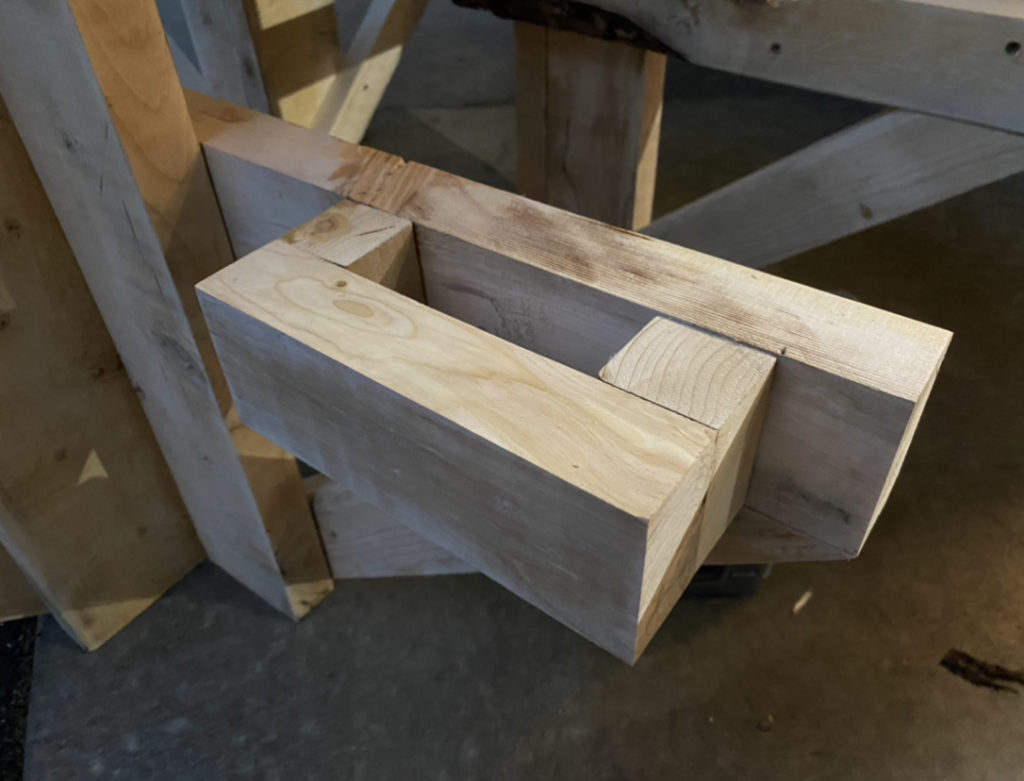
Picnic Table Seat Supports
The bench seats will be attached to angled supports. Horizontal supports will come straight out from the upright supports. Two different lengths are needed so the horizontal supports line up and connect on the inside. An angled bar will be attached to the horizontal supports and upright supports at the bottom. This creates a VERY strong support system.
- Cut 2 pieces of 2″ x 6″ lumber at 17 3/4″ long for the short horizontal supports.
- Cut 2 pieces of 2″ x 6″ lumber at 19 1/4″ long for the long horizontal supports.
- Rip ALL of the horizontal supports in half lengthwise.
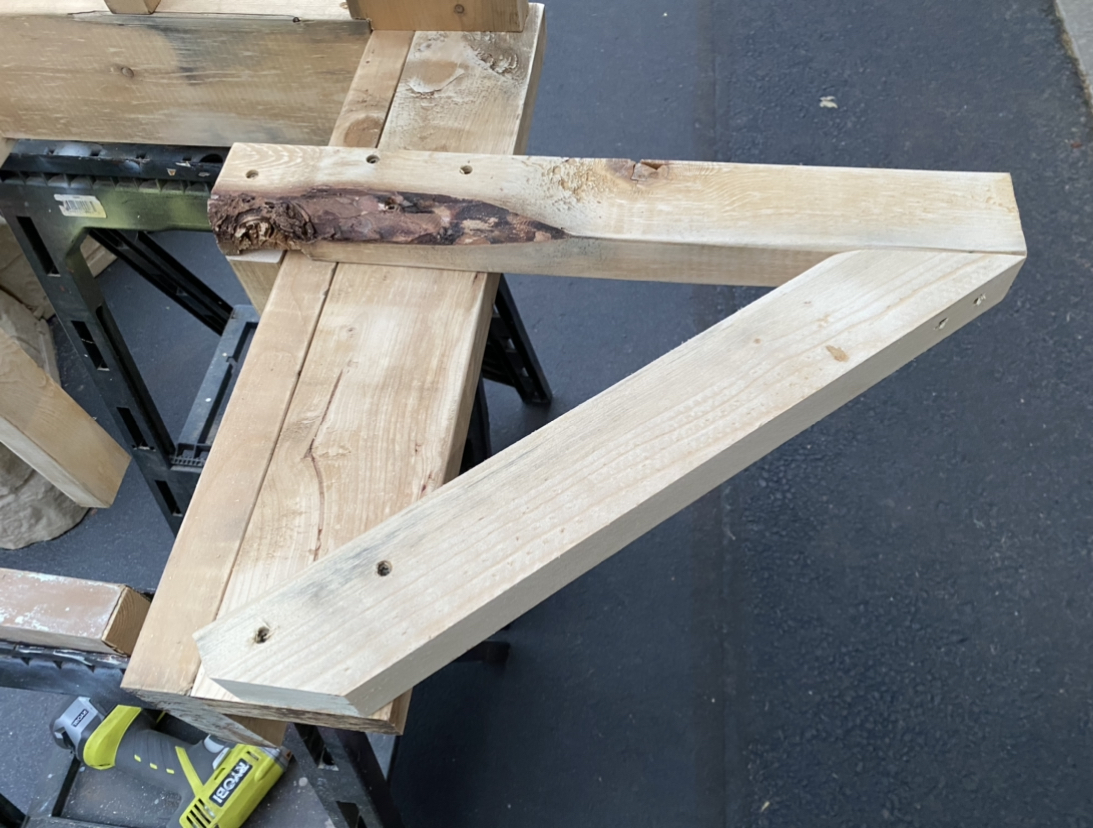
- Cut 4 pieces of 2″ x 6″ lumber at 18″ long for the angled supports.
- Rip the 4 angled supports in half lengthwise.
- Cut 45° angles at both ends of all of the angled supports.
- Reference the pictures below to ensure the angles are cut in the correct direction.
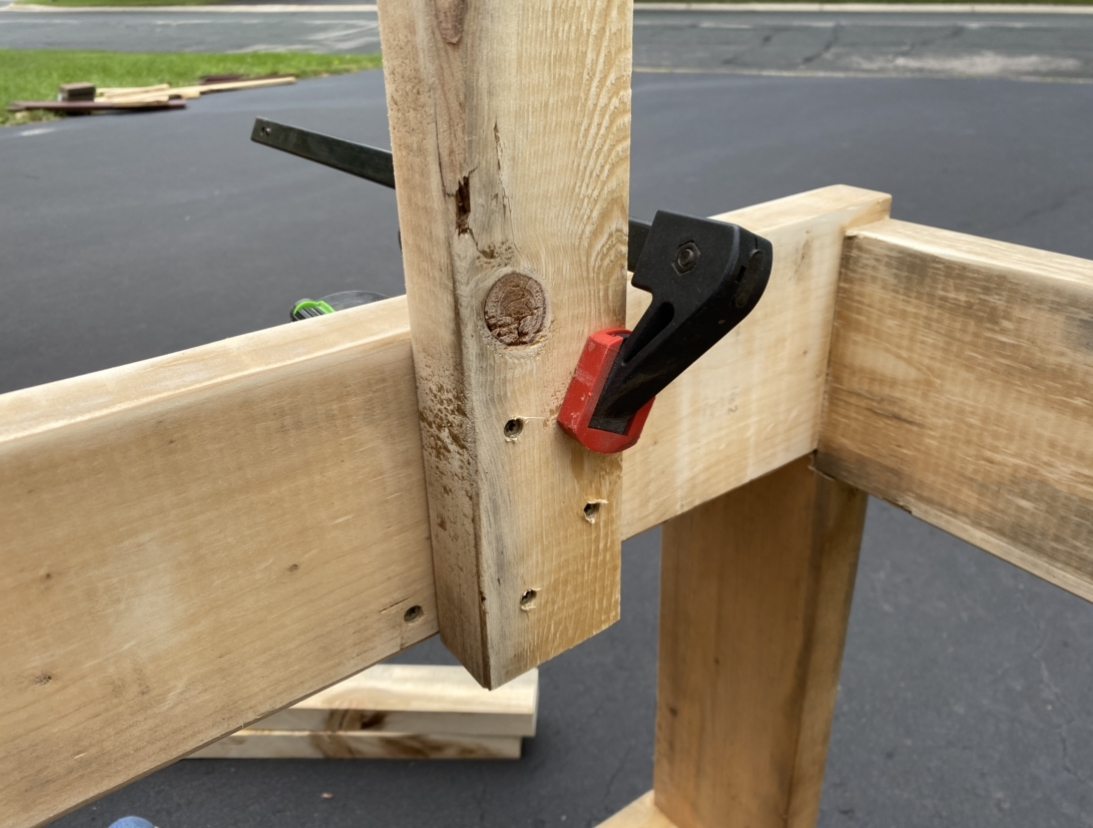
- Use two construction screws to connect an angled support to the underside of each horizontal support.
- Screw the brackets to the inside of the upright supports. Use three screws on each horizontal support and two on the angled supports.
- Use a clamp to help hold it in place to ensure it’s level.
Seat Support Wings
The end caps of the bench seats will need extra support as they are angled cuts and need somewhere to screw into. For this make some “U shaped” brackets out of wood.
- Cut 1 piece of 2″ x 6″ lumber at 28 3/8″ long for the outer frame of the support wings.
- Rip 2 pieces at 2 1/2″ wide out of the 28 3/8″ long 2″ x 6″ piece of lumber.
- Cut the two 2 1/2″ x 28 3/8″ pieces into 8 pieces at 7″ long each for the outer frame of the support wings.
- Cut 16 pieces at 2 1/2″ long each using the scrap cutoff pieces from the upright supports to for the inner frame of the support wings.
- Screw two inner frame pieces to one of the outer frame pieces on the outside edges to make a “U shaped” support wing. Use one construction screw per inner frame piece, screwing through the middle of the inner frame piece into the outer frame piece which will conceal the screw head.
- Attach one support wing to the outside of each horizontal support, screwing from the inside of the horizontal support into the support wings with two screws into each outer frame piece. The support wing should be inset 1 1/2″ from the front of the horizontal support and flush with the top of the horizontal support. Use 2 construction screws per side of the support wing.
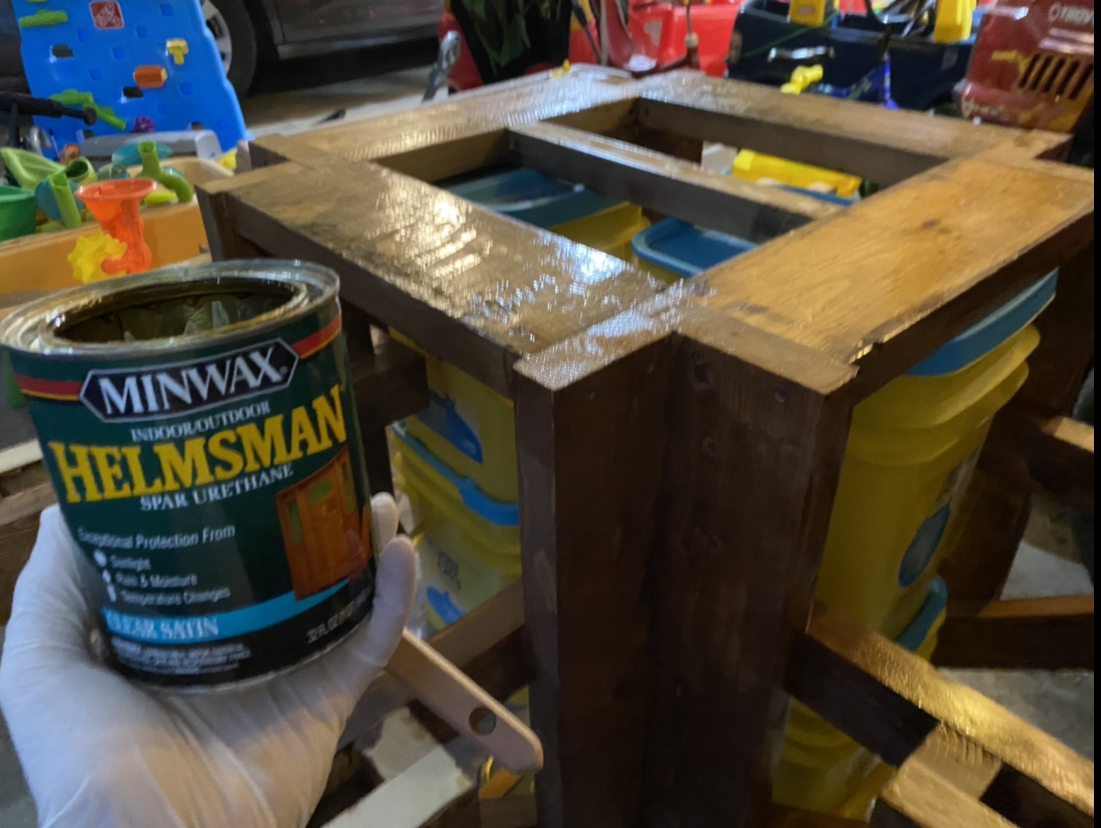
Stain and Clear Coat the Substructure
Before you consider applying a finish, the substructure will need a good sanding to ensure it’s smooth and clean and consistent looking. A a random orbit sander does the job just right. I highly recommend the BOSCH ROS20VSK.
Applying a finish to the picnic table substructure is a subjective choice. For the decking color choices, a darker stain color feels appropriate. But the natural color of pine really is a thing of beauty on it’s own. A stain was used for this project, but choose the finish that best suits your design and project.
A clear coat over the top of the substructure is vital on this project since it will live in the outdoors. The suns rays, heat, and cold will take it’s toll on the pine boards. Pine really isn’t the best choice for an outdoor project like this, but with the proper finish you shouldn’t have an issue for years to come. An oil based spar urethane is a perfect product for this situation.
People often question if you can mix the usage of an oil and water based stain and clear coat. As long the first coat properly dried and cured there won’t be an issue.
| Finish Type Order | Curing Time |
|---|---|
| Oil Based over Water Based | 24 hours |
| Water Based over Oil Based | 72 hours |
Picnic Table Top
The top of the picnic table is the primary focal point of this table. A picture frame wraps around an alternate color on the inside. Take your time for accuracy and attention to detail here. This is the part of the table that will be admired the most. It also is the part that gets used the most, holding plates, cups, toys, and games. The durable Trex material is very durable and will withstand the usage and abuse your kids are likely to subject this table to.
A trick for properly spacing the Trex boards is to use a scrap piece of wood, cardboard, etc. that is the thickness of the gap. This makes it easy to place the spacer between the boards, ensure they are snug, put some pressure down to hold it in place, and drive the screws in.
Table Top Inside
The inner portion of the table top is made of Trex Select 1″ Grooved Edge Boards held in place with the Trex hidden fastener system. Alternate the direction of the grain for a “natural” look.
- Cut 3 pieces Trex Select 1″ Grooved Edge at 17″ long each for the table top inner pieces.
- Install 3 Trex Hideaway Start Clips into one of the table top supports that is perpendicular to the middle table top support at 4 1/2″ in from the outer edge of the table top support. The opening of the clips should face the middle of the table.
- Measure to the outside edge (or the back edge of the “c” shape) of the Trex Hideaway Start clip
- Install 3 Trex Hideaway Start Clips into the table top support that is opposite of the support used in step 2 at 4 1/2″ in from the outer edge of the table top support. The Trex Hideaway Start Clips should be directly across from each other.
- Slide one of the table top inner pieces into one set of Hideaway Start Clips. Center this board left to right.
- Slide another table top inner pieces into the other set of Hideaway Start Clips. Center this board left to right. The grain of these two boards should be going in the same direction.
- Lay the middle table top inner piece in between the two pieces already on the table. The grain should go the opposite direction as the two pieces already in place.
- Slide the 6 Trex Hideaway Plastic Fasteners into place. 3 Hideaway Fasteners go between boards one and two, and 3 fasteners go between boards two and three. Four of the fasteners line up with the outer edge of the table top inner pieces and the screws will go into the table top supports. Two of the fasteners go in the middle of the table top inner pieces and screw into the middle table top support.
- Evenly space the middle table top inner piece and screw the Trex Hideaway Plastic Fasteners into place to secure these inner boards.
Outside Frame
The outer frame of the picnic table top uses four pieces of Trex Select 1″ Square Edge Boards. It is important to ensure that the grain direction matches on these pieces so there is a consistent flow around the entire table for a designer look.
- Cut 4 pieces of Trex Select 1″ Square Edge at 28 3/4″ long each for the table top frame pieces.
- Cut the end of each of these table top frame pieces at 45° to make picture frame pieces. Ensure the grain direction is facing the same direction when making these cuts so that the grain direction flows around the corner of one piece into another.
- Lay one of the table top frame pieces on the top parallel to the direction of the table top inner pieces. Ensure a 9/16″ gap is evenly spaced along the length between the table top frame and table top inner pieces and that it is centered left to right.
- It wouldn’t hurt to lay out all 4 table top frame pieces at this time to ensure the spacing is even as the dimensions used in this tutorial may be off slightly depending on the accuracy of cuts, etc. Also, the Trex boards will expand and contract slightly depending on temperature.
- Drive two 2 1/2″ Composite Decking Screws on each end through the top of table top frame into the middle of the upright supports. Sink the screw head just below the surface of the board.
- Continue to work around the table top installing the three remaining table top frame pieces with four screws each into the upright supports. Ensure an even gap along the length of the table top frame pieces on each side.
Picnic Table Seats
The picnic table seats are finished in a similar pattern as the table top. Given that the seats are narrower than the top a full picture frame look wasn’t feasible. Several design patterns were considered to keep that look but ultimately the proportions didn’t seem to come out right. The chosen design here does expose the grooved edge on the seat inner pieces, but still carries a consistent look to the pattern of the table.
When planned correctly before cutting the boards, the grain pattern on each seat can flow in a circle pattern from the outer wing Square Edge boards, through the seat inner pieces and around the other side. Take a moment before making cuts to plan this out to ensure you are cutting the boards in the right orientation.
NOTE: the grain pattern in the photos don’t all follow the grain direction. The table built in the photos was made using scrap pieces and thus it wasn’t possible to make the grain direction match in all cases. Most people will not notice this flaw in the pattern. Afterall, this table is designed for children and most will not pay attention to this detail.
Seat Inner Boards
- Cut 8 pieces of Trex Select 1″ Grooved Edge at 14 1/2″ long each for the seat inner pieces.
- Install 1 Trex Hideaway Start Clip onto each of the horizontal supports at 10 9/16″ in from the front edge. The opening of the clips should face away from the table.
- Measure to the outside edge (or the back edge of the “c” shape) of the Trex Hideaway Start clip
- NOTE: The pictures do not show this Start Clip – screws through the face of the seat piece were used. Either option works, but using a Trex Start Clip here will result in a cleaner look and less for a leg to get scratched on.
- Insert a seat inner piece into each set of Start Clips. Center it across the horizontal supports.
- Insert 2 Trex Hideaway Plastic Fasteners per seat inner piece on the opposite side of each of the start clips to lock that into place and screw into the horizontal supports.
- Slide the other seat inner piece into the Hideaway Plastic Fasteners. Ensure the outside edges are flush with the first seat inner piece.
- Drive a screw through the top of the outer seat inner piece into each of the two horizontal supports using 2 1/2″ Composite Decking Screws. Sink the screw head just below the surface of the board.
Seat Outer Wings
If working to match the grain pattern with the seat inner pieces be sure to plan the direction prior to making any cuts. If matching the grain direction is not a concern, at least 44″ of the Trex Select 1″ Square Edge board could be preserved by using the cutoff pieces from step 2 in place of cutting new pieces for step 3.
- Cut 8 pieces of Trex Select 1″ Square Edge at 11 1/2″ long each for the seat wing inner pieces.
- Trim the left and right sides off of the seat wing inner pieces at a 45° angle.
- Cut 16 pieces of Trex Select 1″ Square Edge at 5 1/2″ long at a 45° angle to make 16 triangles. Alternate the cuts back and forth.
- Lay a seat wing outer piece onto the support wing with the finished edge facing away from the table. Ensure this piece is square to the seat inner piece and is spaced 1/4″ from the seat inner piece. Drive two 2 1/2″ Composite Decking Screws through the seat wing outer piece into the support wing. Sink the screw head just below the surface of the board.
- Line up the seat in inner piece to the seat wing outer. Ensure it is square and spaced at 1/4″ from the seat inner pieces. Drive two 2 1/2″ Composite Decking Screws through the seat wing inner piece into the support wing. Sink the screw head just below the surface of the board.
- Lay the second seat wing outer piece onto the support wing with the finished edge facing towards the table top. Ensure this piece is square and is spaced 1/4″ from the seat inner piece. Drive two 2 1/2″ Composite Decking Screws through the seat wing outer piece into the support wing. Sink the screw head just below the surface of the board.
- Repeat this process for the other 7 seat wings
Enjoy the DIY Kids Square Picnic Table
The kids DIY square picnic table is now complete and ready for use. This table is durable enough to withstand what kids will put it through. Its properly sized for the kids height. The table top is big enough to hold for plates and waters easily without bumping into each other. It’s heavy and balanced enough to not tip over regardless of if it’s one or 4 kids at the table. It’s even balanced enough that an adult can sit on the seats without much concern.
I would love to hear of your experience using this project plan and what customizations you put into your own tables. I’d love to hear your comments below on how yours turned out and what your kids thought of it!