Makes your mouth water just thinking about it, doesn’t it?
I’m not even going to try and come up with something fancy to say about it – the name says it all. So let’s get right into the recipe.
Pizza Crust
I do have to give some credit to this recipe for the inspiration on the crust. Though I made a few slight adjustments to it, but the crust turned out great.
1 2 3 4 5 6 7 8 | <b>Ingredients</b> 1 teaspoon active dry yeast 1 cup warm water 1 tablespoon white sugar 2 teaspoons salt 1 tablespoon olive oil 3 to 3 1/2 cups all-purpose flour |
- Run your metal stand mixer bowl through warm water. This is both to clean it, but also to get the bowl to a warmer temp so as to give the yeast a warm environment to grow in.
- Pour the water into the bowl and dissolve in the yeast and sugar. Let sit for 5-10 minutes to proof the yeast. You’ll see the froth build in the yeast. When it’s got a good thick head it’s good to go.
- Turn the stand mixer on low and mix in the salt, olive oil, and 3 cups of flour.
- Continue to mix until the dough pulls away from the sides of the bowl. If after a few minutes the dough is still too wet and not pulling away, work some more flour in. I typically do a 1/4 cup at a time.
- You can continue to knead the dough ball in the mixer, but to be honest I say nothing beats a good ole fashioned hand kneading. Put your dough onto a lightly floured surface and go to work kneading it. Push it down, fold it over, and repeat over and over until your dough is smooth and elasticity. The classic test of pushing your thumb into the dough ball and seeing if it bounces back will tell you when you are all set. This should take 5-10 minutes of kneading.
- Lightly oil the inside of a bowl. I typically use a plastic bowl as the material will maintain it’s temperature better. Place your dough ball inside and cover with either plastic wrap or a towel. Place the bowl in a warm non-drafty location.
- Let the dough rise for at least an hour. You want your dough ball to at least double in size. I’ll often times make this in the morning and leave it all day until I get home from work.
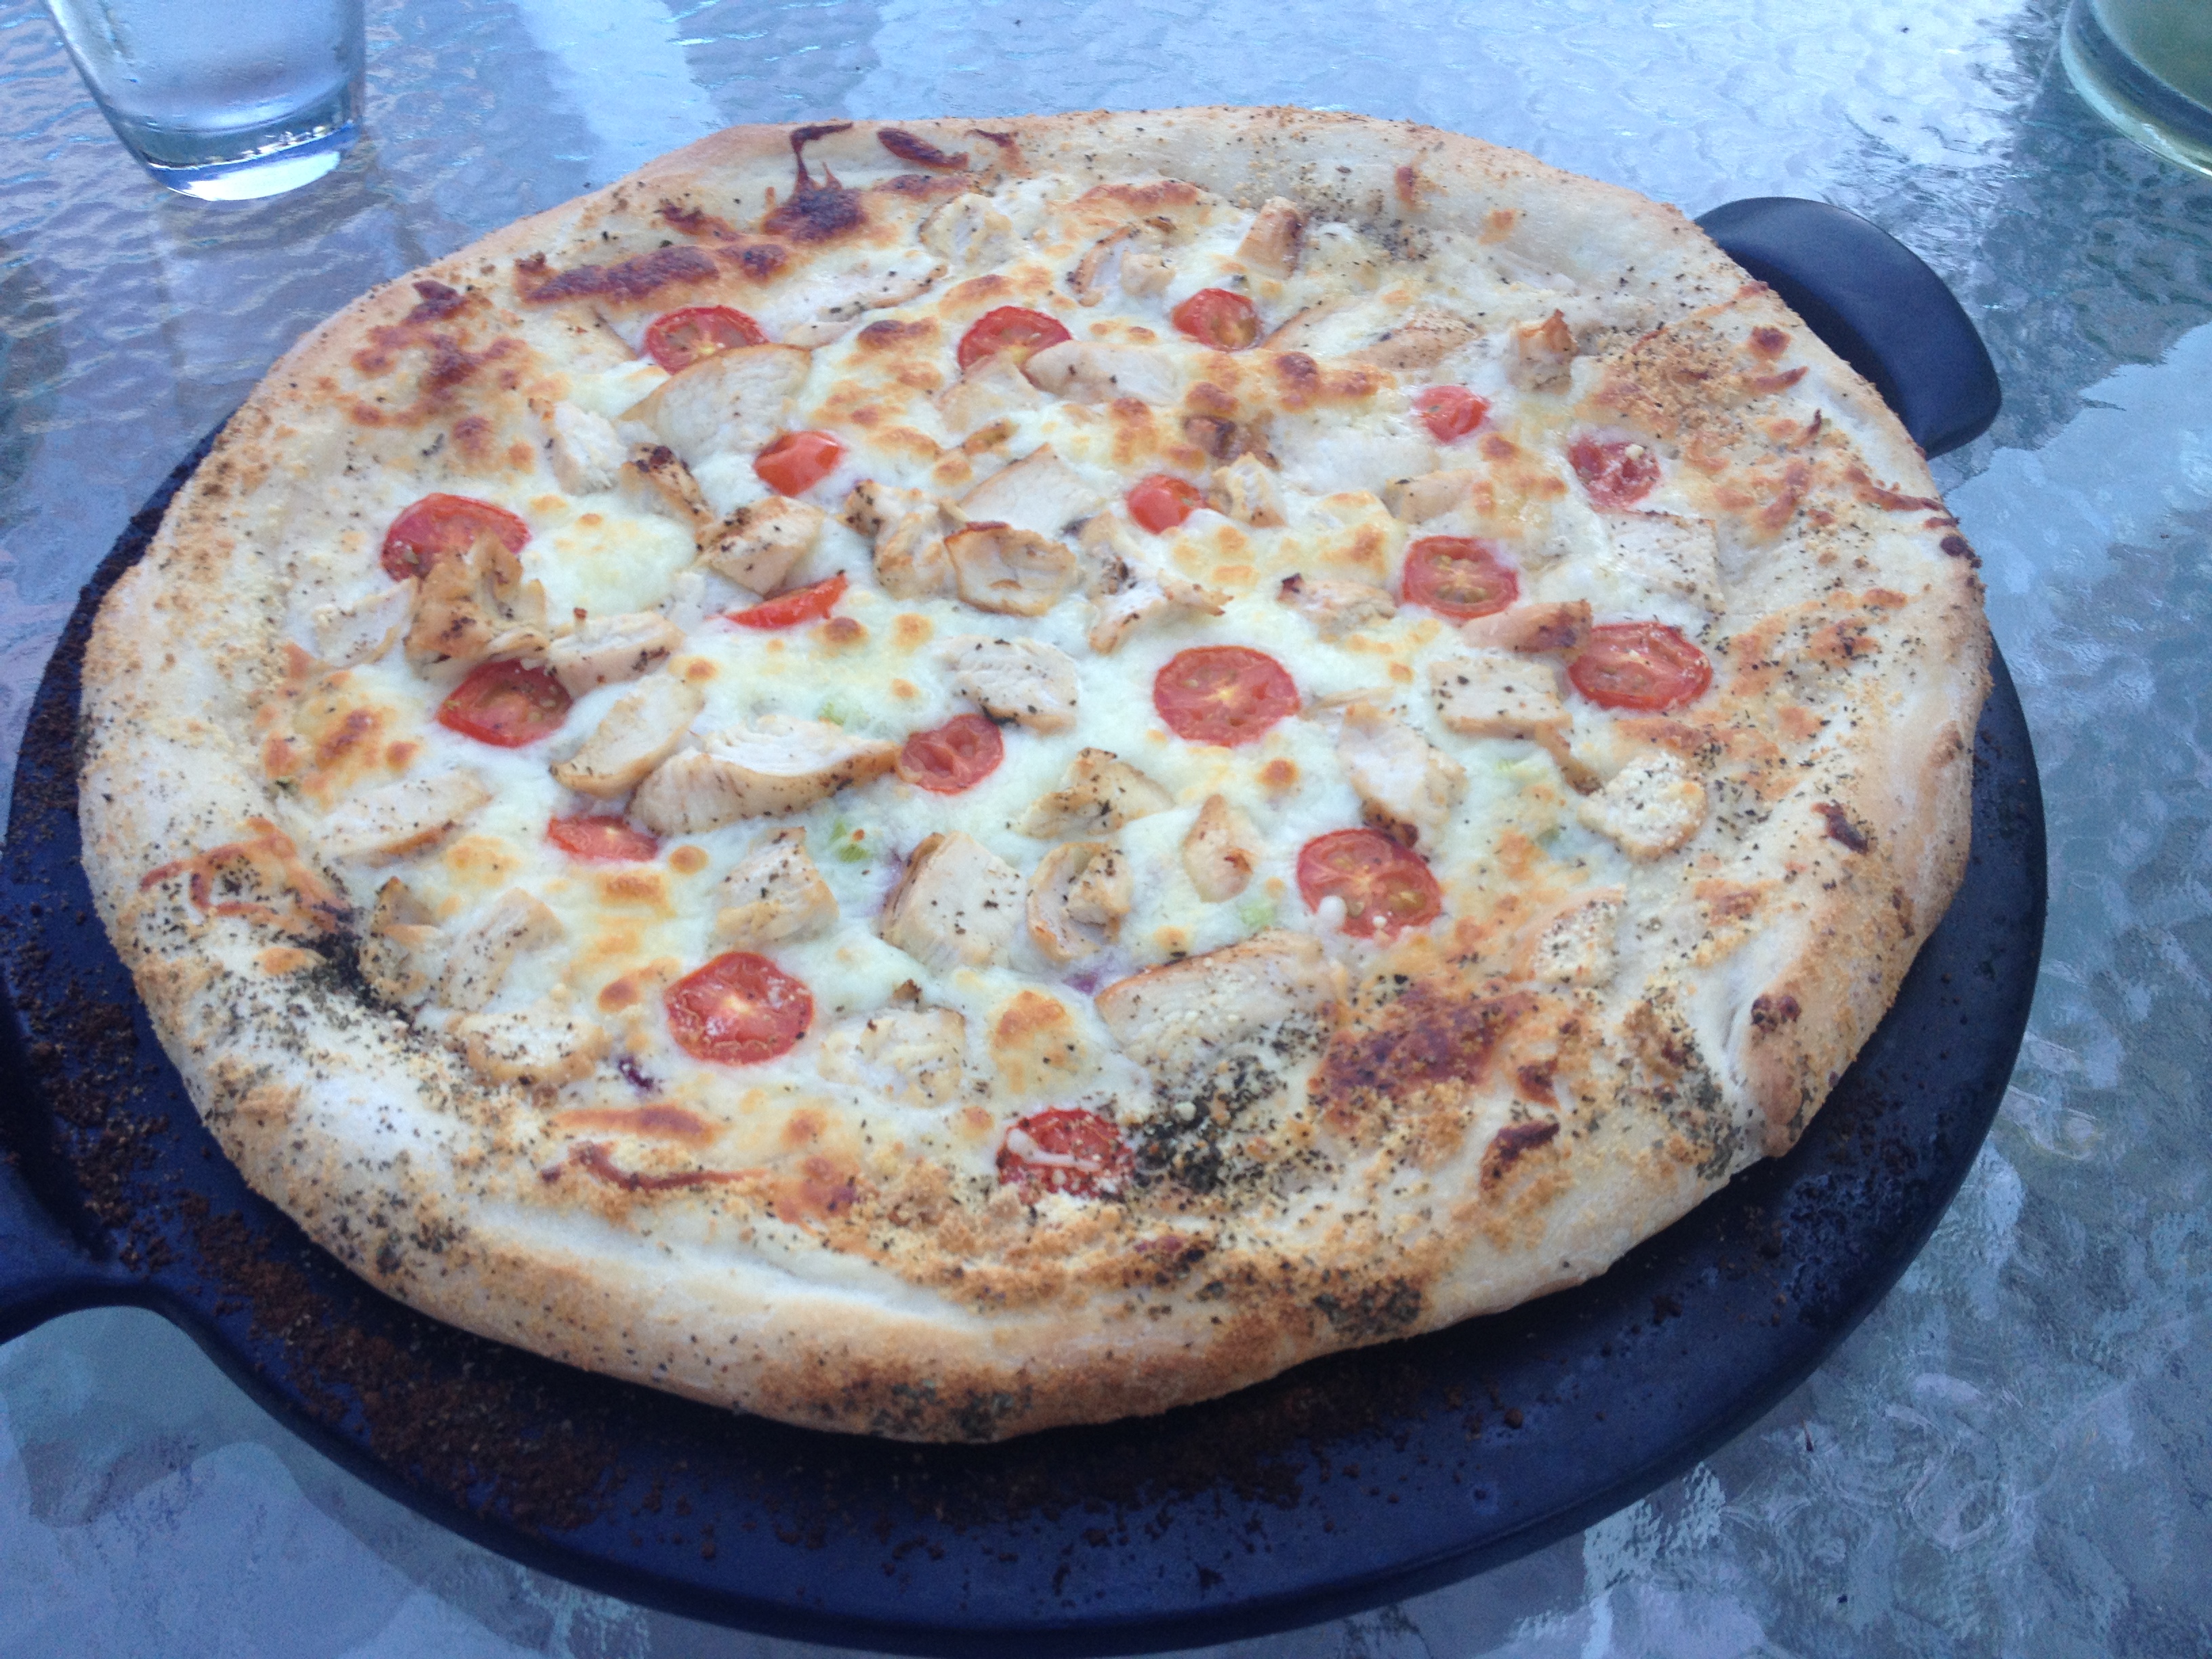
Building your pizza with yummy toppings!
Really you can do whatever you like on your pizza. I seem to have a natural talent for mixing ingredients that go well together (so others tell me), so to me that step is easy. What I’m going to list here is what I did for this pizza, and let’s be honest – it was good! And my wife, a pizza connoisseur, raves about this one!
I will say that if and when I do this again, I’d actually add in red pepper and fresh spinach leaves. I sadly didn’t have those on hand this day….
Also, for those of you that love to follow recipes to the T, you’re going to hate me for this one, but I don’t really measure things unless I’m baking – like the dough recipe. That stuff is so “sciency” and that’s part of why I started this blog – so I would have a place to look up the ones that worked! There are so many dough recipes with slight tweaks and methods…. but I digress. What I’m trying to say is that I don’t really measure things all that often. When you’re making a pizza, you’ll know when you have enough on it. Use your gut feelings on this – after all, that’s where it’s going, so trust it when your making your meals. It’s worked for me for YEARS!
1 2 3 4 5 6 7 8 9 10 11 12 13 14 15 | <b>Ingredients</b> pizza dough - see the above recipe 1 grilled chicken breast alfredo sauce (generally the pricer ones taste better...) grape tomatoes - sliced red onion - grilled garlic cloves (the more the better!) - grilled, then diced green onion with the chives - diced fennel seed italian seasoning freshly ground black peppercorn pizza seasoning (I had it on my spice rack, so why not?) mozzarella cheese - I ended up using a whole bag grated parmesan cheese (from the shaker jar) olive oil |
- Fire up the grill, get it nice and warm, and let’s start prepping the goods
- Grill the chicken breast. I seasoned it with fresh ground black peppercorn, italian seasoning as well as a garlic and herb seasoning I had. Season as you’d like.
- Carefully place red onion slices on the grill to lightly cook them. This knocks down the flavor a bit that many people dislike (and the resulting breath) and actually brings out the sweetness and flavor a bit. This won’t take long to grill, so keep an eye on it. If the edges start to char or dry out it’s time to take it off. After taking the slices off the grill, cut each ring into half each way, leaving you with 4 pie shapes.
- Carefully put your peeled garlic cloves onto the grill. Let them cook for about a minute on each side. This will knock down the harsh flavor and really sweeten them up. You could actually eat the clove as is after grilled and enjoy it! :) They become kind of squishy and gooey. Yum. Once cooked, dice the cloves.
- Prep the dough
- I’ve done this in the past where I put the pizza directly onto the grill grates. That works out alright, but I do recall it being hard to keep the crust from burning while cooking the top just right. It does give the crust a different flavor as it gets more of the grill char so to speak. Feel free to experiment with that as you’d like.
- What I did this time was in a way an accident… I decided to stretch my dough on my pizza stone and was then going to transfer it to the grill grates as mentioned above. However… I didn’t flour the pizza stone first, and thus the dough didn’t want to come off of the stone nicely when transferring to the grill. So I just left it on the stone and cooked it that way. While the crust turned out awesome, I’ve read online that some say NOT to put a pizza stone on the grill as theirs has cracked in doing so. I’m not sure how it’s all that different from using the stone in the oven though, so not sure what to take of that. Thankfully mine cooked without any issues.
- But I have digressed again… prepping the dough. Stretch your dough into the circular flat pizza shape you want. Work from the center pushing out, spinning, pushing out, etc. to make it round. The dough will have a lot of elasticity, so keep working it, it’ll go eventually. Working from the middle ensures you get a thin and even crust through out. I wanted more of a traditional crust, so I rolled the edges back in a bit to raise them up. If you desired a thin crust you’d keep stretching, and possibly divide your dough ball before this point even as I think this recipe simply makes too much dough for a thin crust.
- Topping the pizza
- First the sauce – the beloved alfredo sauce! Use a bit spoon, glob it on, and spread it around with the back of the spoon. In my mind, you want the sauce thick enough that you can’t see the dough through it, but not so thick that there are puddles. I want to taste the sauce but not let it overpower the other toppings.
- Next, season. Evenly coat the pizza with the seasonings. Freshly ground black pepper. Italian seasoning. Fennel seeds. Pizza seasoning if you have it. Feel free to experiment.
- When it comes to seasonings, I feel most people are afraid to “put too much in”. I’m on the other side of the fence – I put a generous portion into all of my recipes. On the same note, you can over-power things with seasonings. So how do you know when it’s right, especially when I don’t give you measurements? Well part of why I don’t give measurements is everyone has different taste buds. But experiment with your recipes. Keep working a bit more in with every meal you make and you’ll find that “happy point”. Remember how you seasoned and try to repeat the next time. Seasonings are cheap, can change a good recipe to amazing with raves from your family, and should be used in most all of your cooking.
- Now for some toppings. Evenly spread out your red onions, green onion, and garlic. This just adds to the seasoning layer, but these are fresh flavors! Always so much better. You could replace some of these with garlic powder and onion powder, but whenever you can do the real thing over a seasoning, do it!
- Cheese! Who doesn’t love a healthy dosing of cheese on their pizza! Spread the mozzarella around nice and even and thick.
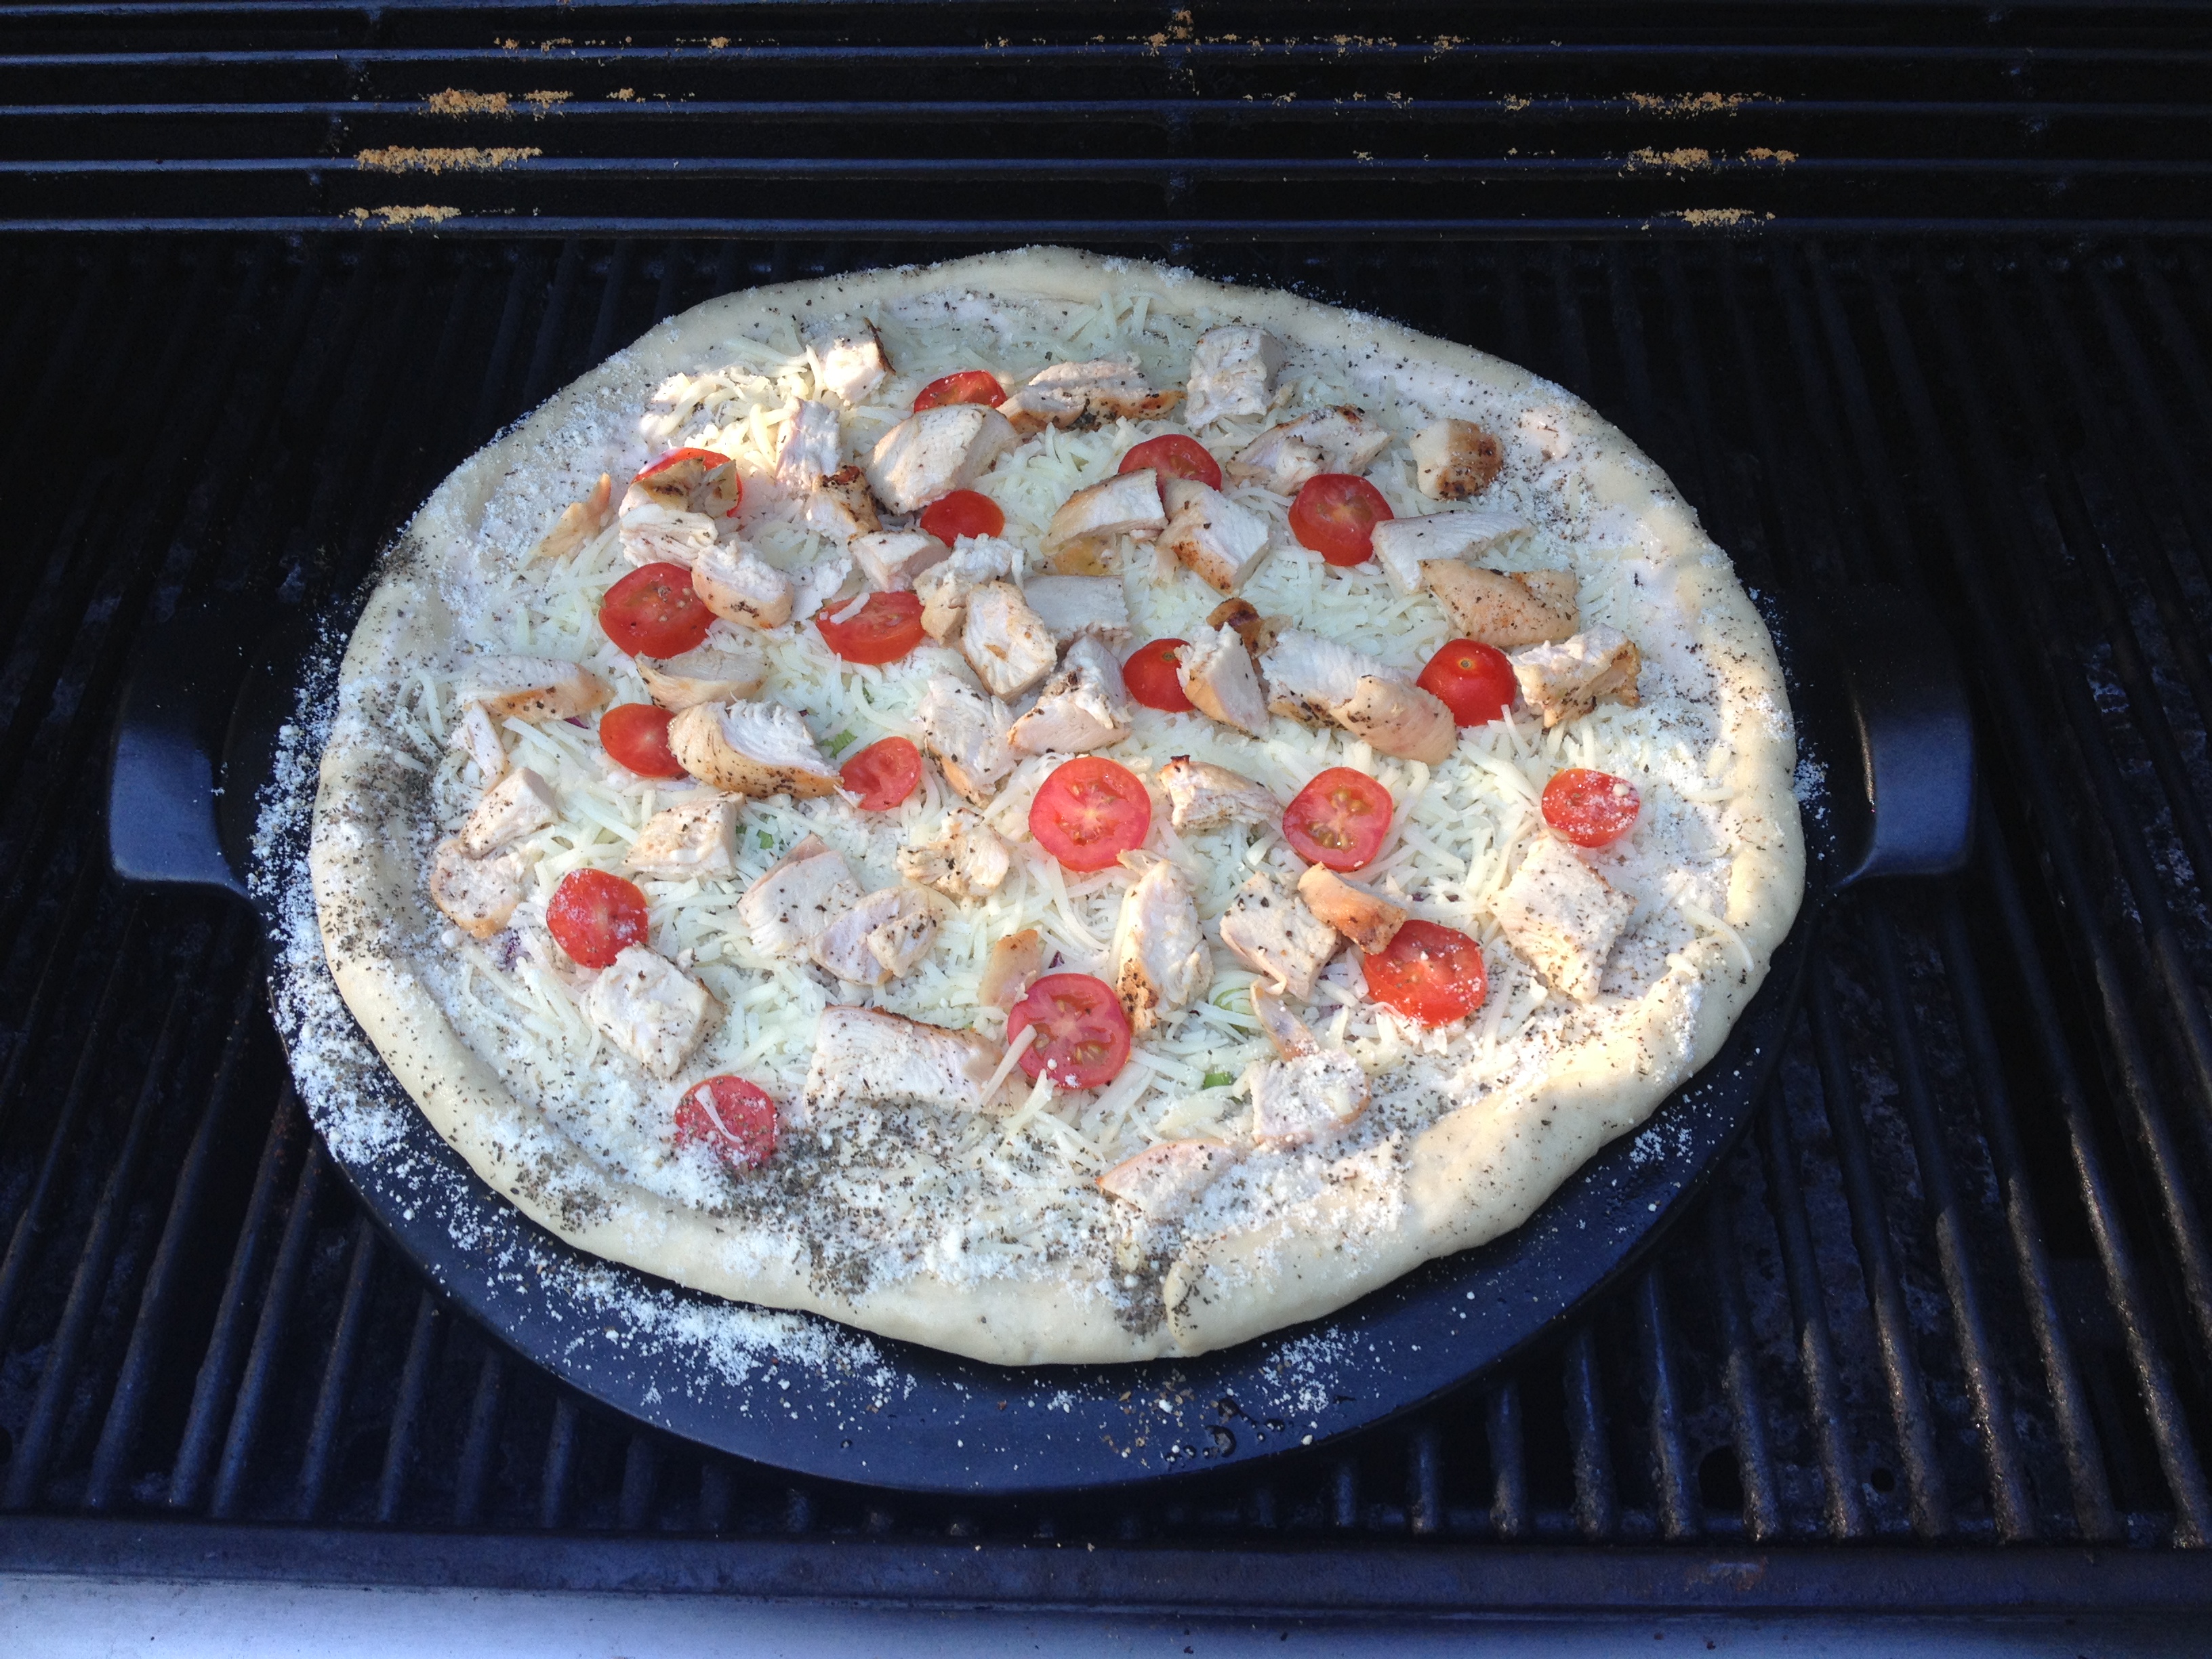
- More toppings! We save this layer of toppings for the top because it’ll make the pizza look fancier. ;) Cut your grilled chicken breast into cubes and spread that around. Also spread around the sliced grape tomatoes.
- Bonus round – if you had red pepper, fresh spinach leaves, or mushrooms, now would be a great time to spread those around as well. Though you could consider putting the spinach under the cheese layer (I know, I’m telling you too late) as well; that might prevent it from over-taking the pizza visually. Either way works really. It’ll get cooked down more on top…
- Don’t forget the crust! I brush the crust with a bit of olive oil, and then sprinkle parmesan cheese on it. Then add some italian seasoning as well. The oil will help these toppings to adhere to the crust.
- Cooking Time!
- Your grill should still be cooking and warm at this point. I’d suggest having it around 400°F. This will ensure the top gets cooked enough, but won’t over cook the crust. If you don’t have a thermometer on your grill, I’d shoot for a medium-high heat setting on your burners.
- Put your pizza on the grill.
- If you’re using a pizza stone, place it right on the grill and you’re all set.
- If you’re going to try putting the pizza directly onto the grates, I’d suggest adjusting your flame a bit. You’ll want to turn the burners directly under the pizza down to low and leave the outside burners on high. This should keep the grill at the correct temperature, but not put too much heat just below your pizza and thus not over-cook the crust.
- After about 12 minutes I’d take a peak and see how it’s coming along. Let the cheese melt, the crust brown slightly, and hopefully get some browning on the cheese as well. You know, it’ll look like a cooked pizza when its done. :)
- Best step of all – eat and enjoy!
Bonus – Garlic Cheese Bread
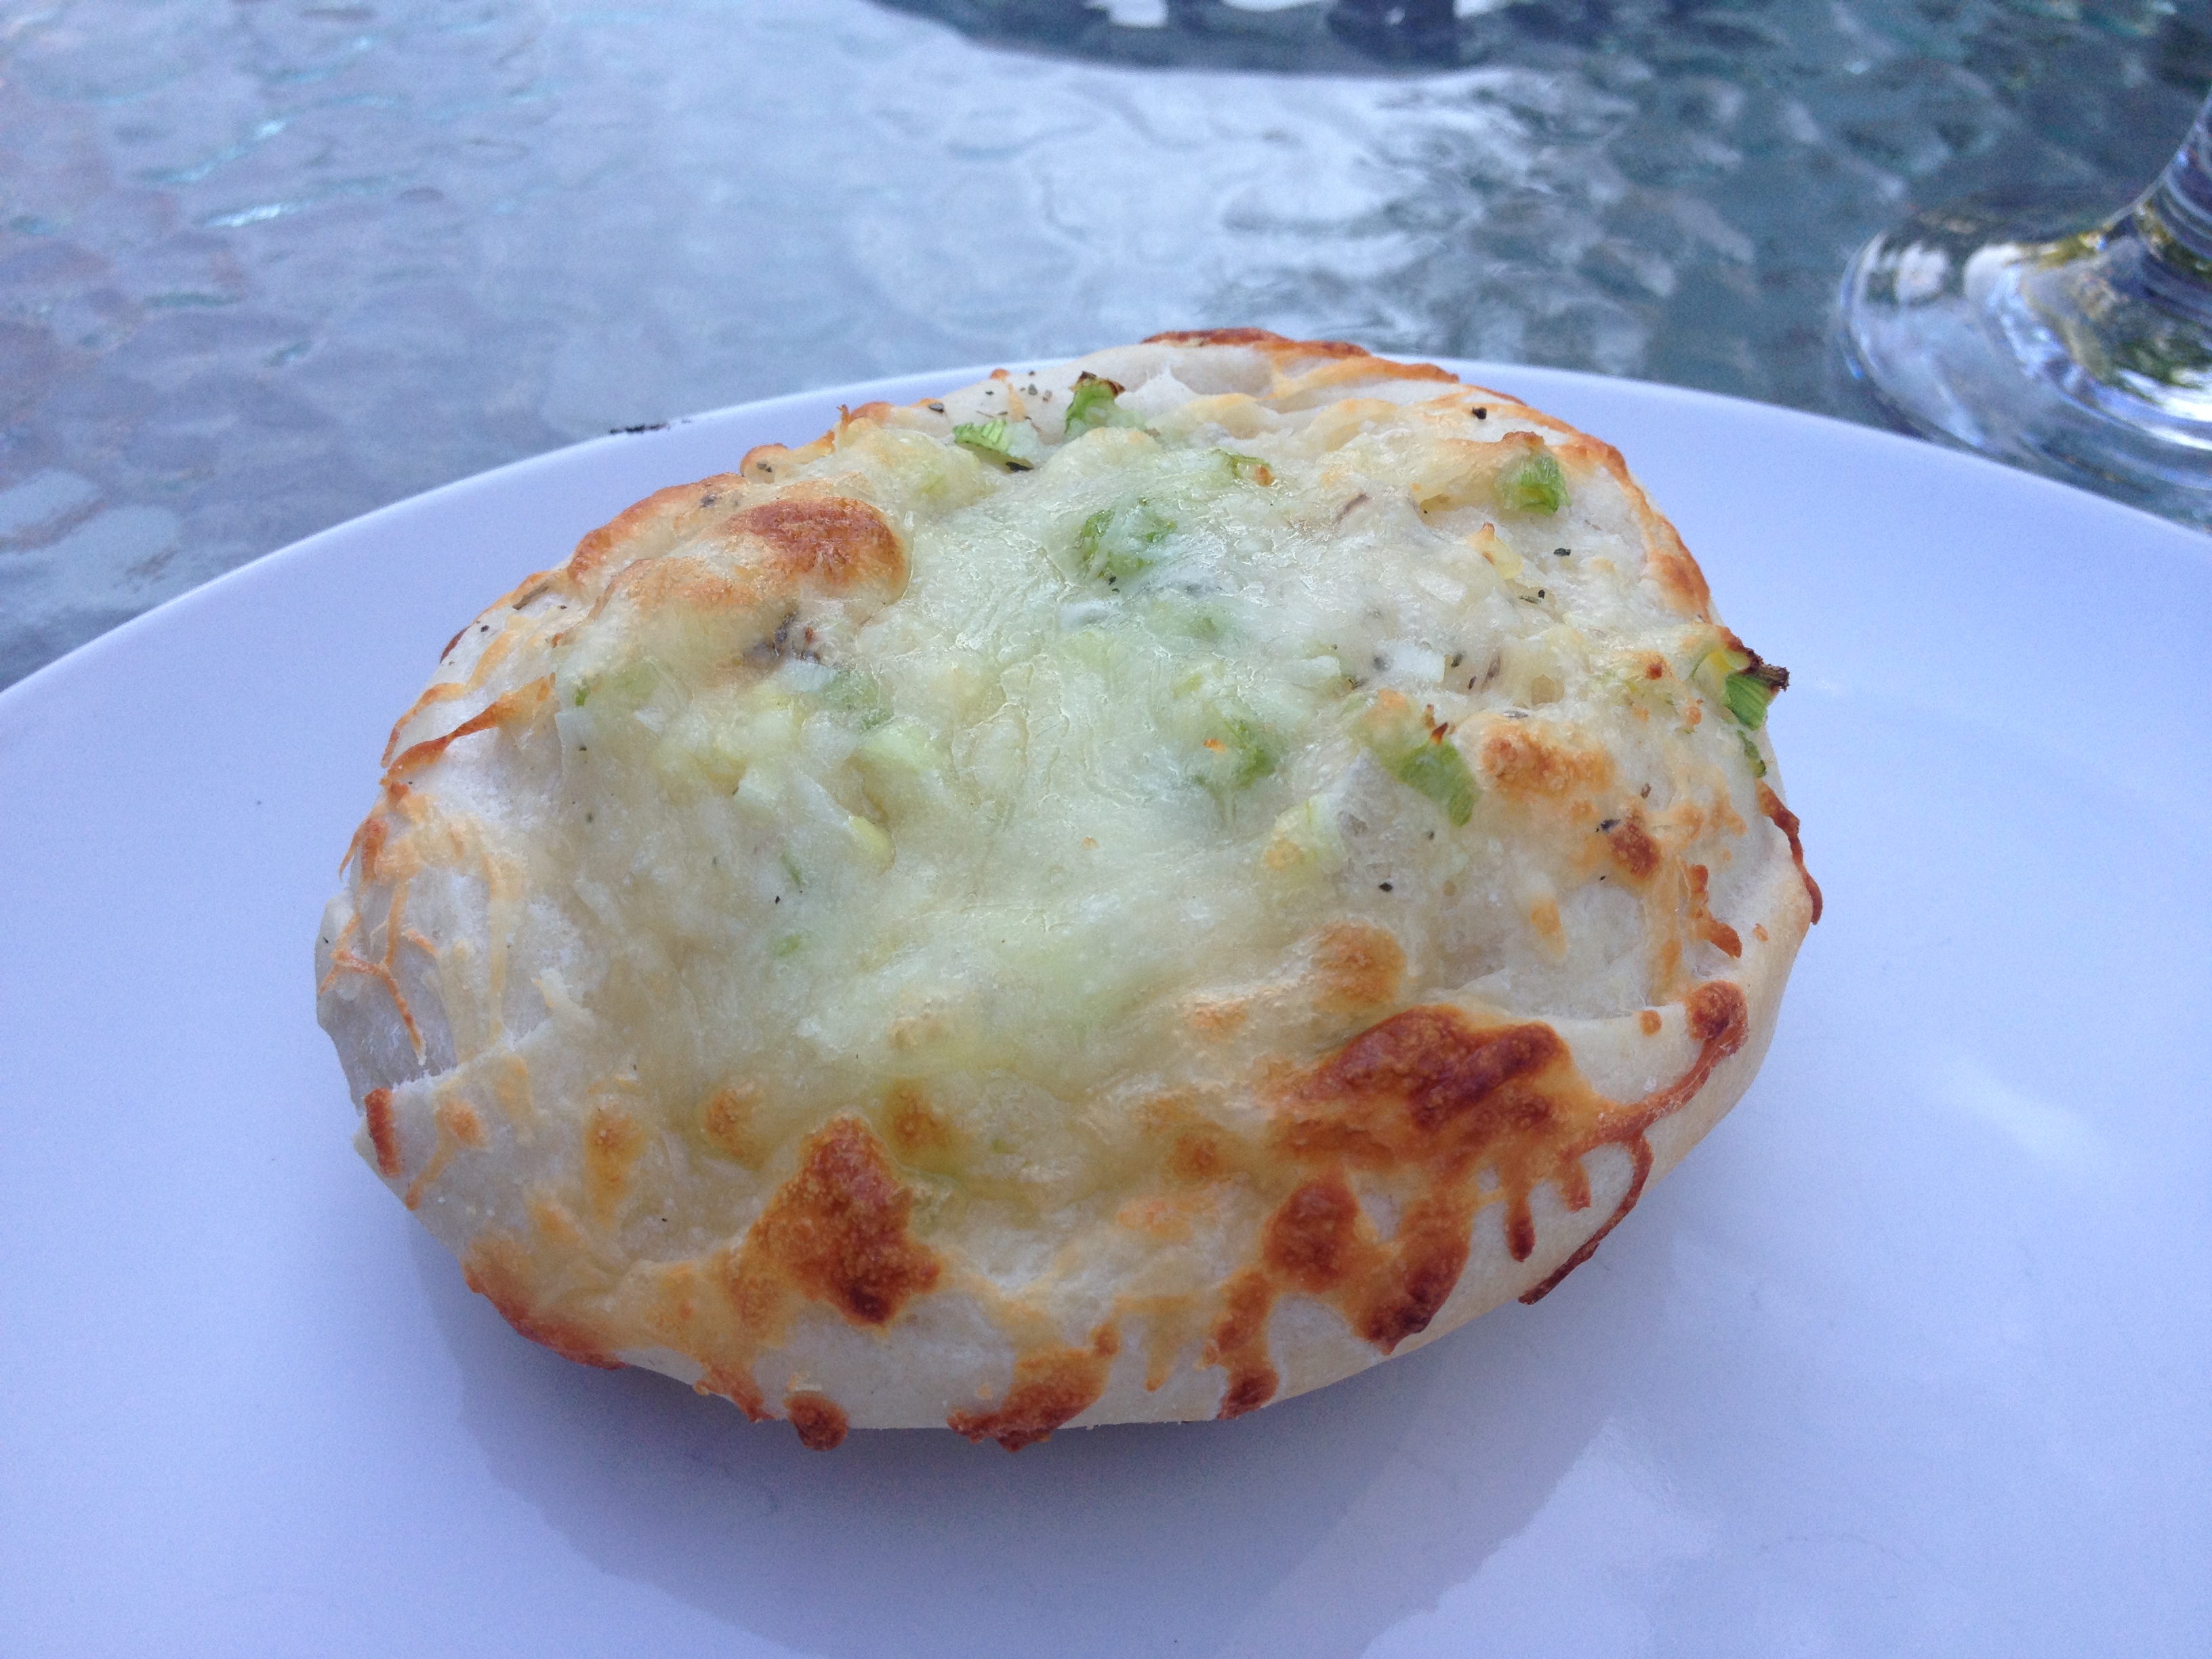
If you’re like me, you want more than one item on your plate and love the appetizer round! With that said, I can’t go to a good pizzeria without getting an order of cheese bread to start off the meal. And if the best pizzeria in town is my house, well then I had better live up to my expectations! :)
These are a simple add-on to the meal, and I used the same dough ball I made for the pizza. The dough is actually more than you need for the pizza, so I took about 1/3 of the dough ball to make the cheese bread.
You could serve these with a side of red sauce for dipping. Though I’m not going to lie, they taste so good by them selves that I’ll argue that the red sauce isn’t needed and will just distract from the flavor.
1 2 3 4 5 6 7 8 | <b>Ingredients</b> pizza dough - see the above recipe garlic cloves (the more the better!) - grilled, then diced green onion with the chives - diced butter italian seasoning Cheese - mozzarella or an italian mix |
- The crust
- Cut a small portion of the dough ball made for the pizza and roll into a ball. Then flatten the dough balls into your cheese bread crusts. Curl up the edges a bit to make a small “bowl” shape.
- The toppings
- Butter the inside of the dough bowls.
- Prepare the the garlic cloves by grilling them (as explained in the pizza instructions) and dice it.
- Spread the garlic, green onion, and italian seasoning on top of the butter.
- Top with a generous layer of cheese.
- Cook on the grill
- Heat up the grill to 400°F. If you don’t have a thermometer on your grill, set the burners to medium-high heat.
- Place the cheese bread directly on the grill grates. I’d suggest the top rack if you have the option.
- Cook for about 7-10 minutes. The cheese should start to brown as well as the crust – they are all set to enjoy!
